
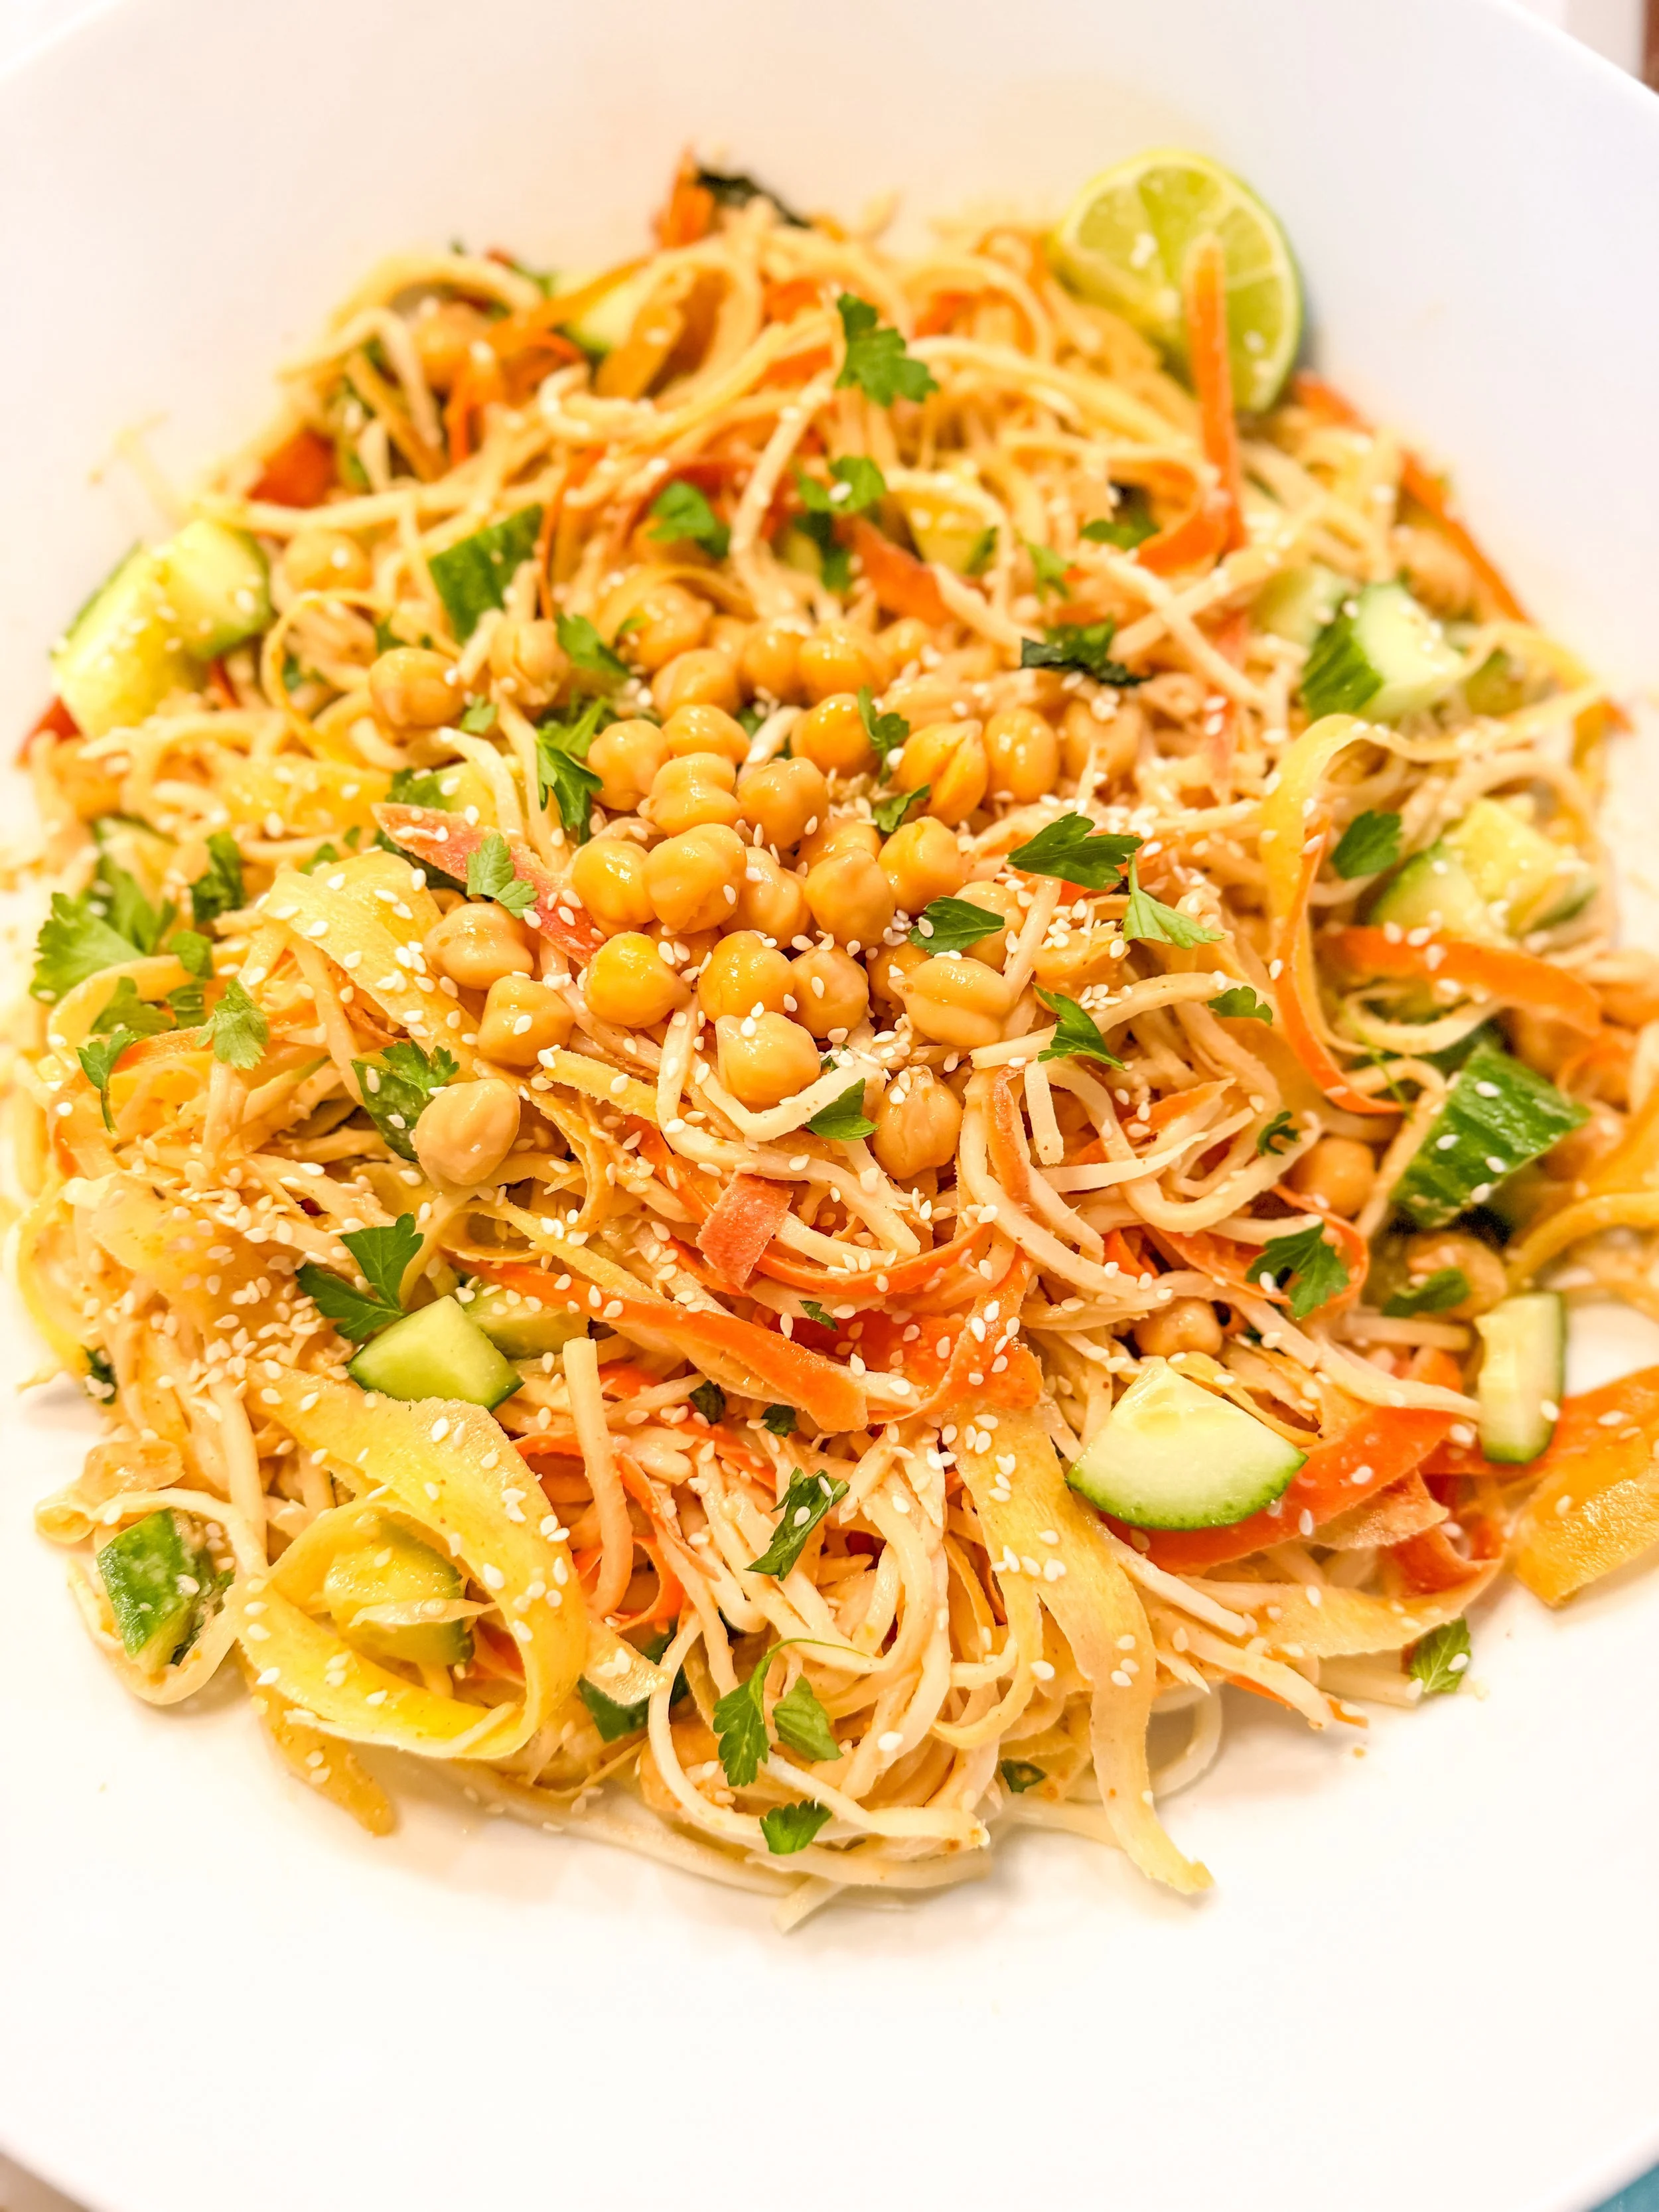
Peanut Crunch Noodle Bowl
Crunchy, saucy, and packed with fresh herbs — this is my go-to when I want something fast that still feels special.
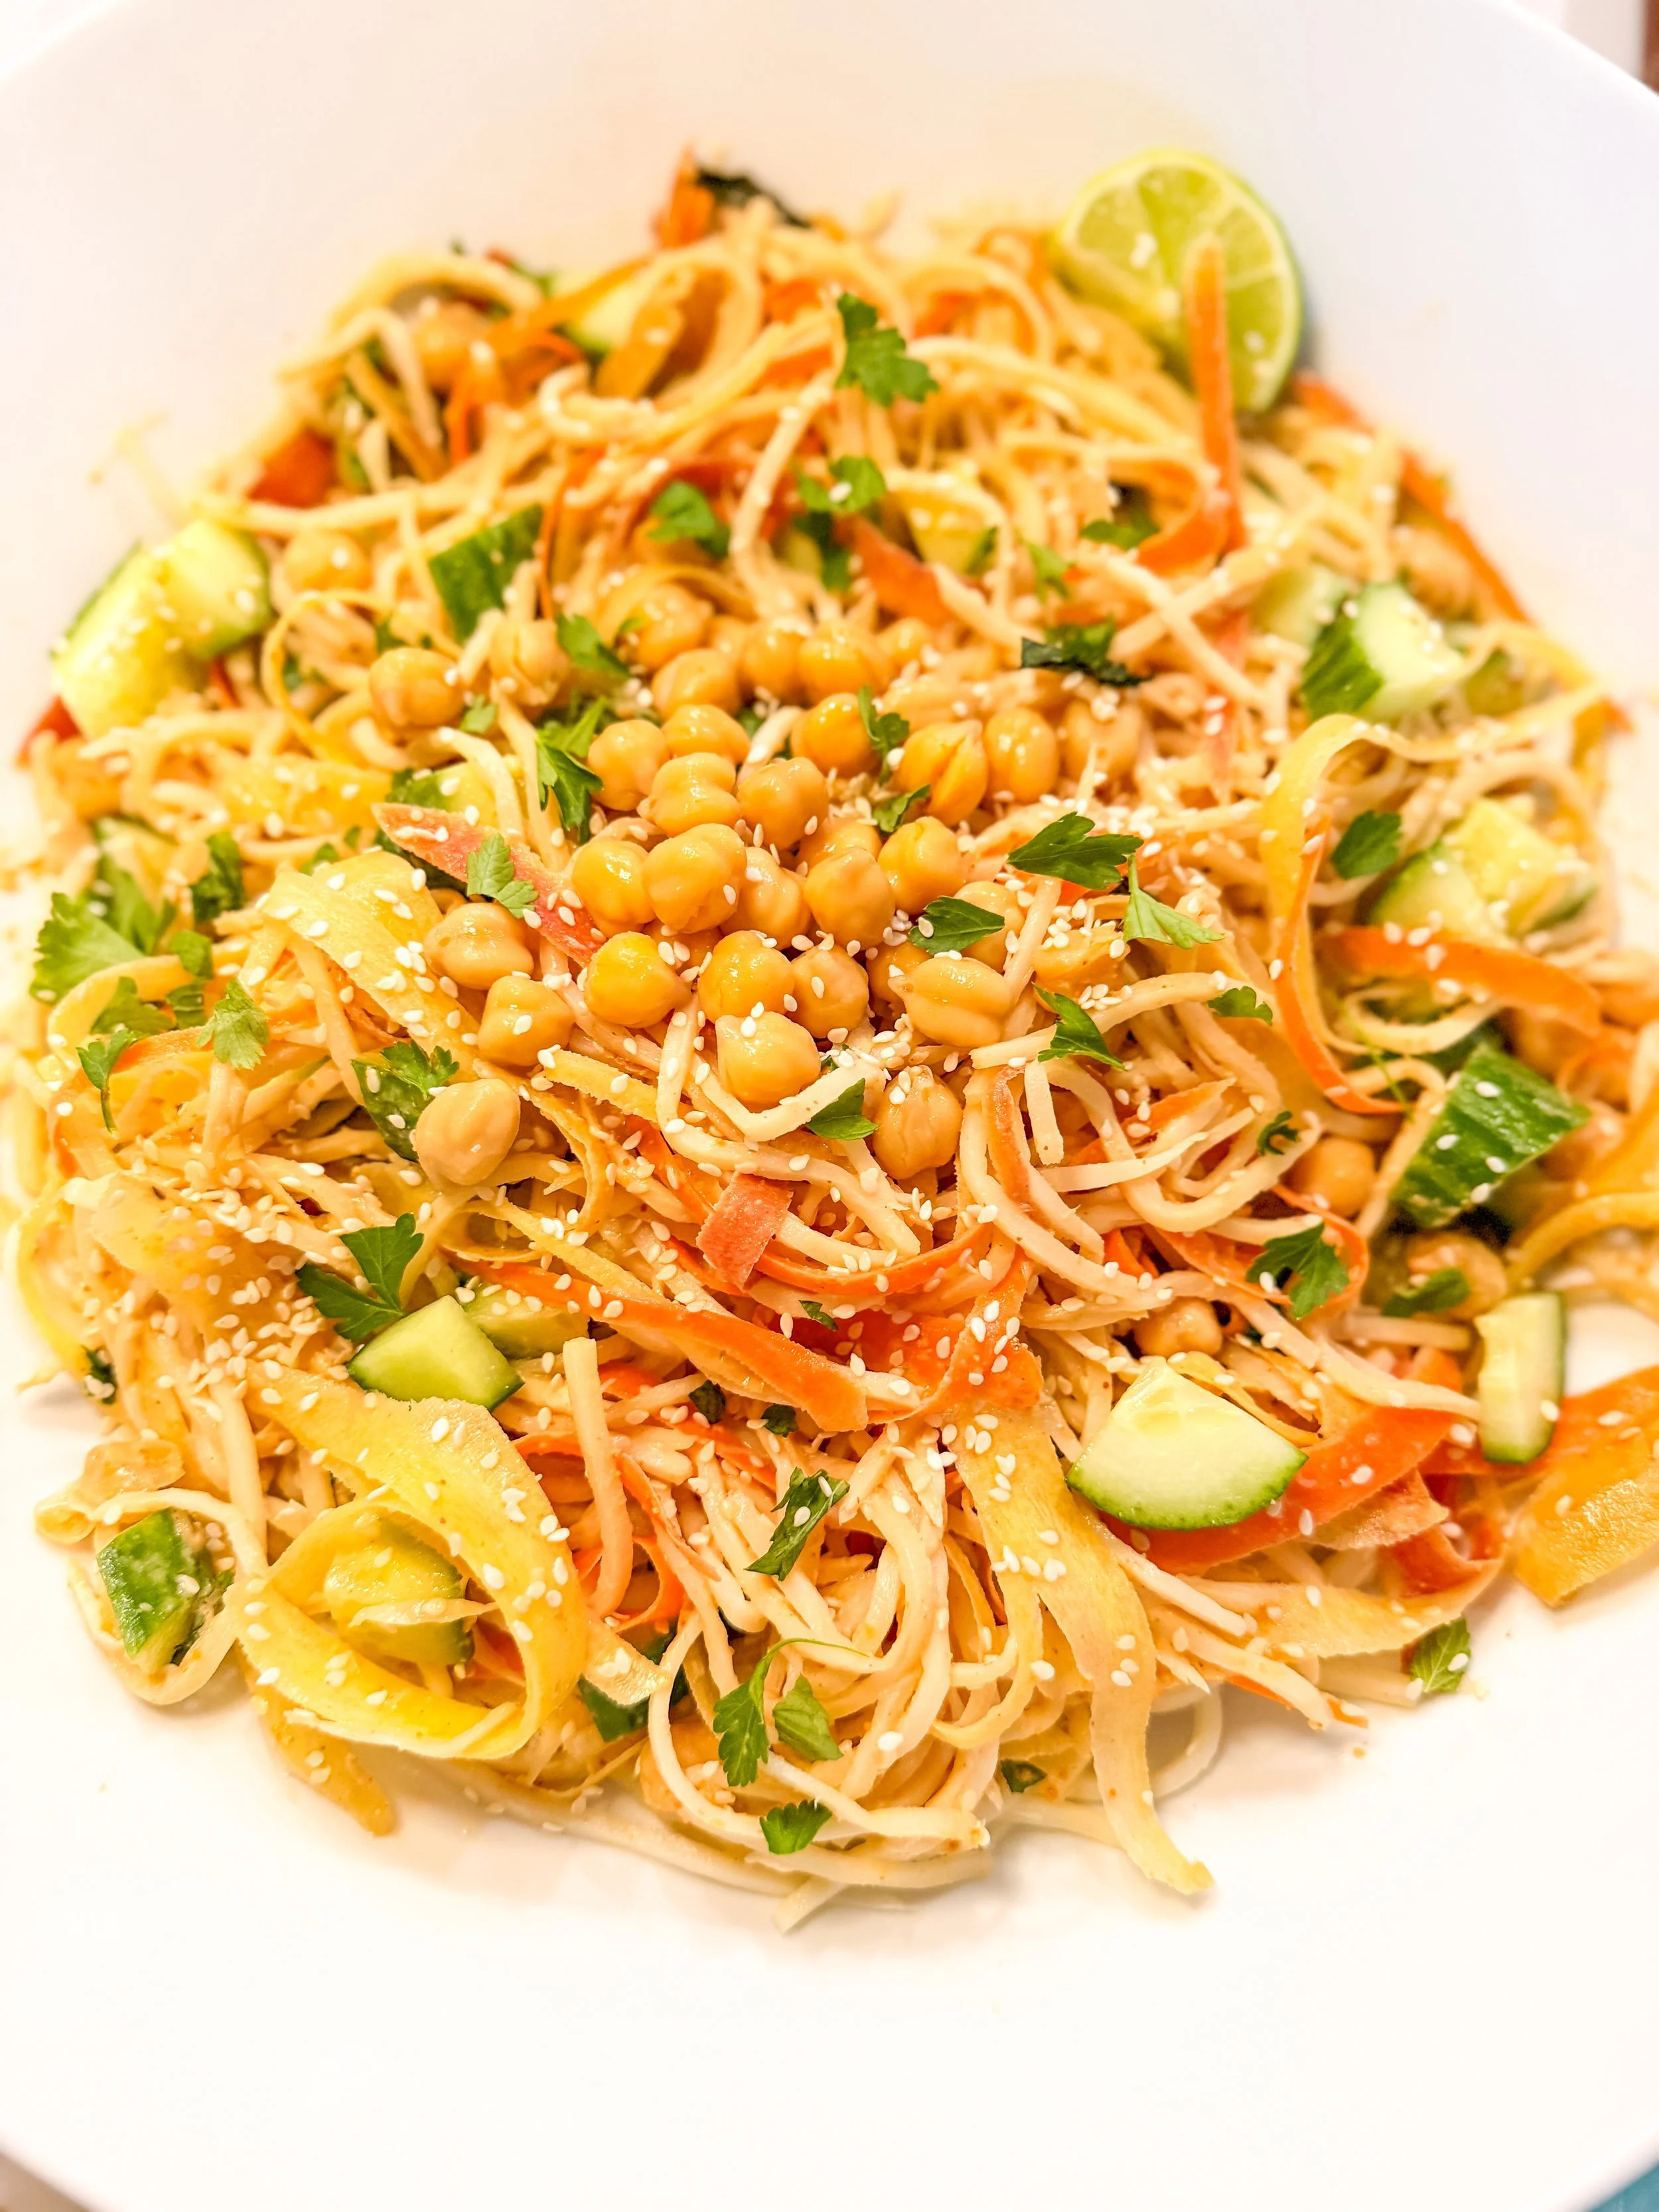
Ingredients
1 bag Palmini noodles, rinsed
1 cup carrots, ribboned
1 cucumber, sliced thin
1 cup chickpeas, drained and rinsed
Fresh mint, chopped
Fresh parsley, chopped
Sesame seeds, for topping
Peanut Sauce
1/3 cup peanut butter
2 tbsp tamari
Juice of 1 lime
1 tbsp maple syrup
1 tsp sesame oil
Water, to thin as needed
Instructions
Whisk together peanut butter, tamari, lime juice, maple syrup, and sesame oil. Add water a tablespoon at a time until pourable.
Rinse and drain Palmini noodles well; pat dry.
Toss noodles with carrot ribbons, cucumber, and chickpeas.
Pour peanut sauce over and toss to coat.
Top with fresh mint, parsley, and sesame seeds.
Crunchy, saucy, and done in under 15 minutes — this is the bowl I make when I want maximum flavor with minimum effort.
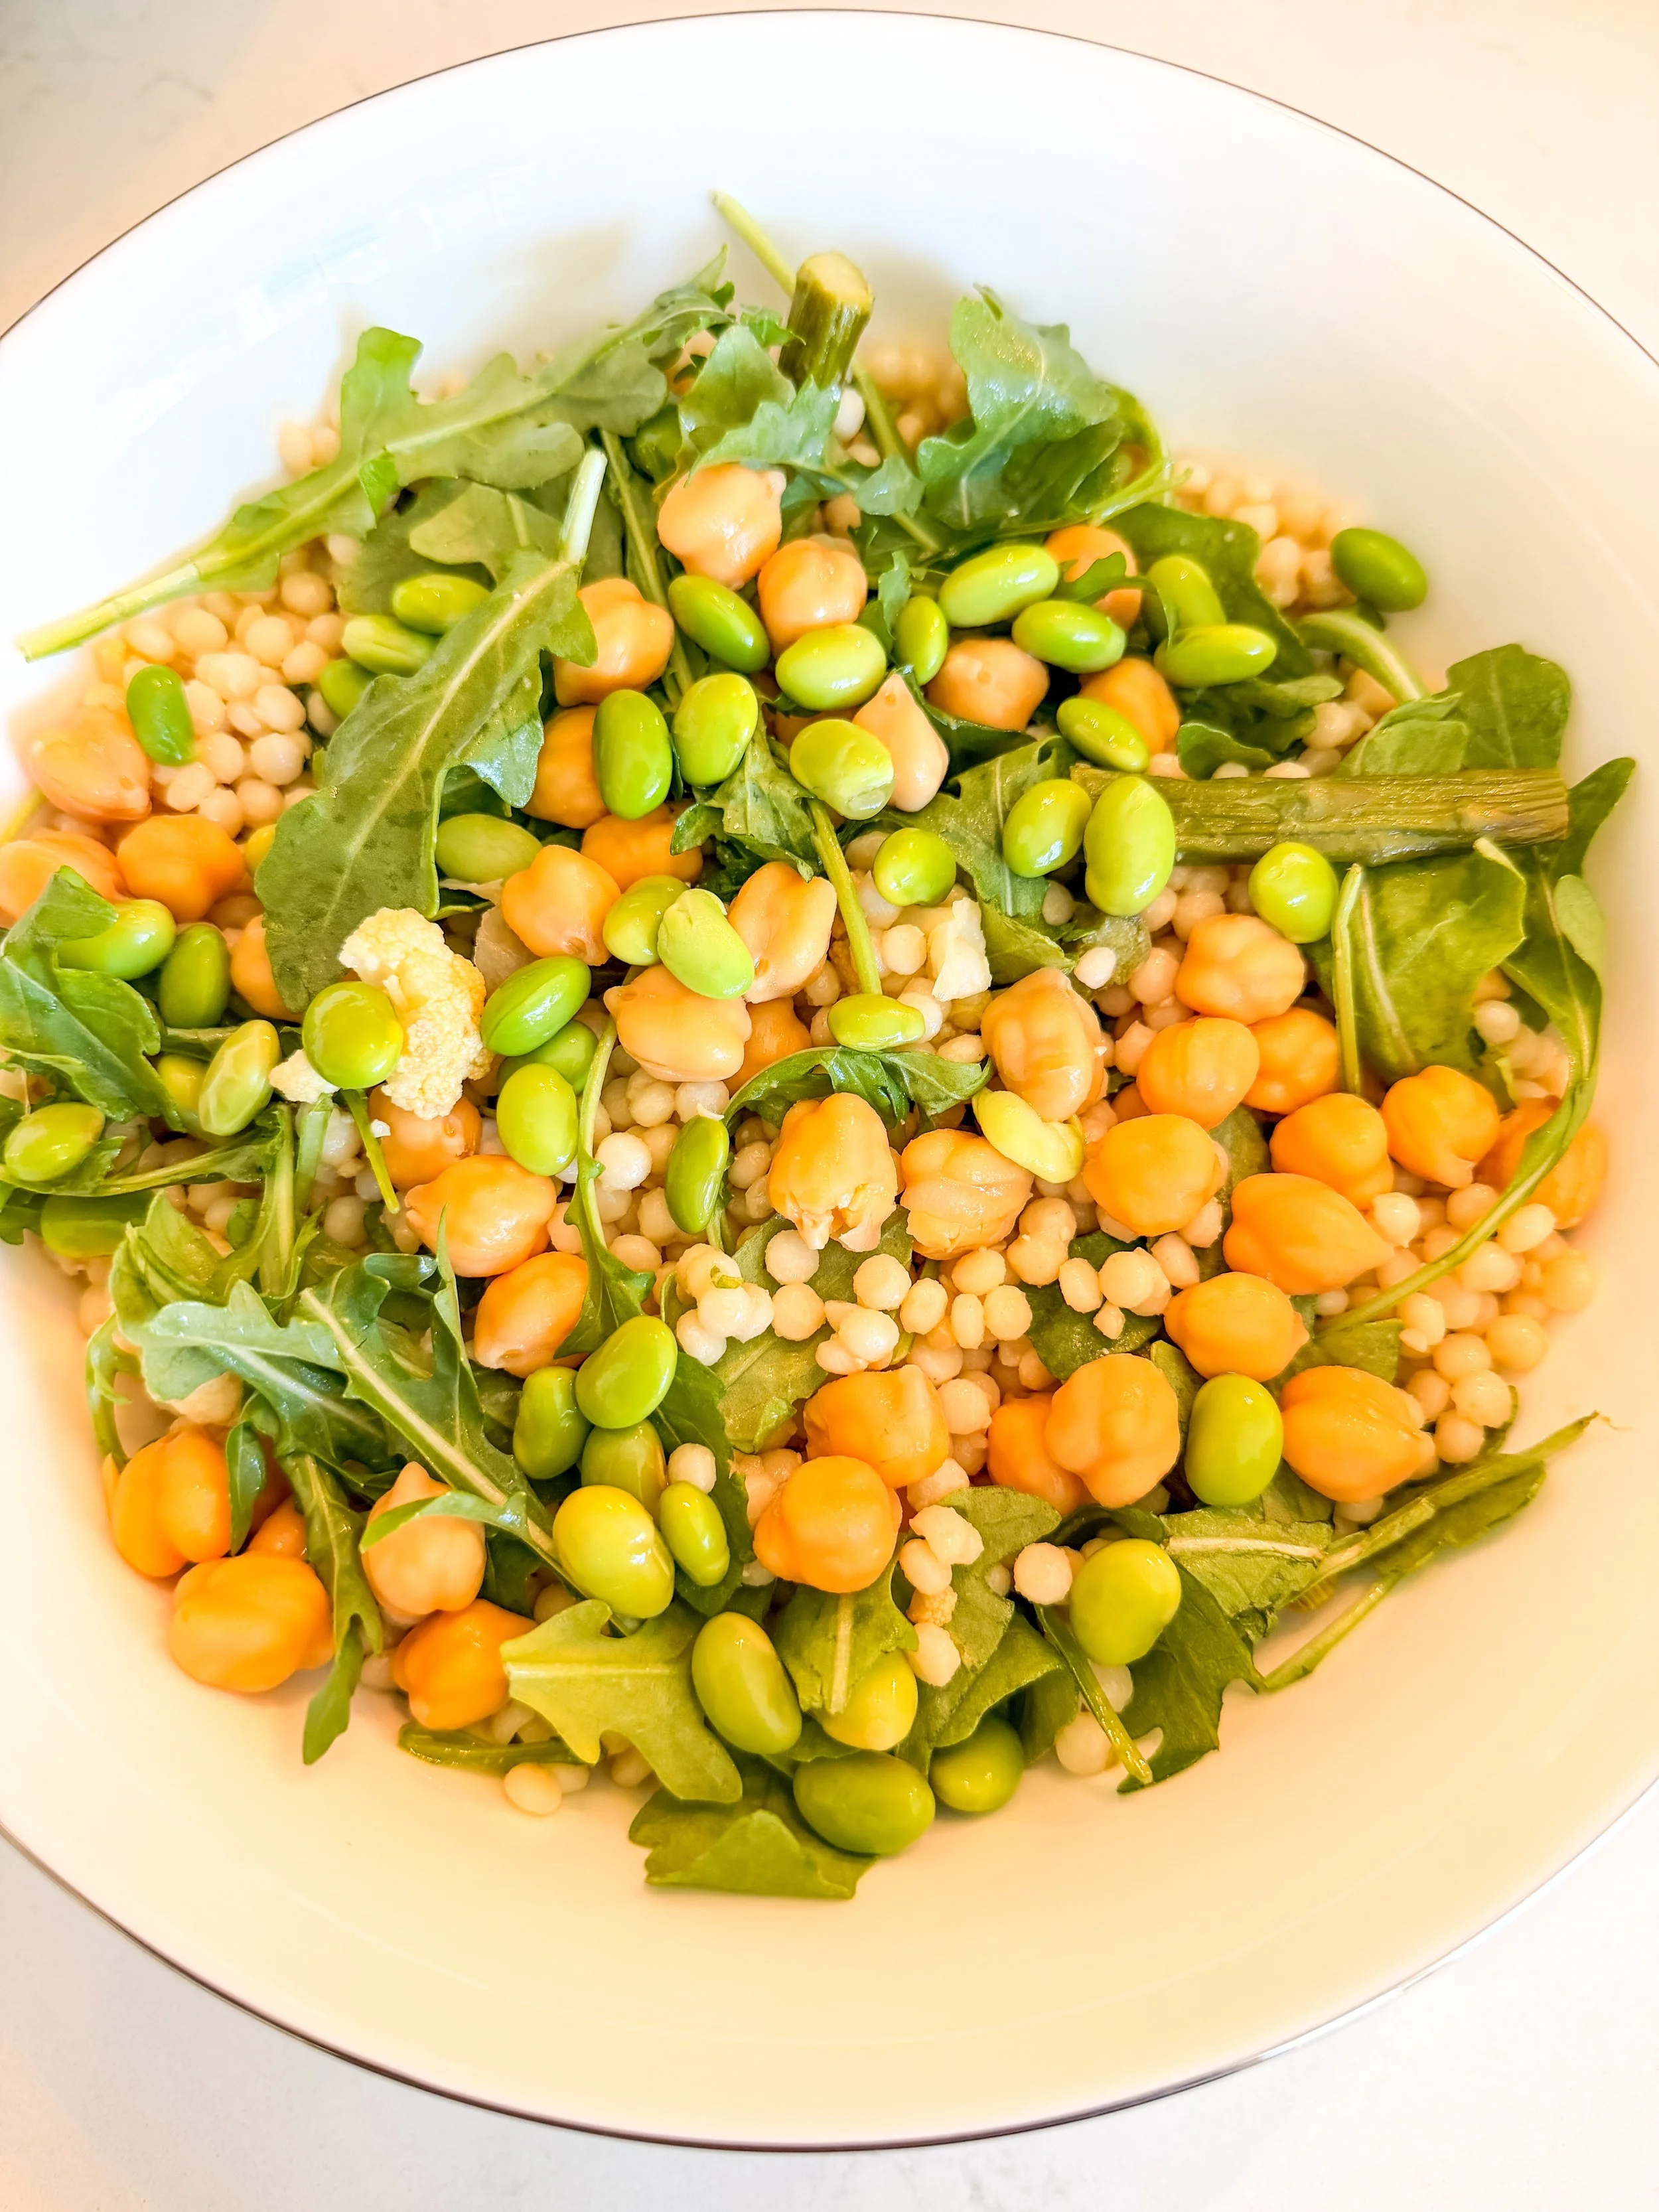
Earth Day Asparagus & Cauliflower Couscous Salad
A springtime favorite I made for Earth Day — packed with veggies and finished with crumbled feta for that little something extra.
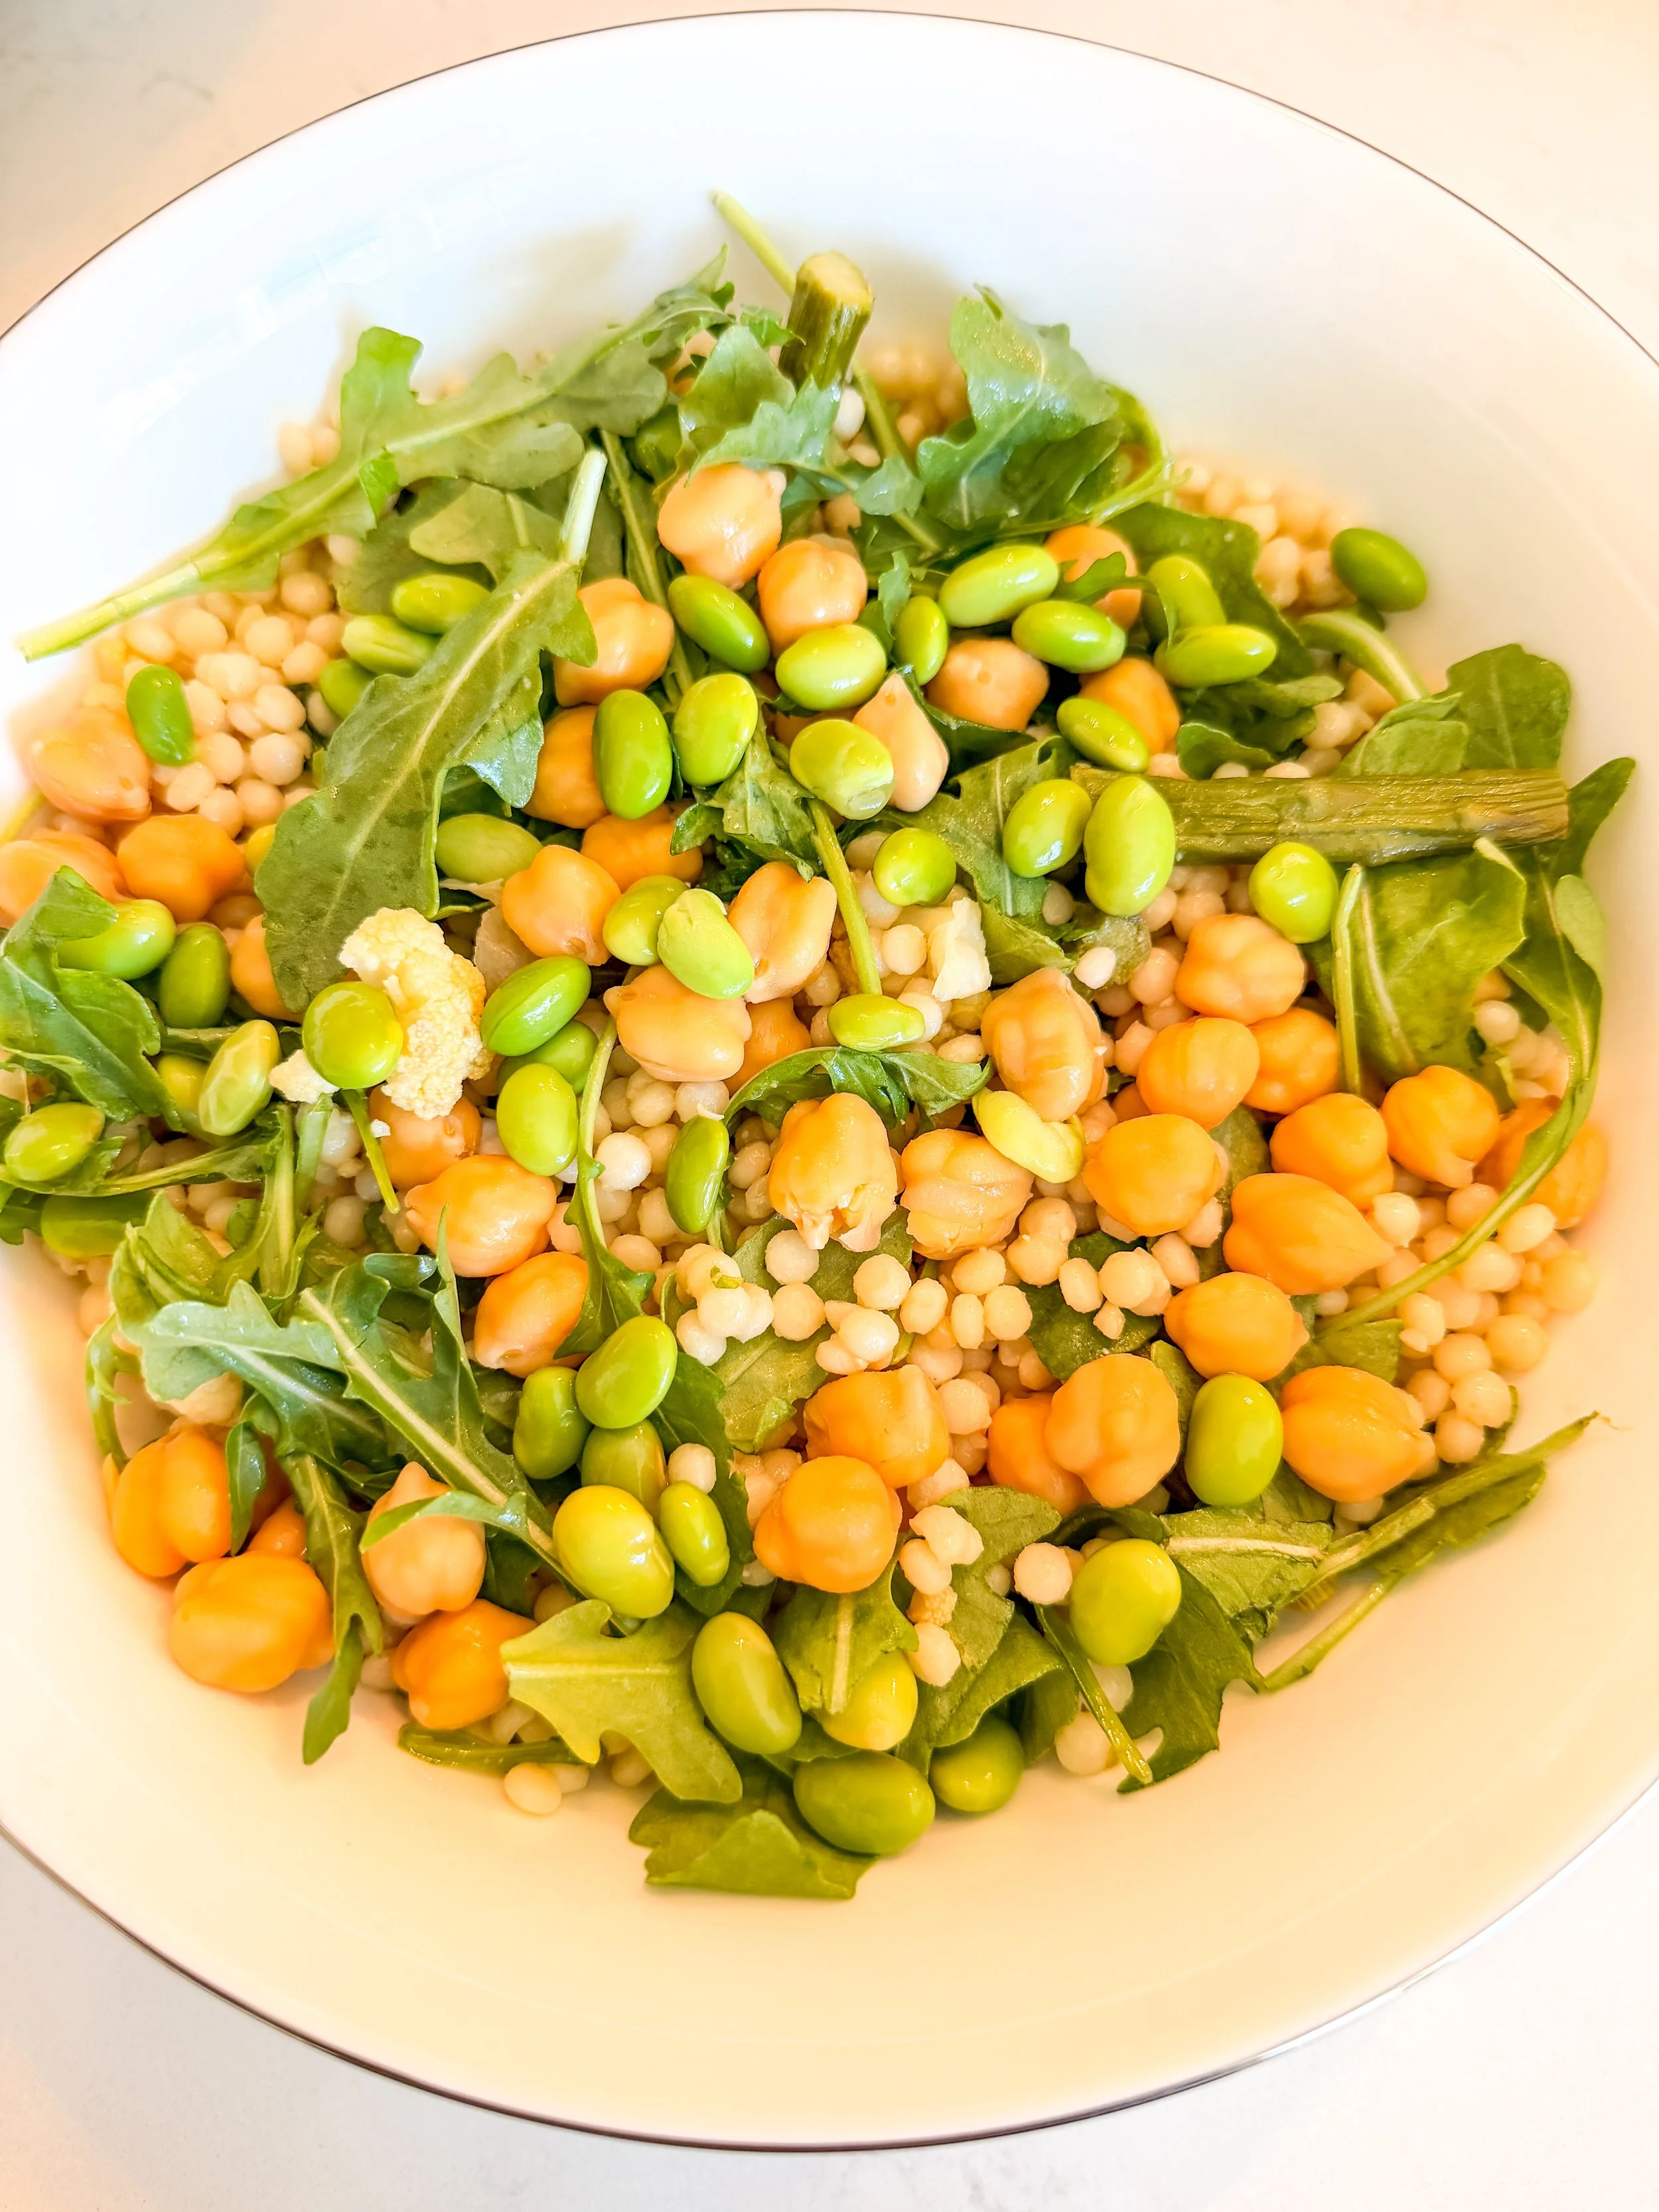
Ingredients
1 cup couscous, cooked
1 cup cauliflower, roasted
1 bunch asparagus, roasted and chopped
2 cups arugula
1 cup edamame, shelled
1 cup chickpeas, drained and rinsed
2 tbsp fresh dill, chopped
1/4 cup toasted pine nuts
1/2 cup Violife feta, crumbled
Instructions
Combine cooked couscous, roasted cauliflower, roasted asparagus, arugula, edamame, and chickpeas in a large bowl.
Toss with olive oil, a squeeze of lemon, salt, and pepper (or your favorite lemony dressing).
Fold in fresh dill.
Top with toasted pine nuts and crumbled Violife feta before serving.
A little Earth Day reminder that eating seasonally and plant-based can be this colorful and satisfying. Save this one for your next spring gathering.
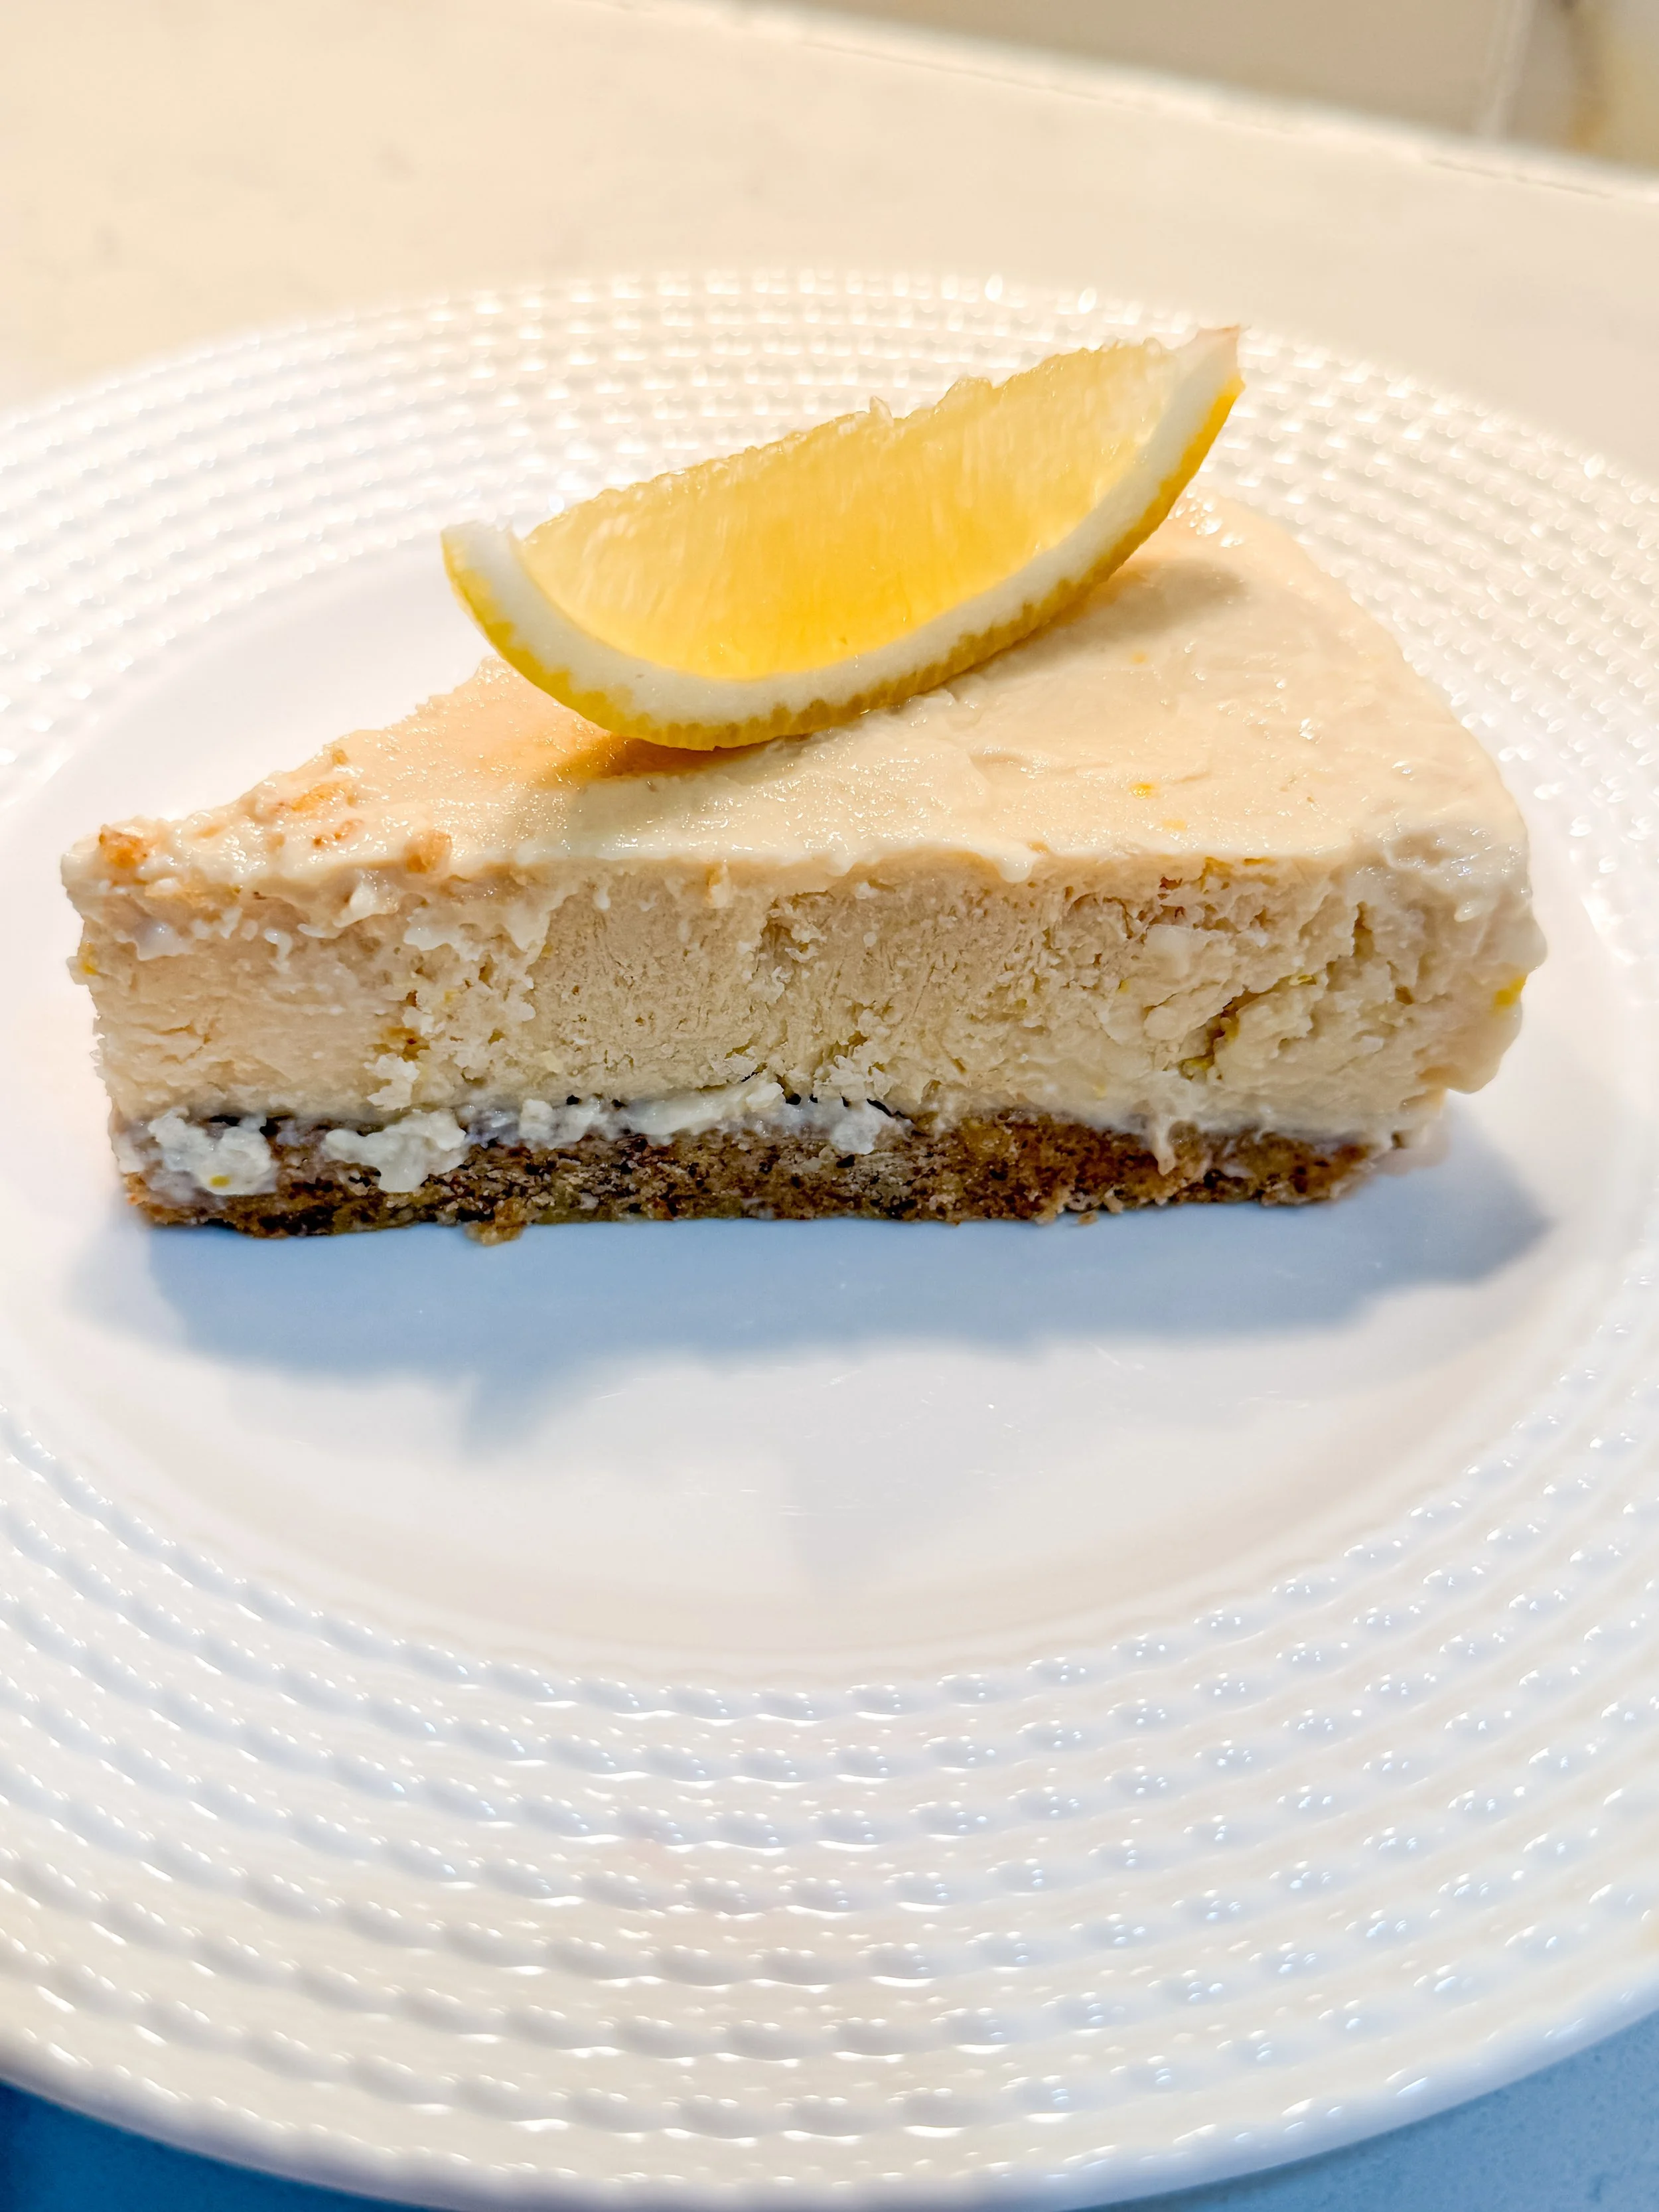
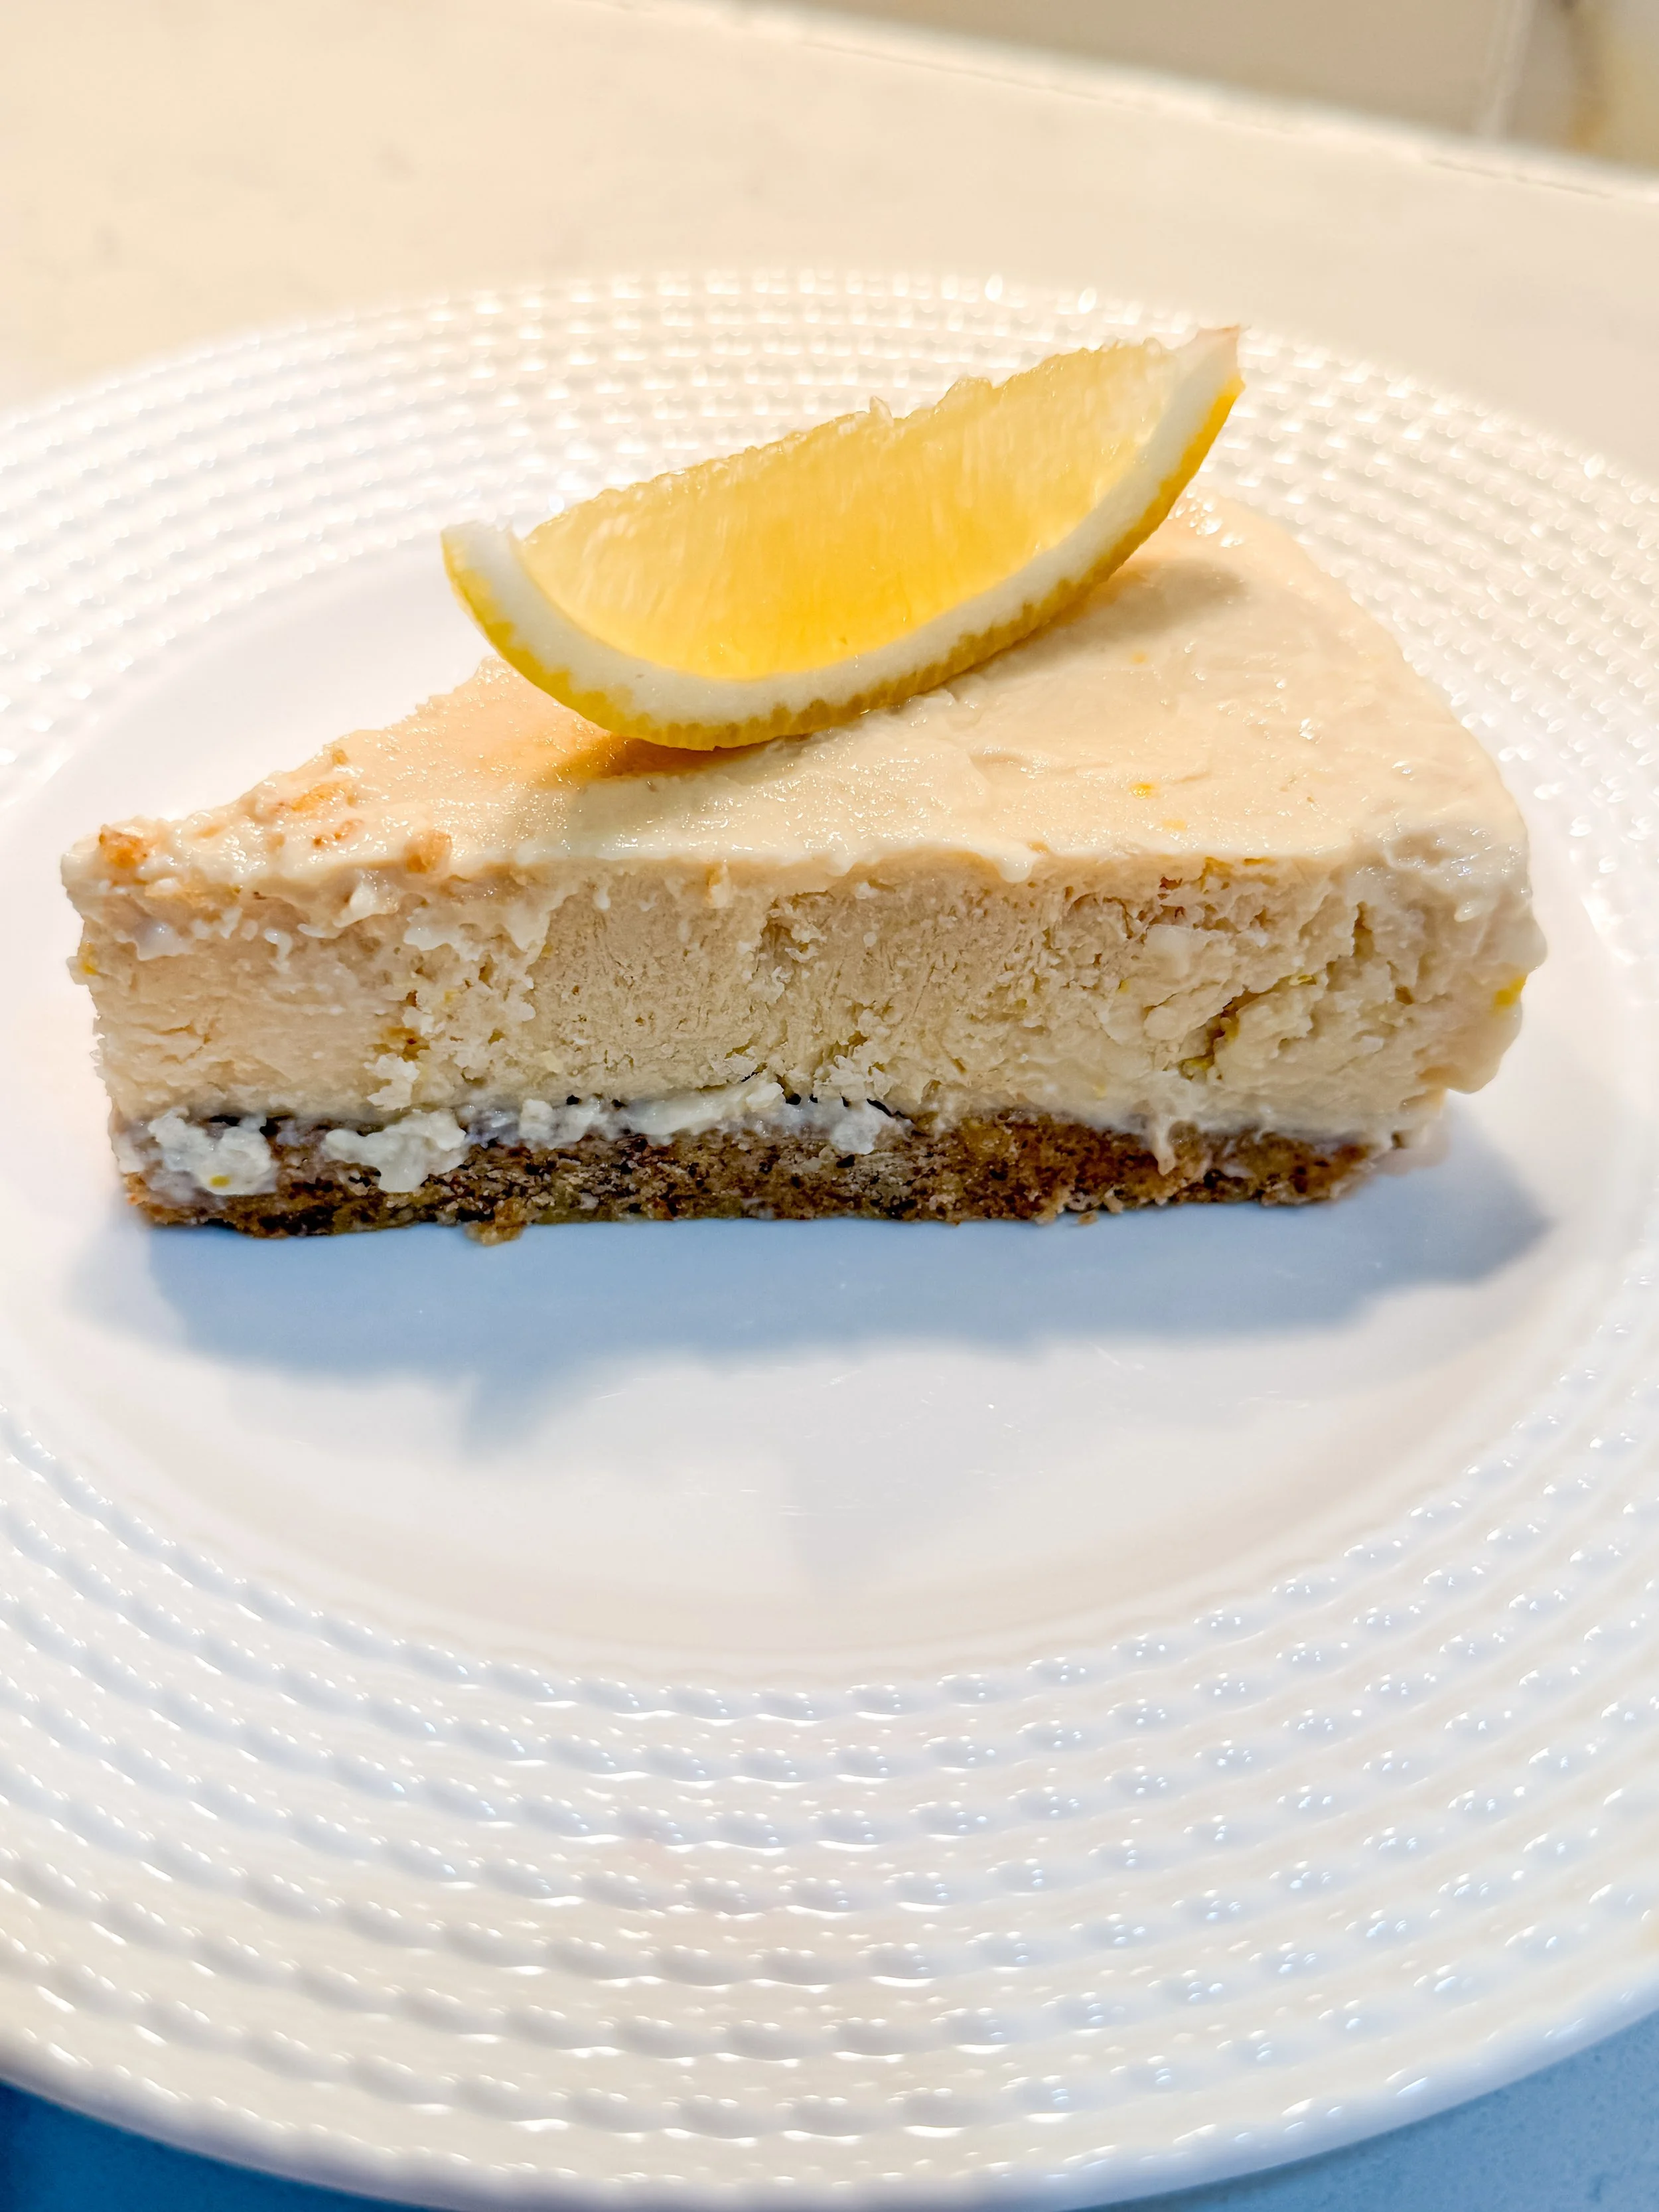
Lemon "Cheesecake" with Nasoya Silken Tofu
I'm so excited to share this one — a collab recipe using Nasoya silken tofu to make a creamy, dreamy lemon cheesecake that's entirely plant-based.
Crust
1 1/2 cups almond flour
8-10 pitted dates
2 tbsp coconut oil, melted
Filling
1 package Nasoya silken tofu
1/3 cup maple syrup
Juice of 2 lemons
2 tbsp coconut oil, melted
1 tsp vanilla extract
1 tbsp cornstarch
Pinch of salt
Instructions
Preheat oven to 350°F. In a food processor, pulse almond flour, dates, and coconut oil until it forms a sticky dough.
Press the crust mixture into a lined springform pan or tart pan. Bake for 8-10 minutes, then let cool.
Blend silken tofu, maple syrup, lemon juice, coconut oil, vanilla, cornstarch, and salt until completely smooth.
Pour filling over the cooled crust.
Bake at 325°F for 25-30 minutes, until the center is just set. Cool completely, then chill for at least 4 hours before serving.
Silky, citrusy, and secretly made with tofu — this is the dessert that convinces people plant-based can be just as indulgent. So excited to have partnered with Nasoya on this one!
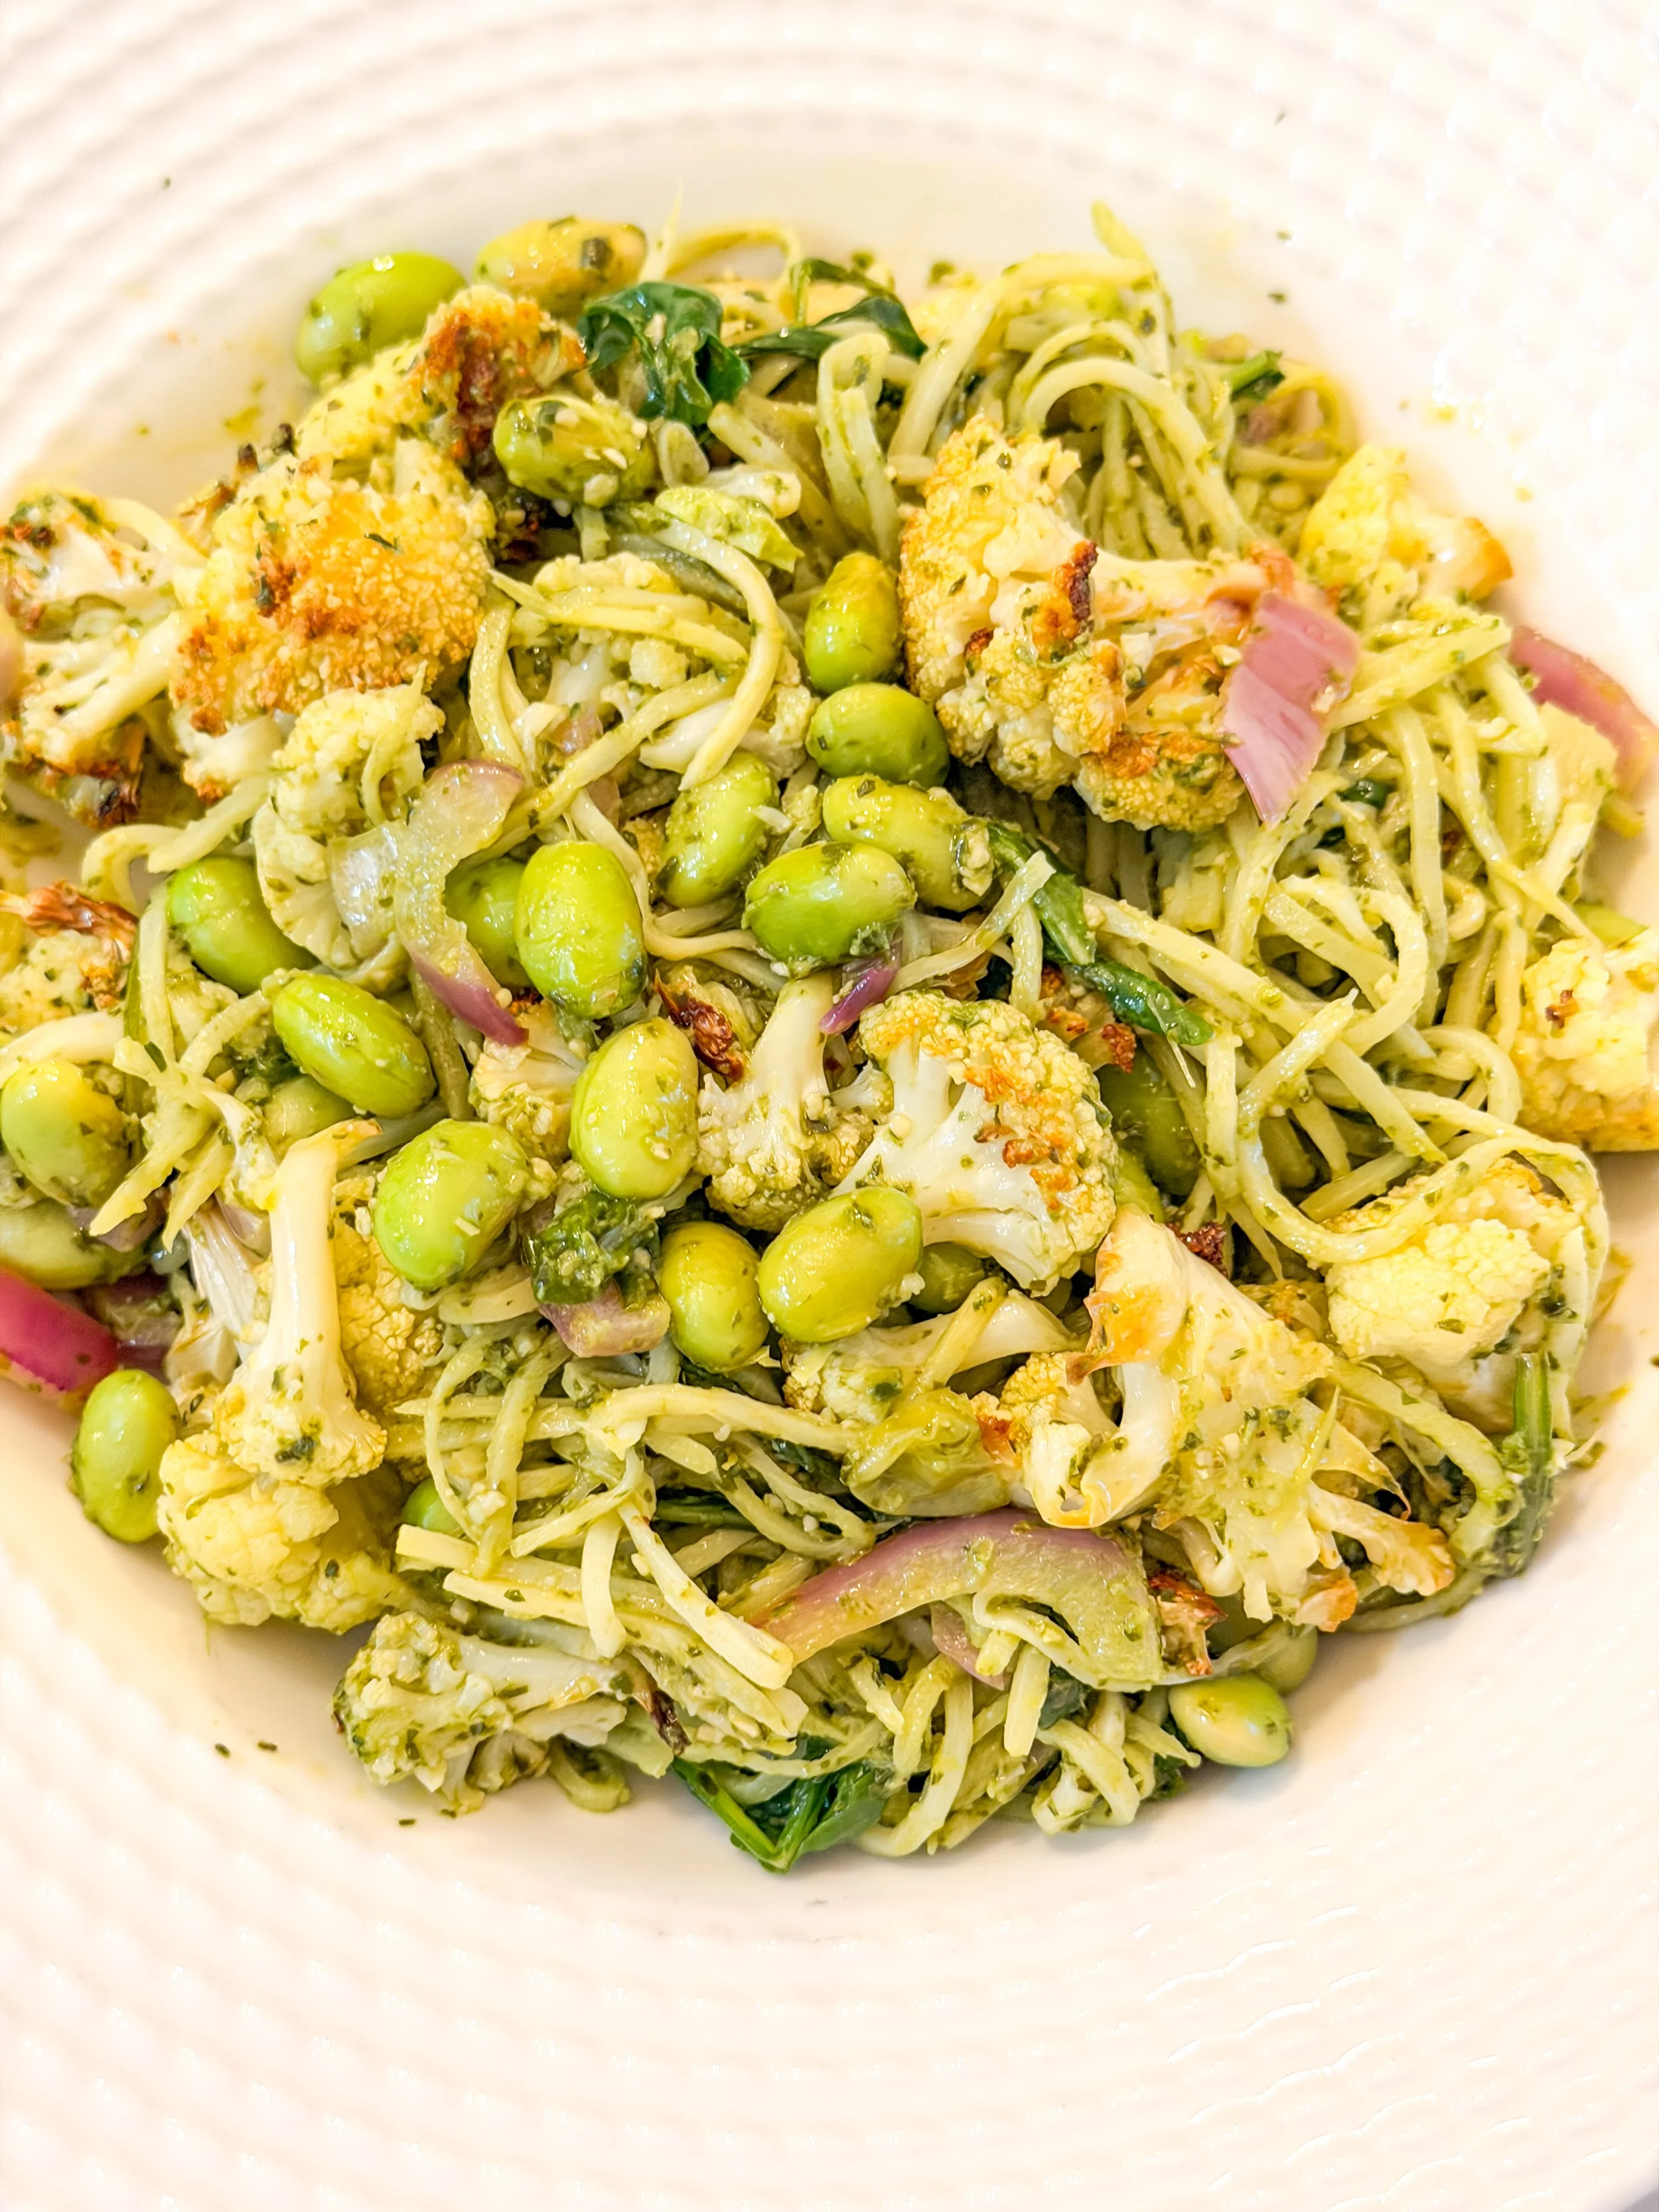
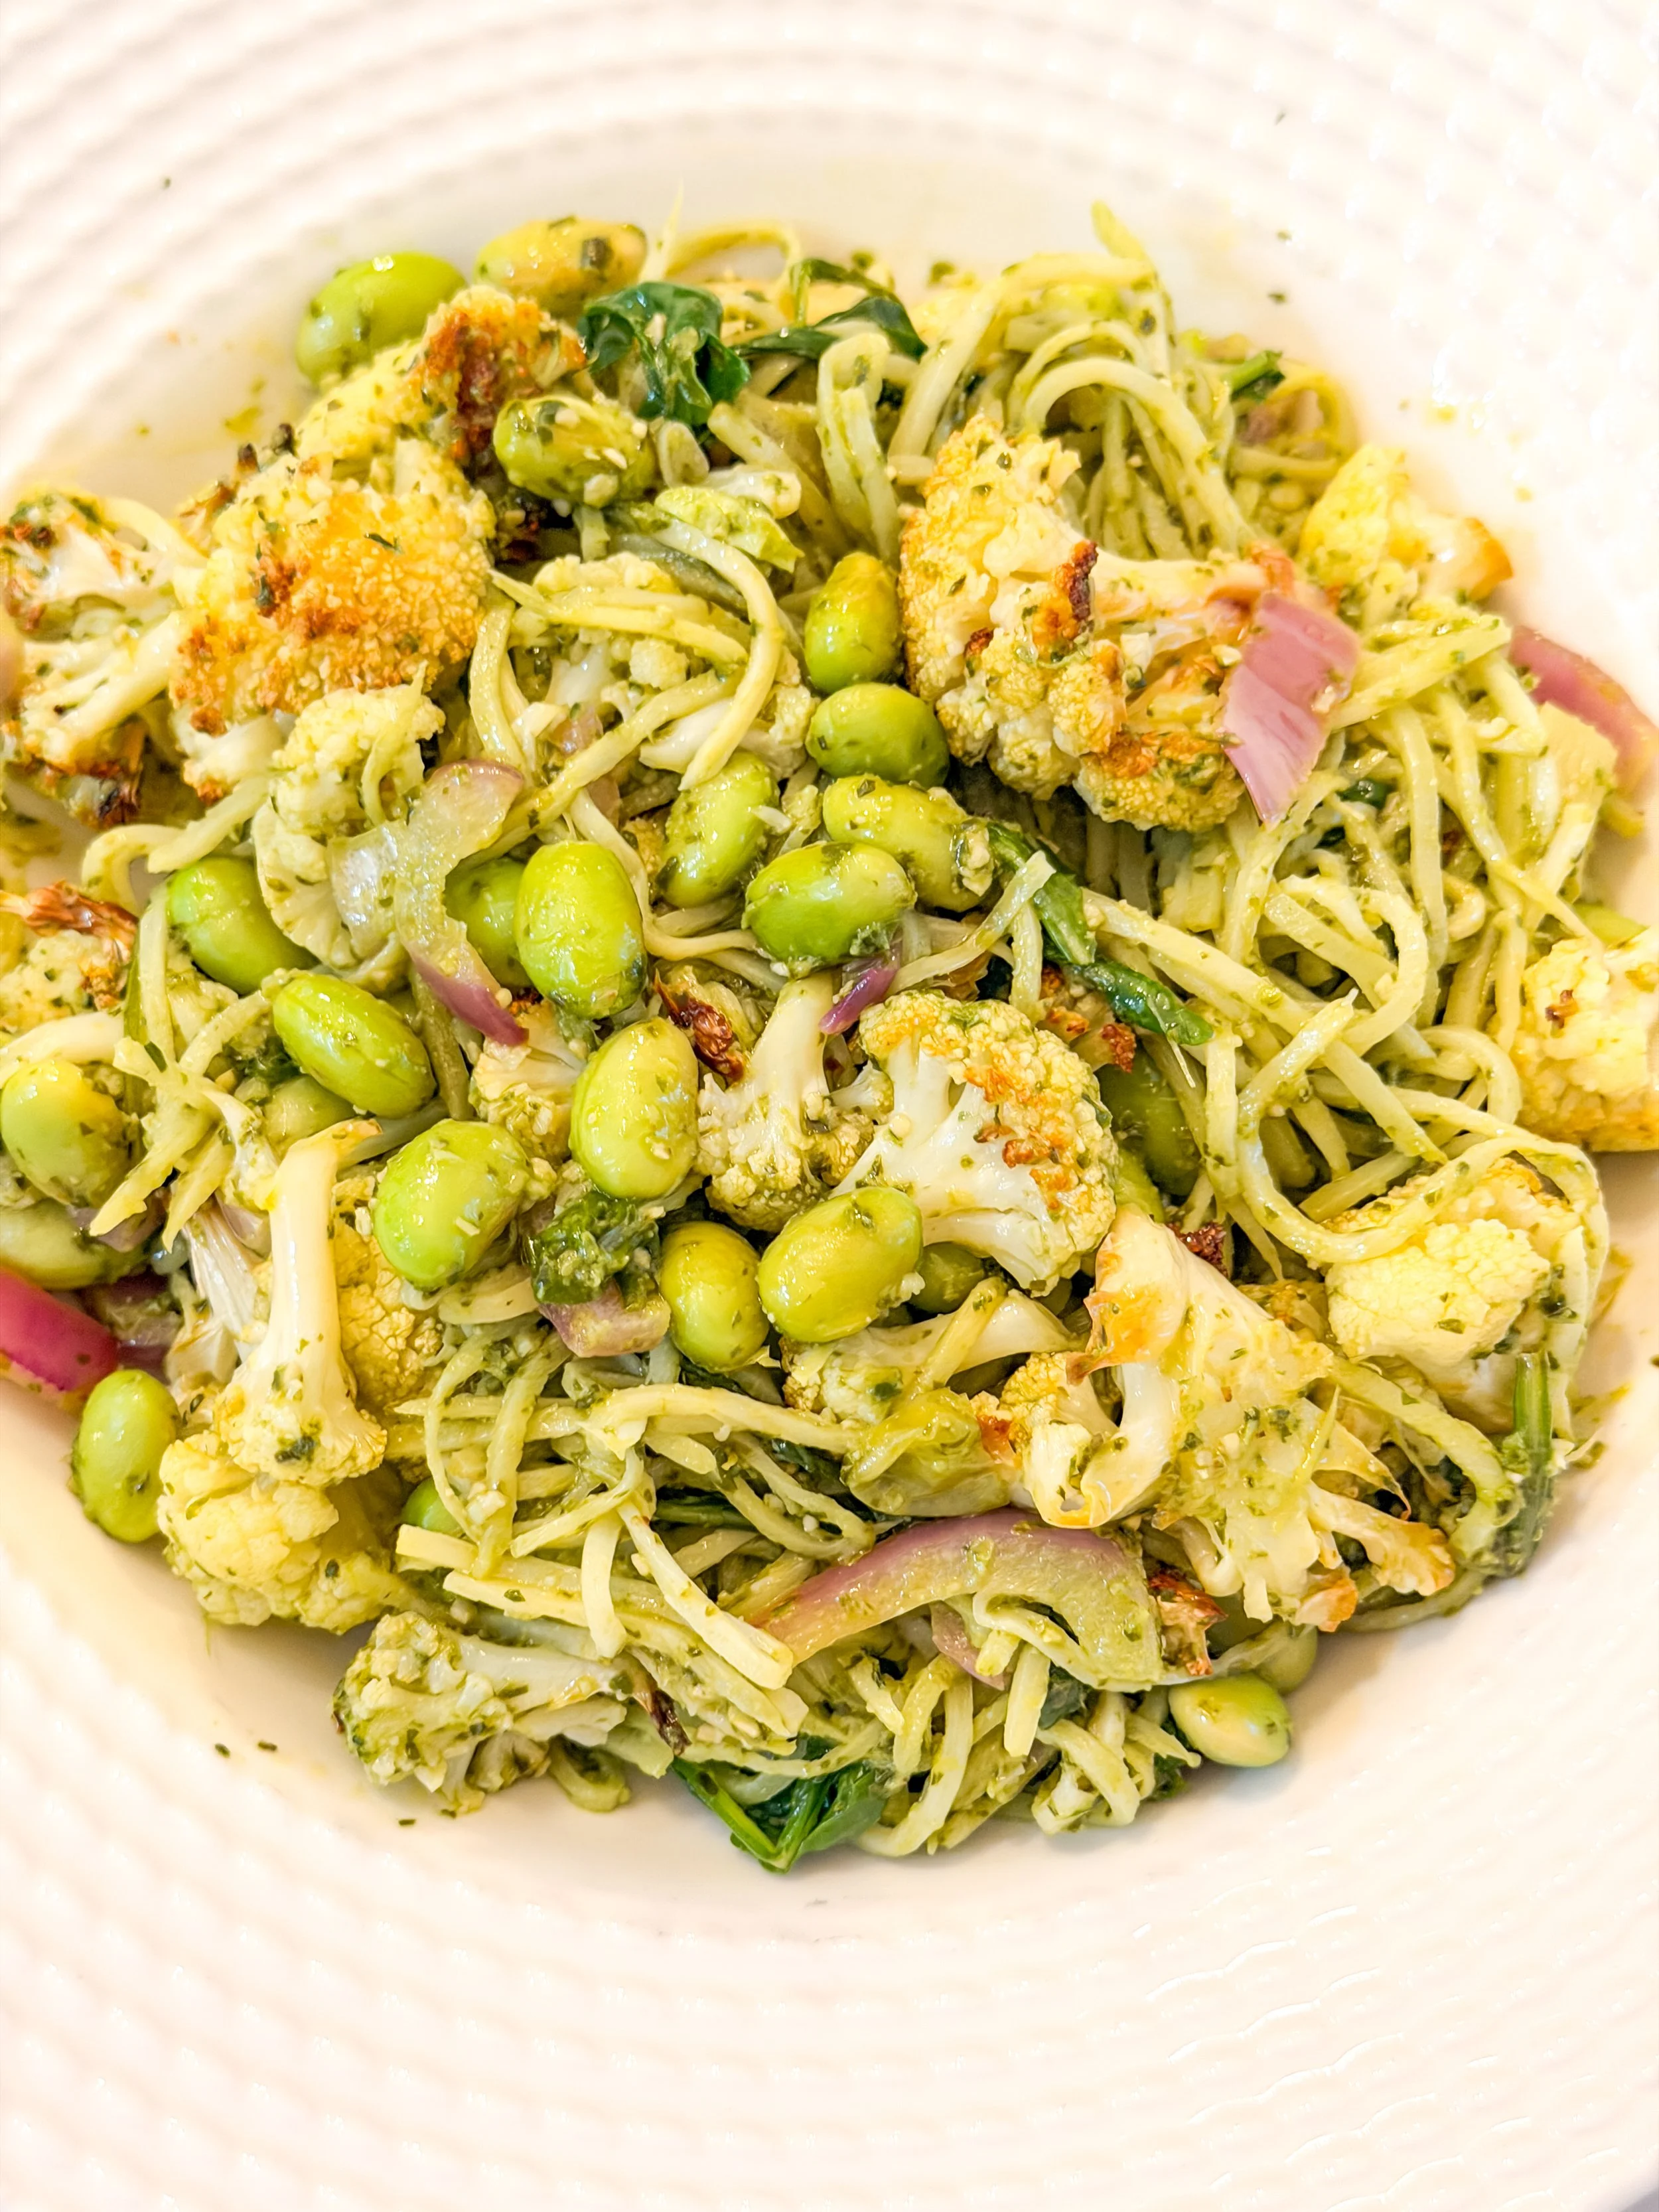
Creamy Pesto Pasta with Palmini
Palmini noodles are such an easy lower-carb swap, and this creamy pesto version proves plant-based pasta night doesn't have to be complicated.
Ingredients
1 bag Palmini noodles, rinsed well
1 cup cauliflower, roasted
1 cup edamame, shelled
1/4 cup red onion, sliced
2 cups arugula
1/2 cup vegan pesto (homemade or store-bought)
1 tbsp olive oil
Vegan parmesan, to taste
Juice of 1/2 lemon
Toasted pine nuts, for topping
Instructions
Rinse Palmini noodles thoroughly and pat dry; sauté briefly in olive oil to warm through.
Toss noodles with roasted cauliflower, edamame, red onion, and arugula.
Stir in vegan pesto until everything is well coated.
Finish with a squeeze of lemon juice, a sprinkle of vegan parmesan, and toasted pine nuts.
Serve warm or at room temperature.
Comfort food, plant-based style. This one's proof that "healthy pasta night" doesn't mean sacrificing flavor.
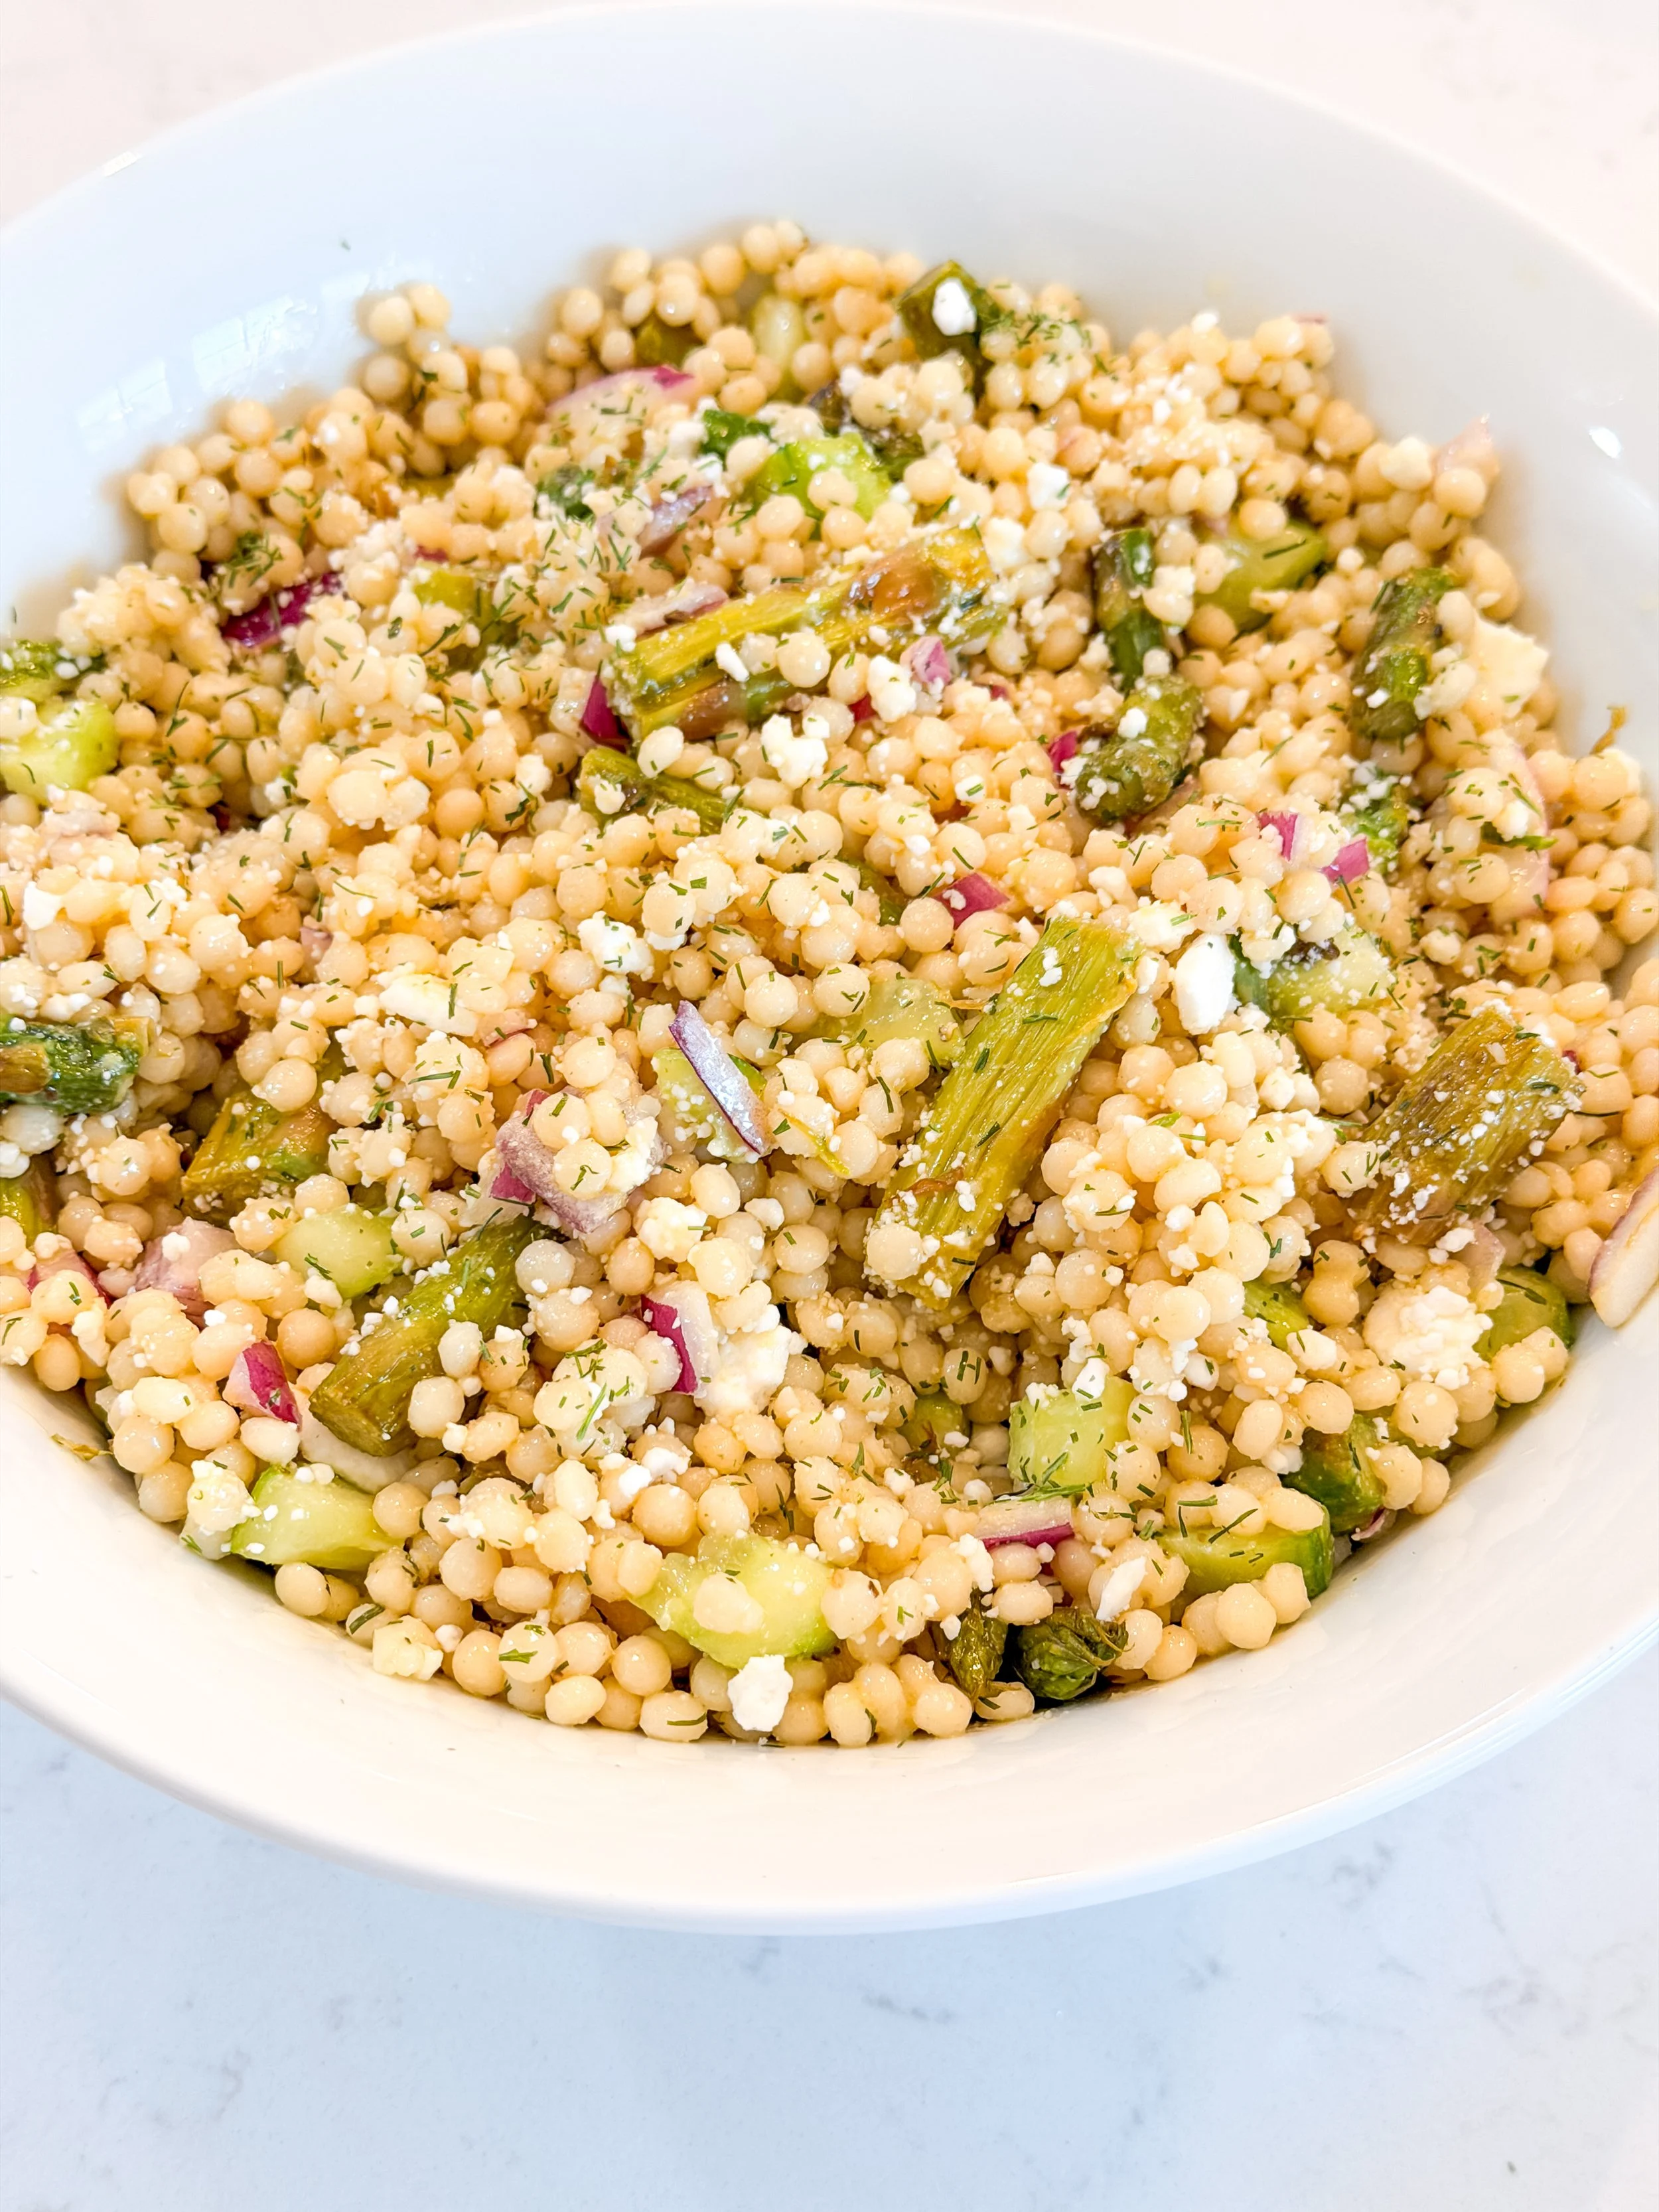
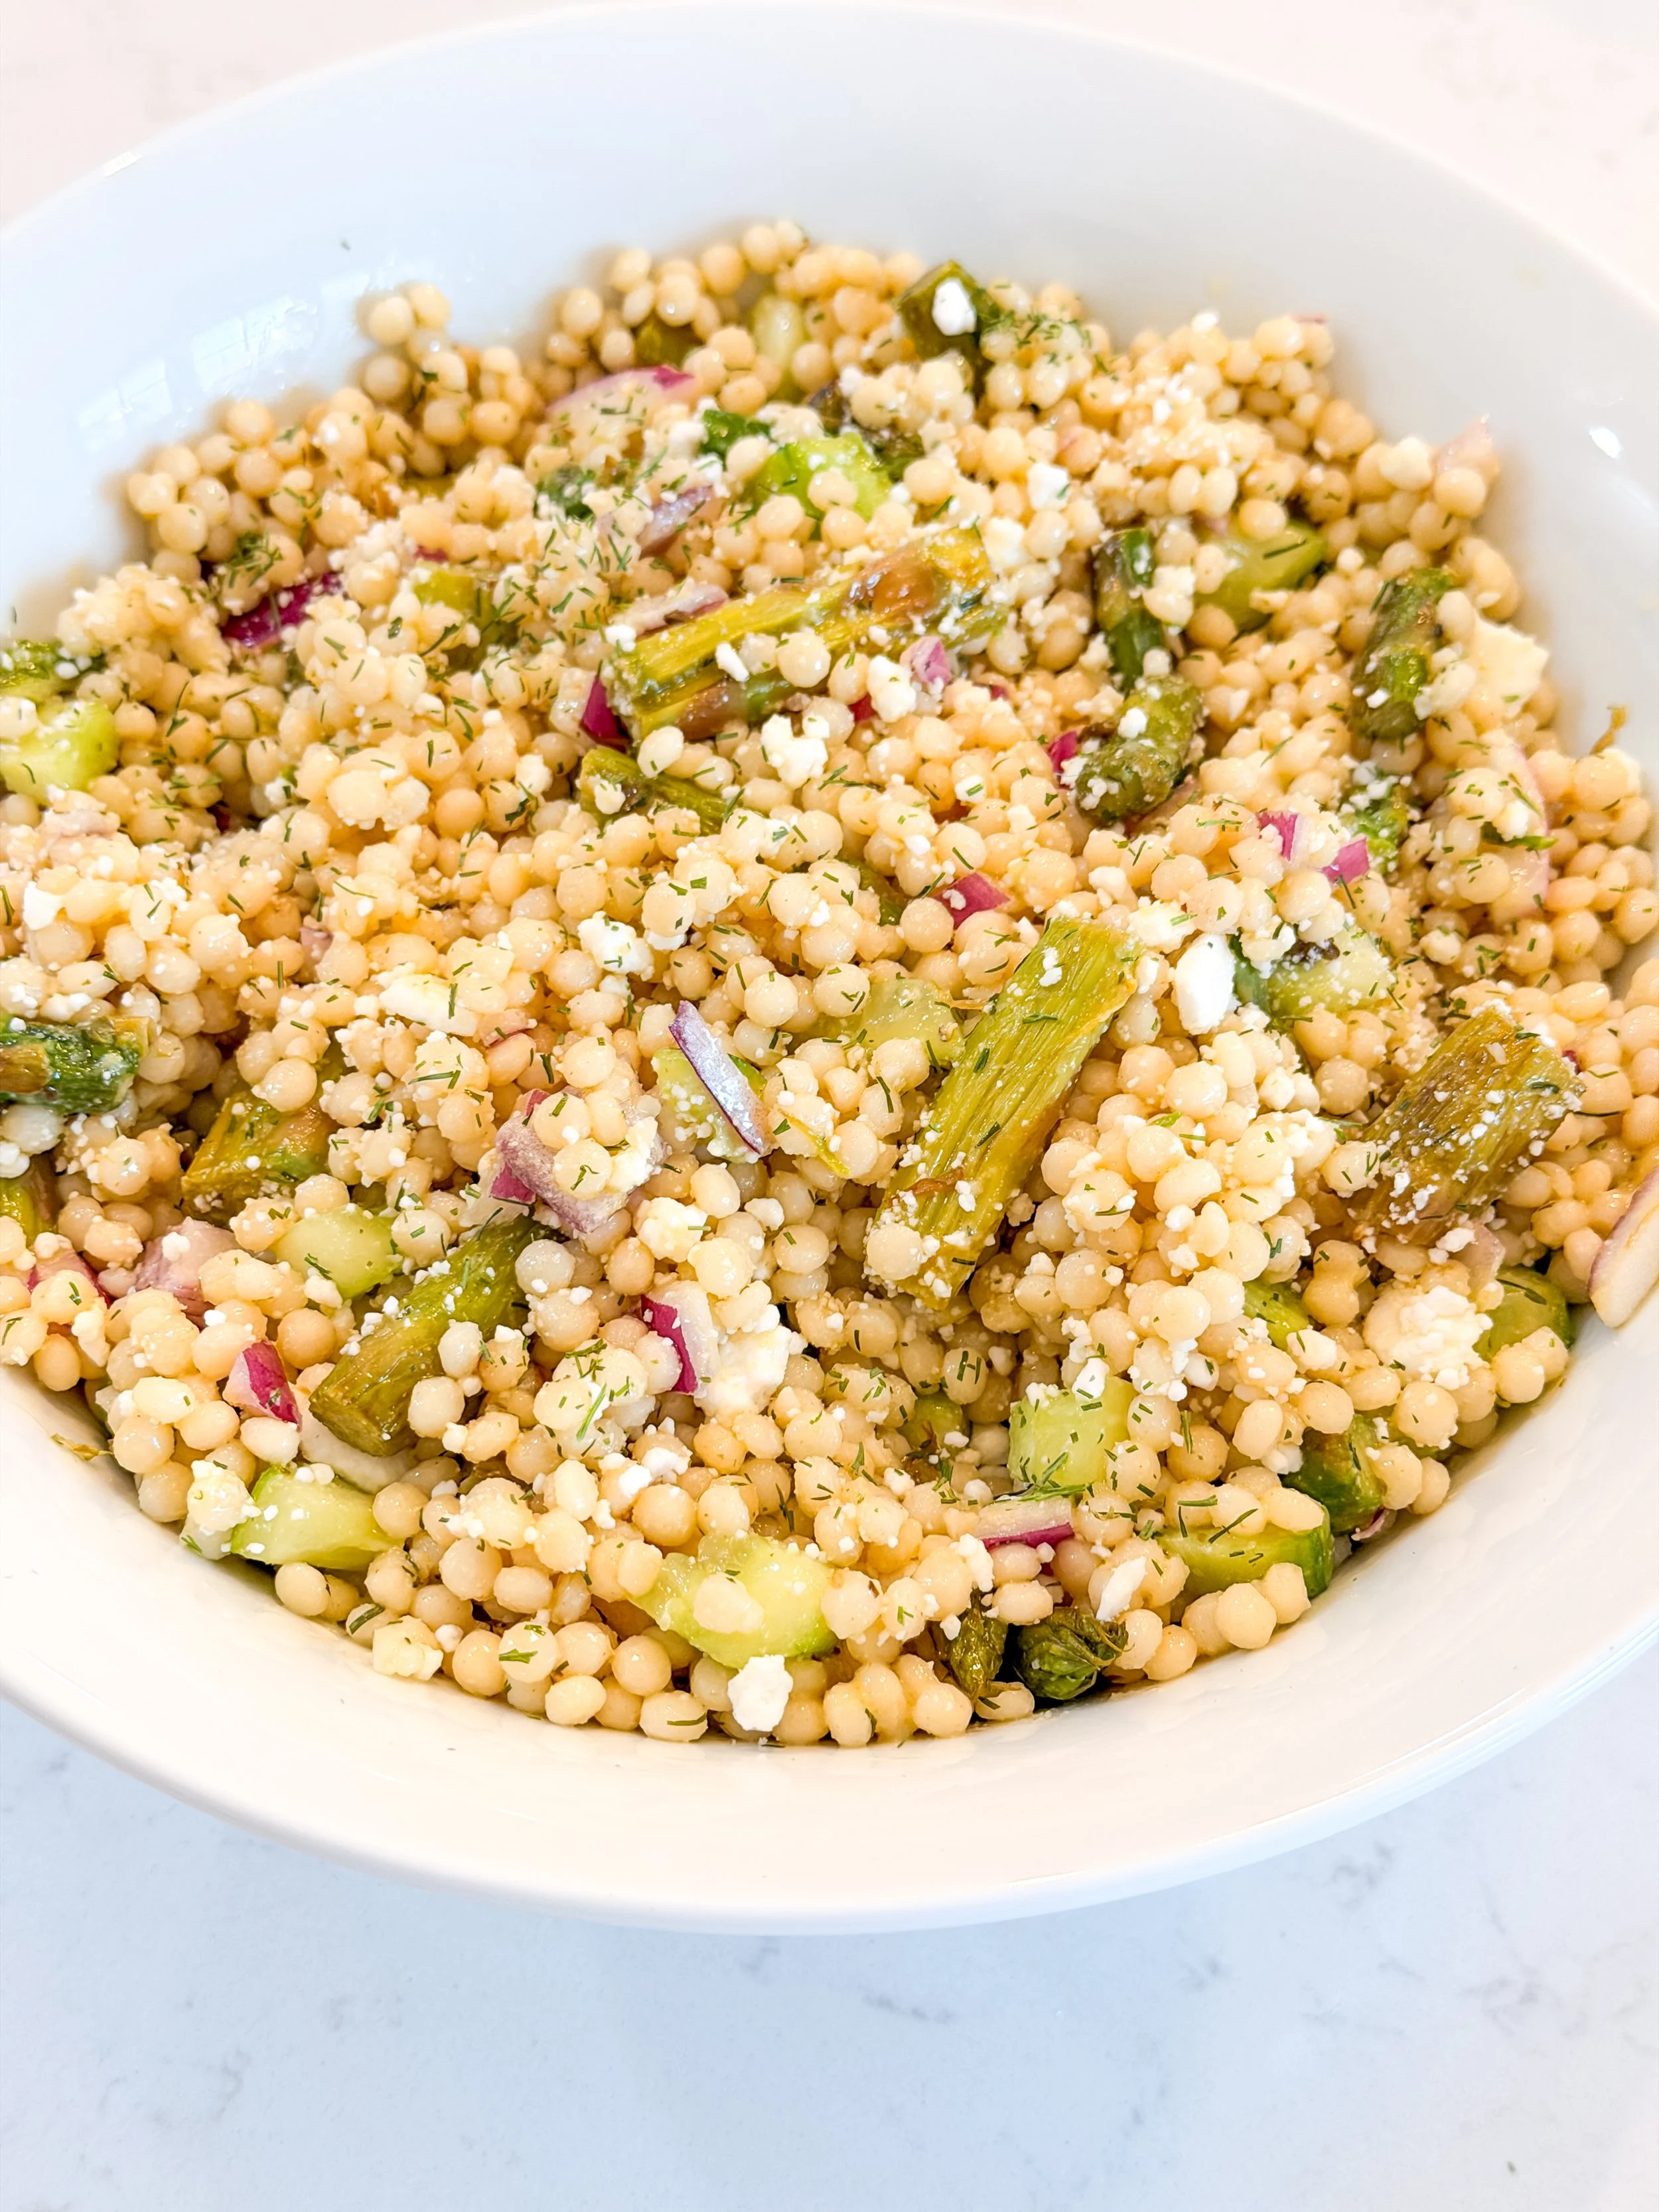
Pearl Couscous Salad with Roasted Asparagus
Fresh herbs and lemon are doing all the heavy lifting in this one. It's light, a little tangy, and perfect for spring and summer tables.
Ingredients
1 cup pearl couscous, cooked
1 bunch asparagus, trimmed and roasted or blanched, chopped
1/2 cup Follow Your Heart vegan feta, crumbled
1 cucumber, diced
1/4 cup red onion, thinly sliced
2 tbsp fresh dill, chopped
2 tbsp fresh parsley, chopped
1/4 cup toasted pine nuts
Bright Lemon Herb Dressing
Juice of 1-2 lemons
3 tbsp olive oil
Fresh dill and parsley (reserved from above)
Salt and pepper to taste
Instructions
Cook pearl couscous according to package directions and let cool slightly.
Whisk lemon juice, olive oil, herbs, salt, and pepper for the dressing.
Combine couscous, asparagus, cucumber, and red onion in a large bowl.
Pour dressing over and toss well.
Top with vegan feta and toasted pine nuts before serving.
This is my go-to for a dish that photographs as good as it tastes — perfect for a tablescape moment or a simple weeknight side.
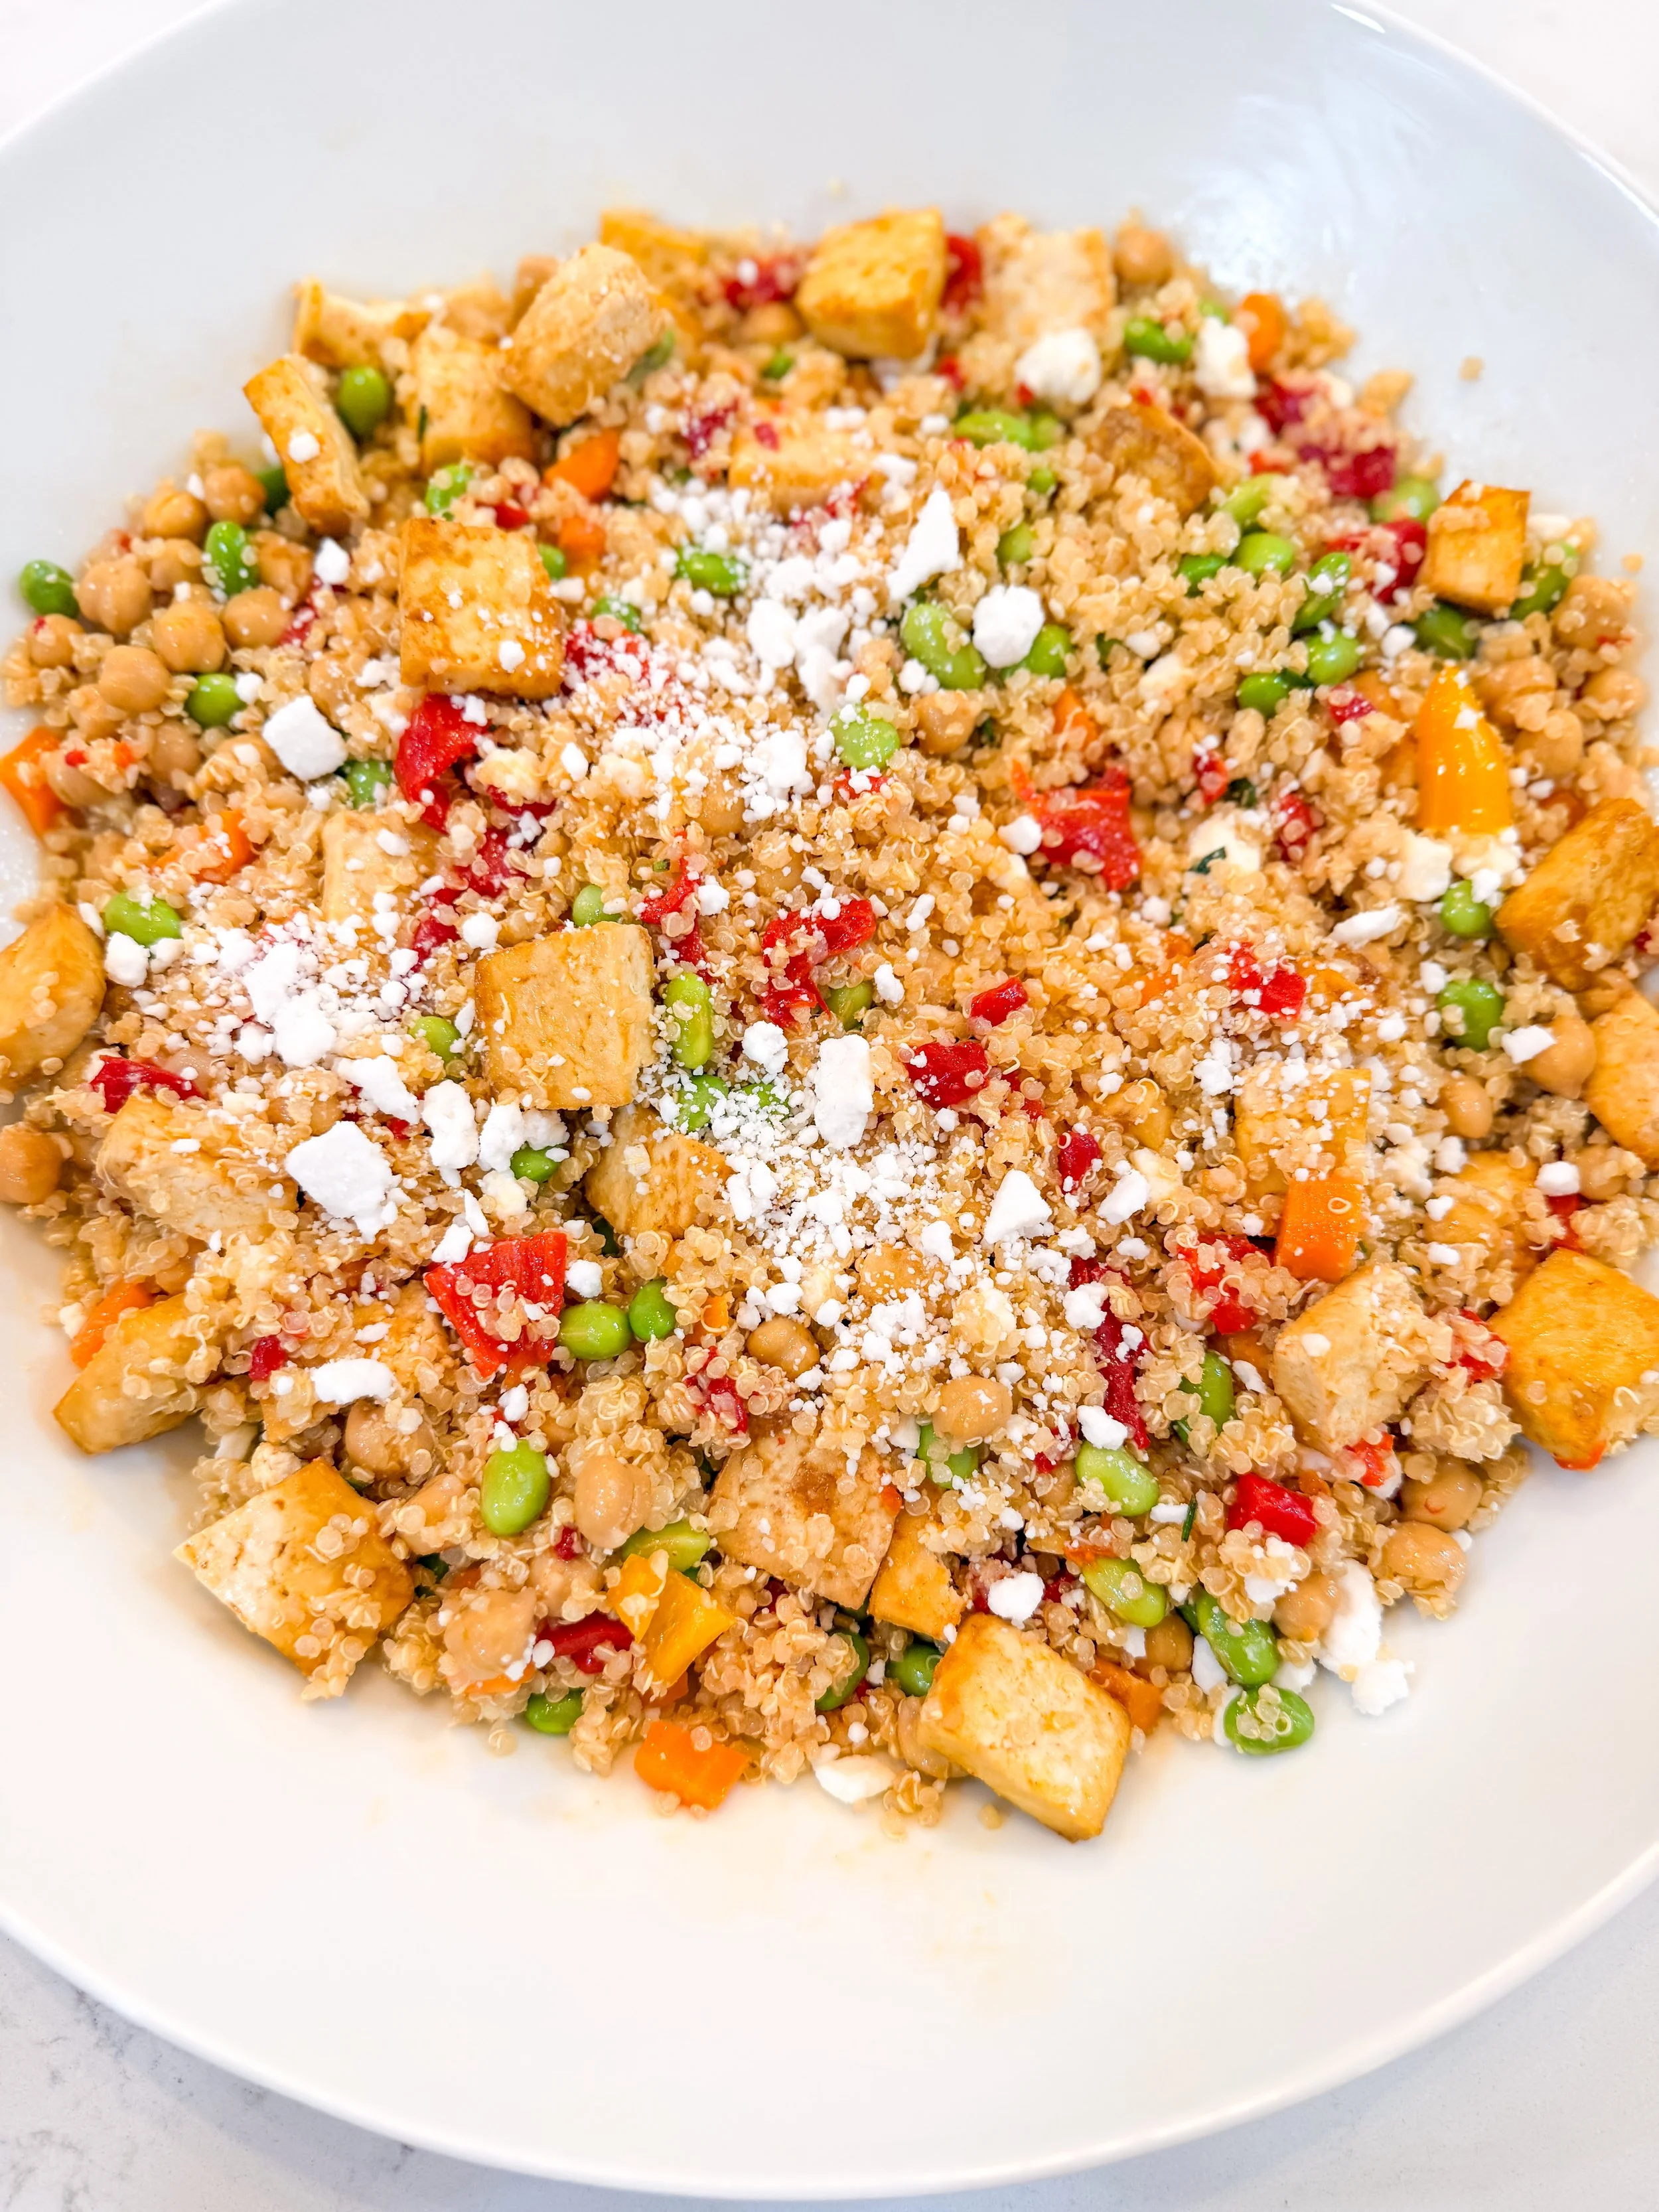
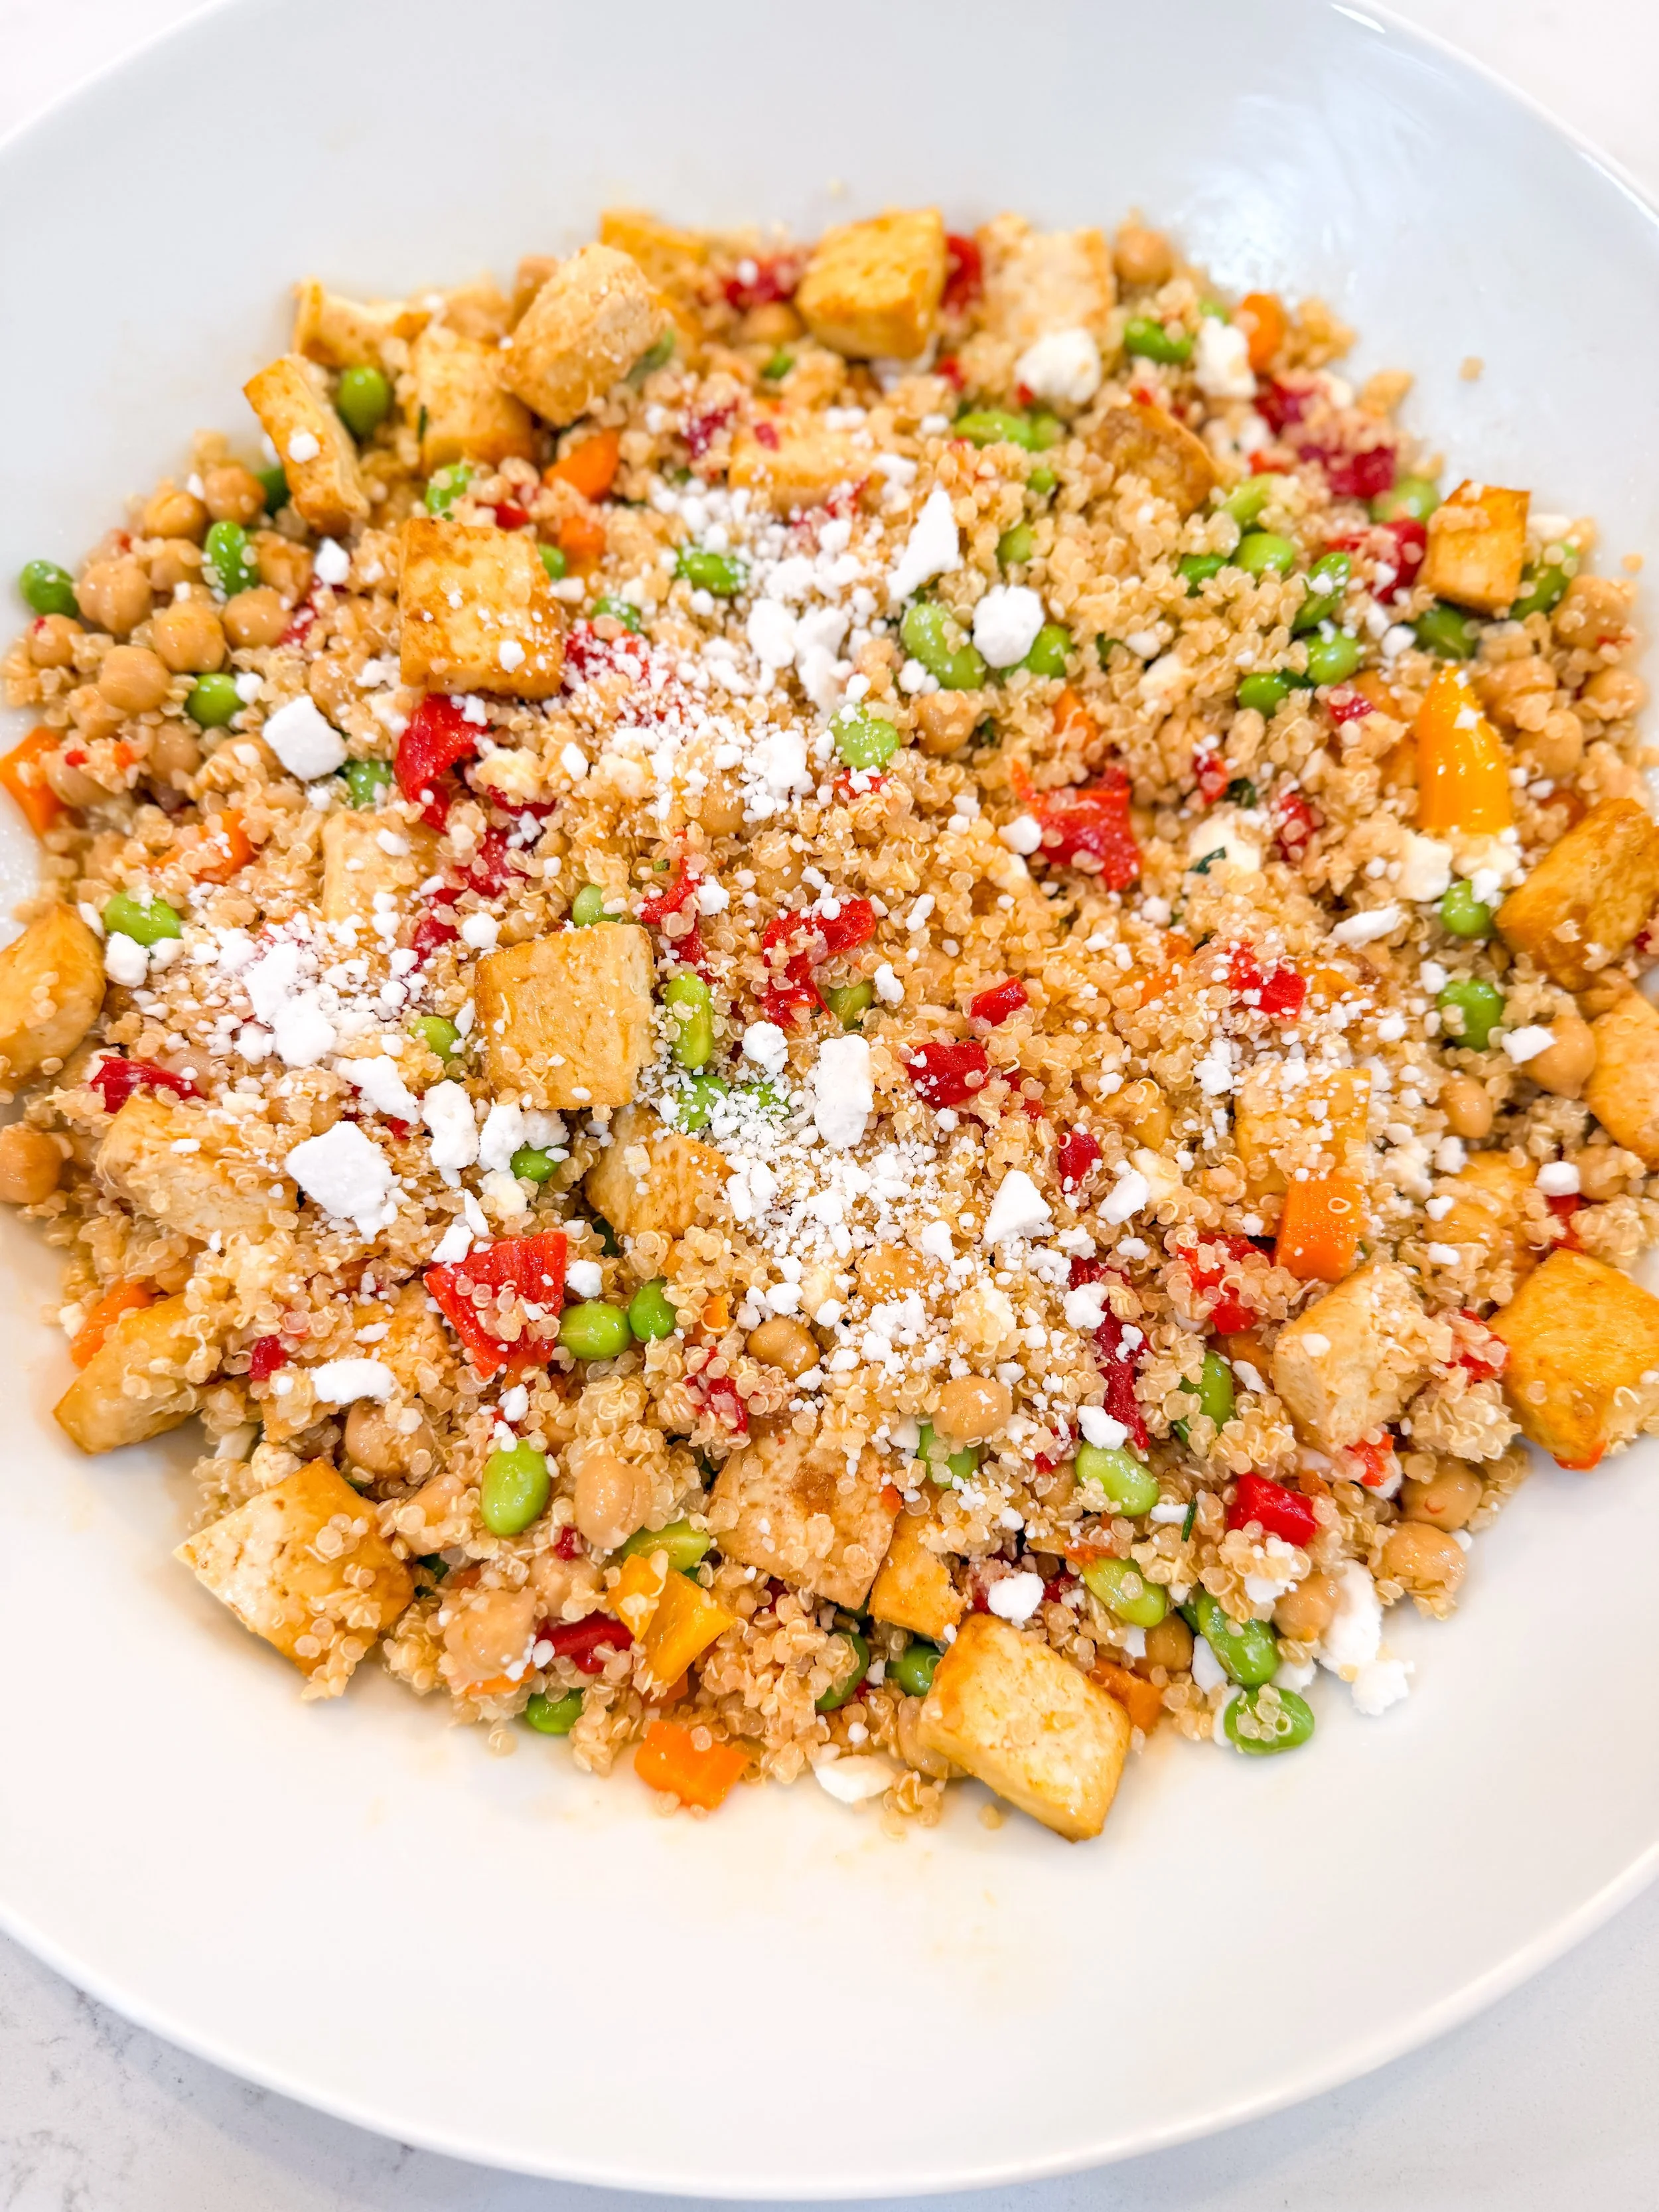
Crispy Tofu Quinoa Bowl
Crispy tofu is one of those things that instantly makes a bowl feel like a full meal. Pair it with roasted veggies and a lemon rosemary dressing, and you've got a weeknight staple on repeat.
Ingredients
1 cup quinoa, cooked
1 block extra-firm tofu, cubed and pan-fried or air-fried until crispy
1 cup carrots, roasted
1 red pepper, roasted and sliced
1 cup edamame, shelled
1 cup chickpeas, drained and rinsed
Lemon Rosemary Dressing
Juice of 1 lemon
1 tsp fresh rosemary, minced
3 tbsp olive oil
Salt and pepper to taste
Instructions
Whisk lemon juice, rosemary, olive oil, salt, and pepper together.
Arrange quinoa in bowls and top with roasted carrots, red pepper, edamame, and chickpeas.
Add crispy tofu on top.
Drizzle with lemon rosemary dressing and serve.
Crispy, citrusy, and endlessly customizable — swap in whatever veggies you have on hand. This is the kind of bowl that makes meal prep feel exciting again.
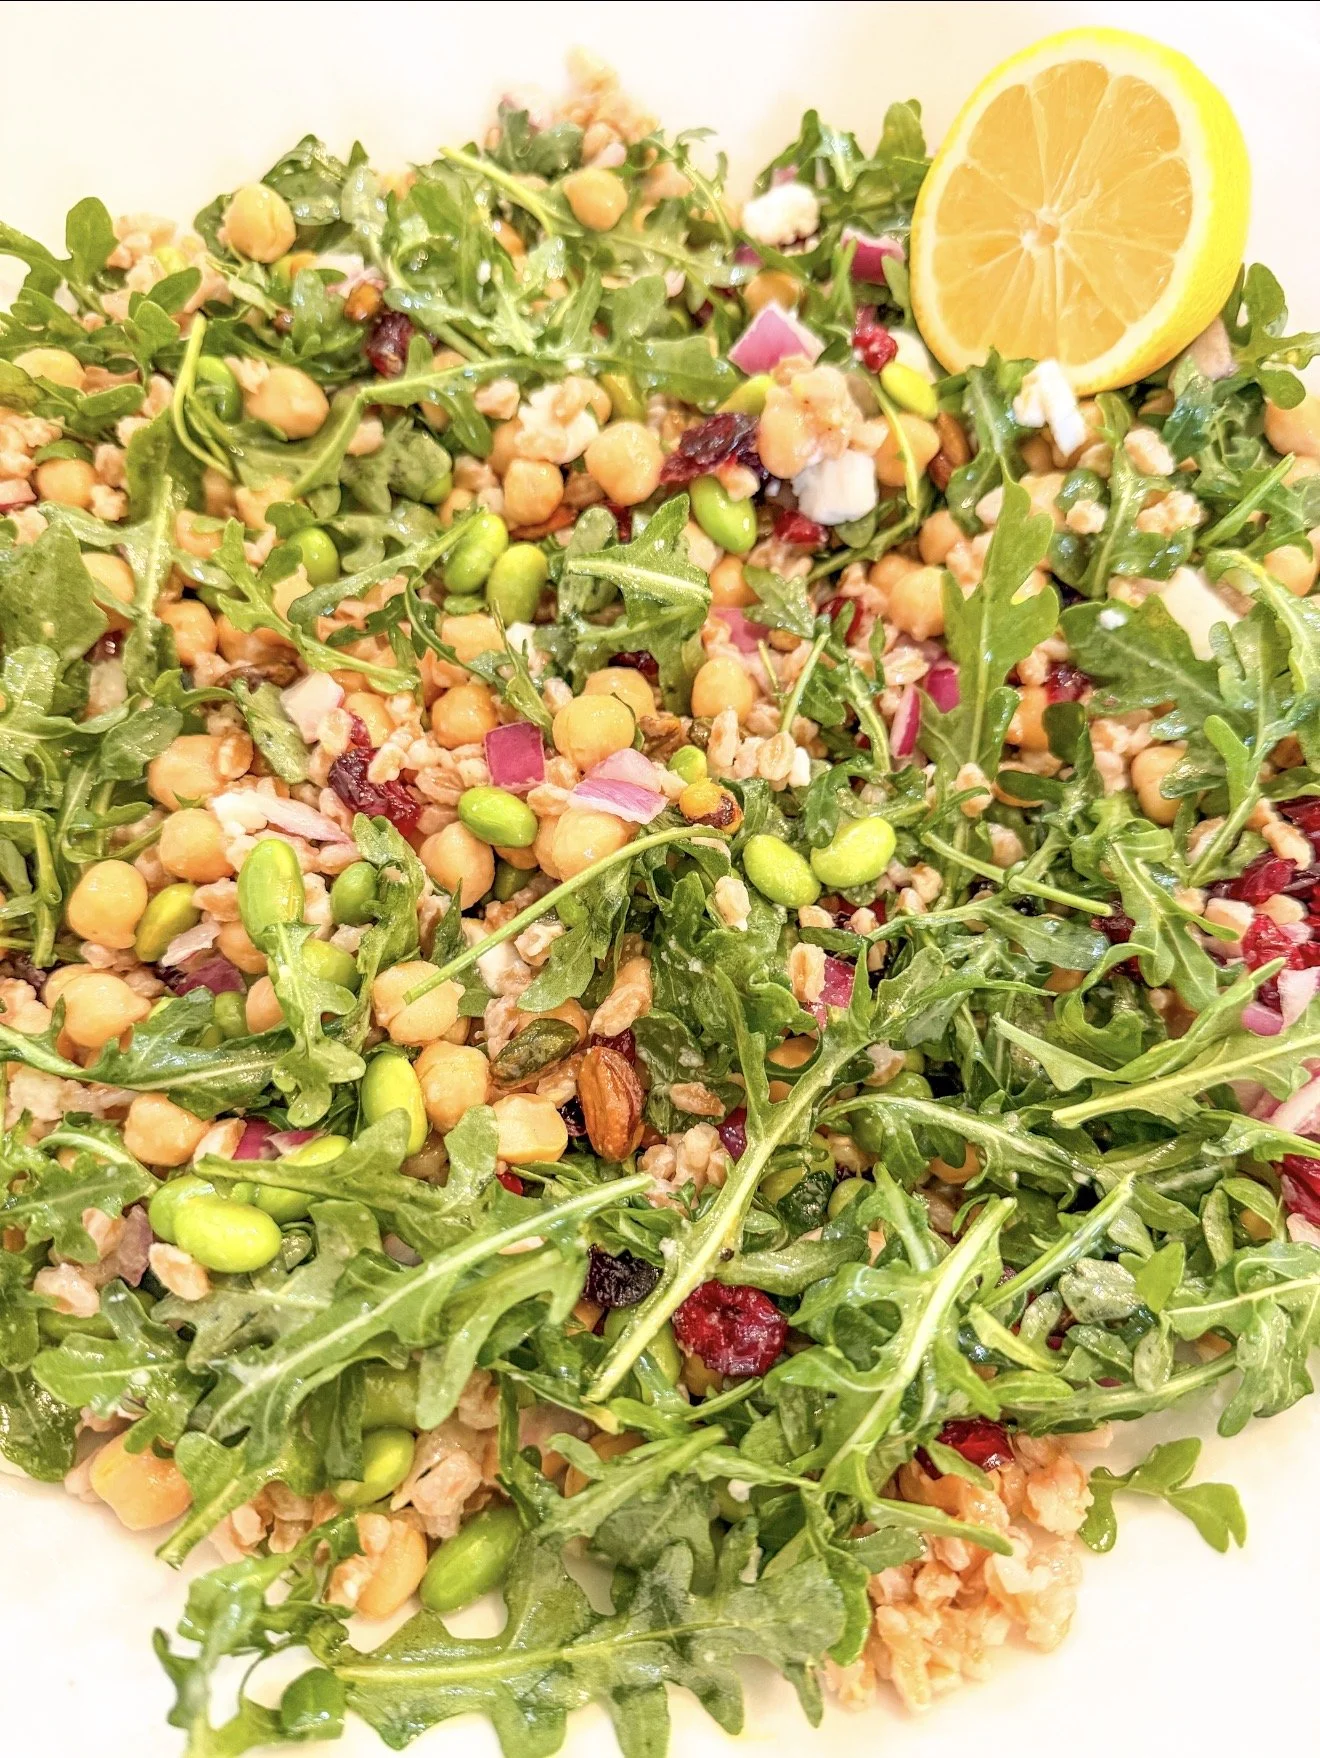
Garden Party Farro Bowl
It's been a minute since I posted a new recipe here, and this one felt like the right way back in — bright, hearty, and made for warm-weather gatherings. Think of it as a salad that can actually hold its own as a meal.
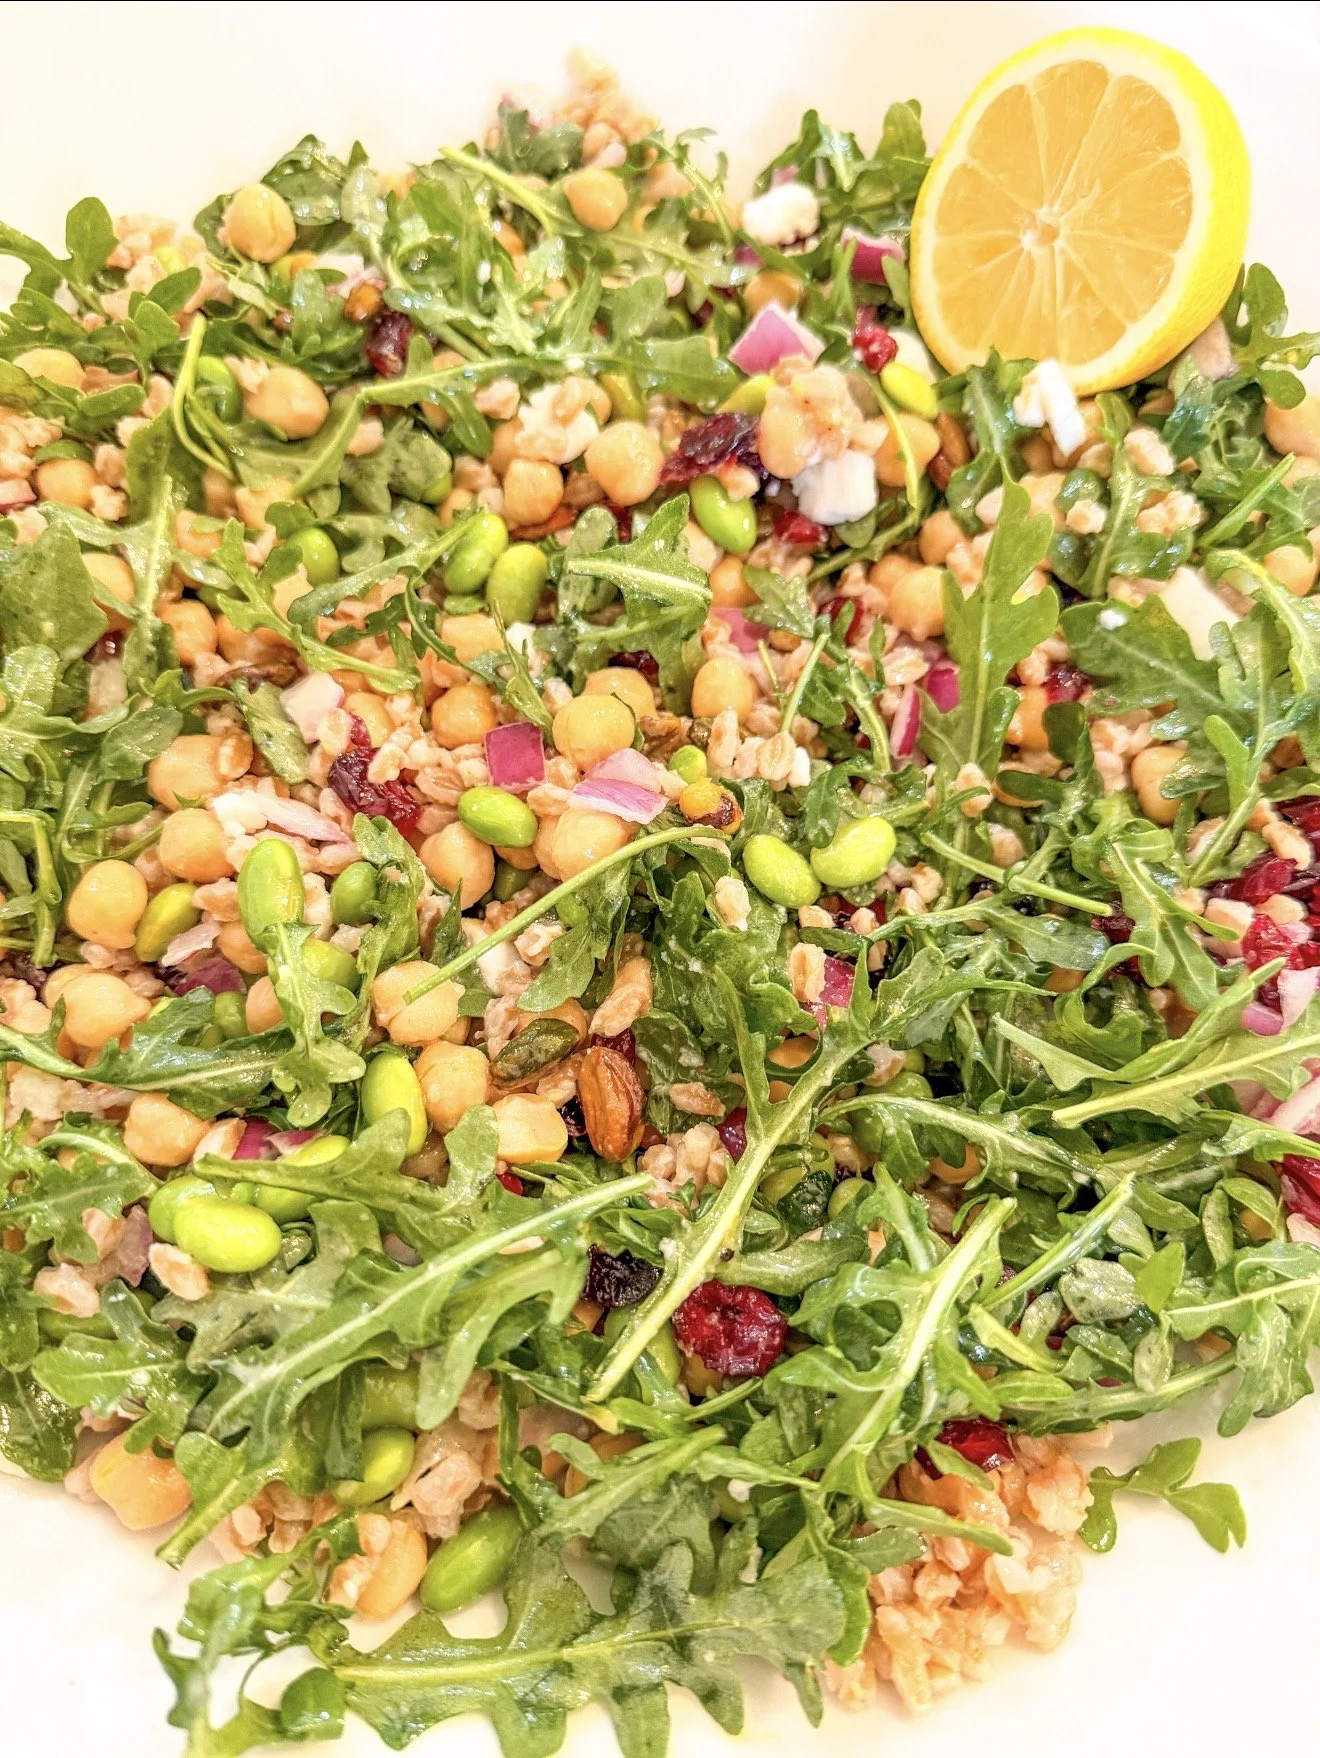
Ingredients
1 cup farro, cooked
1 cup chickpeas, drained and rinsed
1 cup edamame, shelled
2 cups arugula
1/4 cup red onion, thinly sliced
1/4 cup dried cranberries
1/4 cup toasted pistachios, chopped
1/2 cup Follow Your Heart dairy-free feta, crumbled
Lemon Dijon Dressing
Juice of 1 lemon
1 tbsp Dijon mustard
3 tbsp olive oil
Salt and pepper to taste
Instructions
Whisk together lemon juice, Dijon, olive oil, salt, and pepper until emulsified.
In a large bowl, combine cooked farro, chickpeas, edamame, arugula, and red onion.
Pour dressing over the bowl and toss to coat.
Top with dried cranberries, toasted pistachios, and dairy-free feta.
Serve chilled or at room temperature.
This one's a garden party in a bowl — pack it for a picnic or serve it as a side at your next backyard hang. Save this one for later and let me know if you make it!
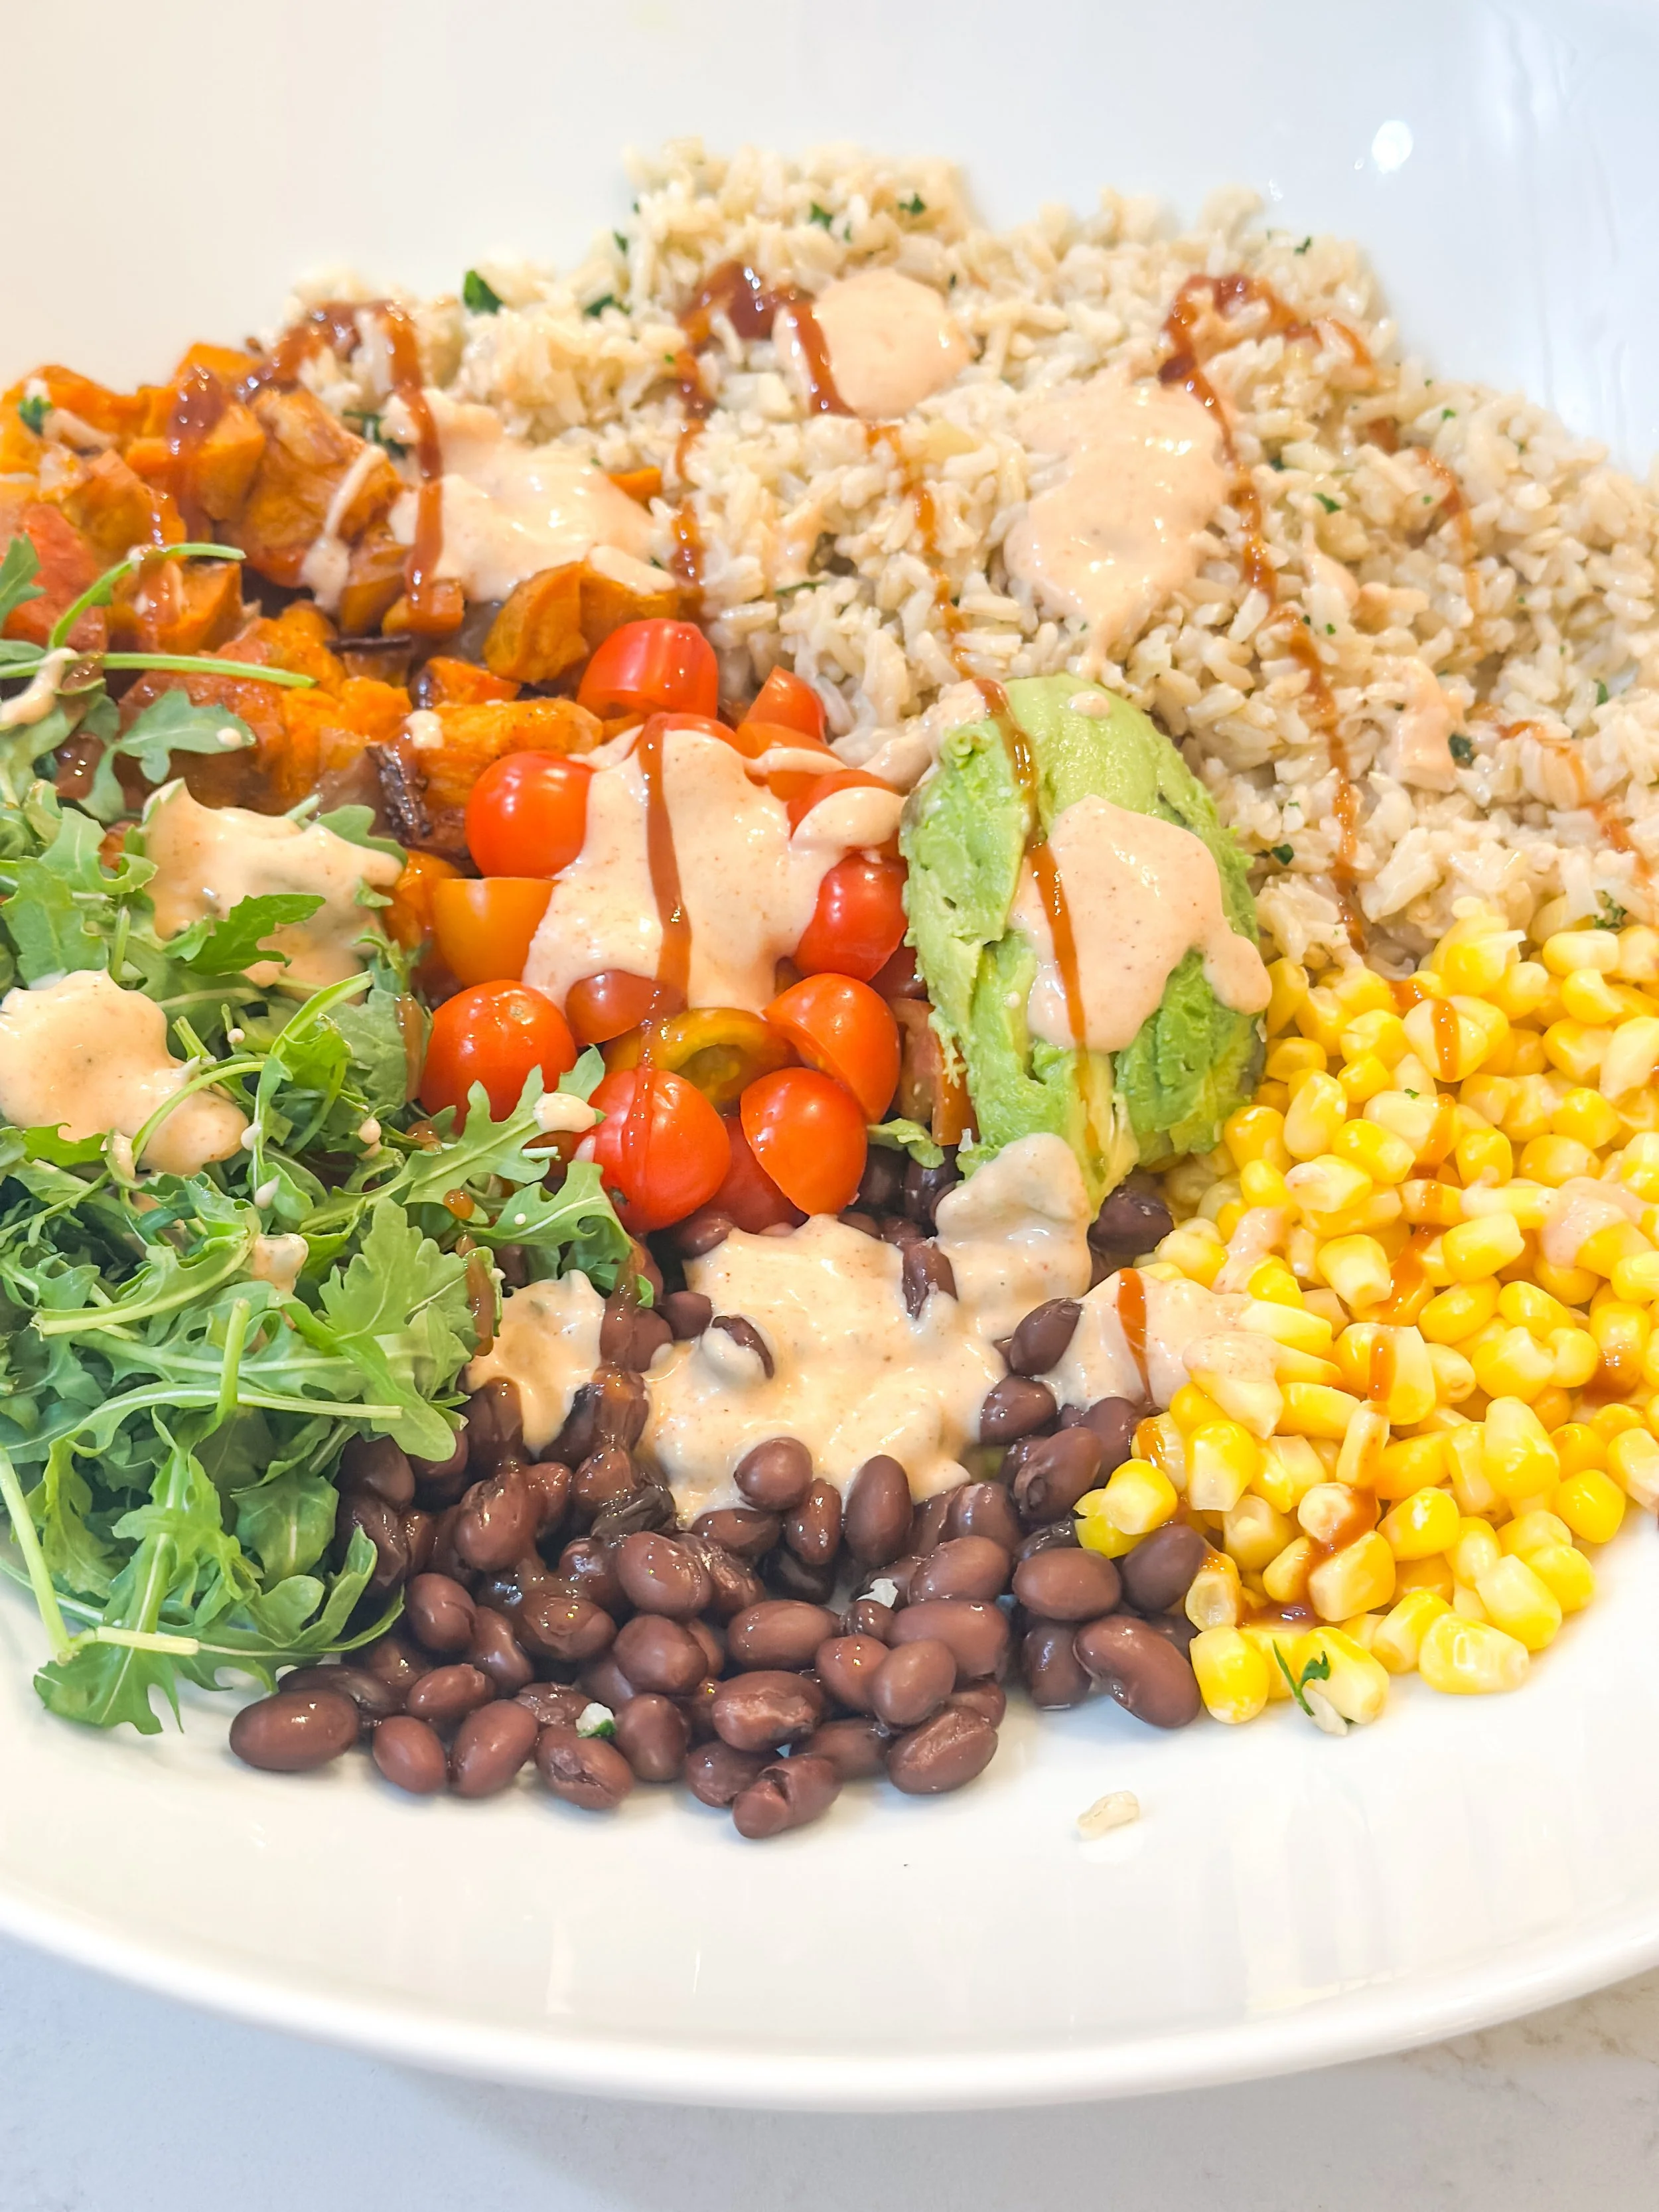
Southwest Sweet Potato Burrito Bowl with Smoky BBQ Mayo (Vegan + Easy Grain Bowl)
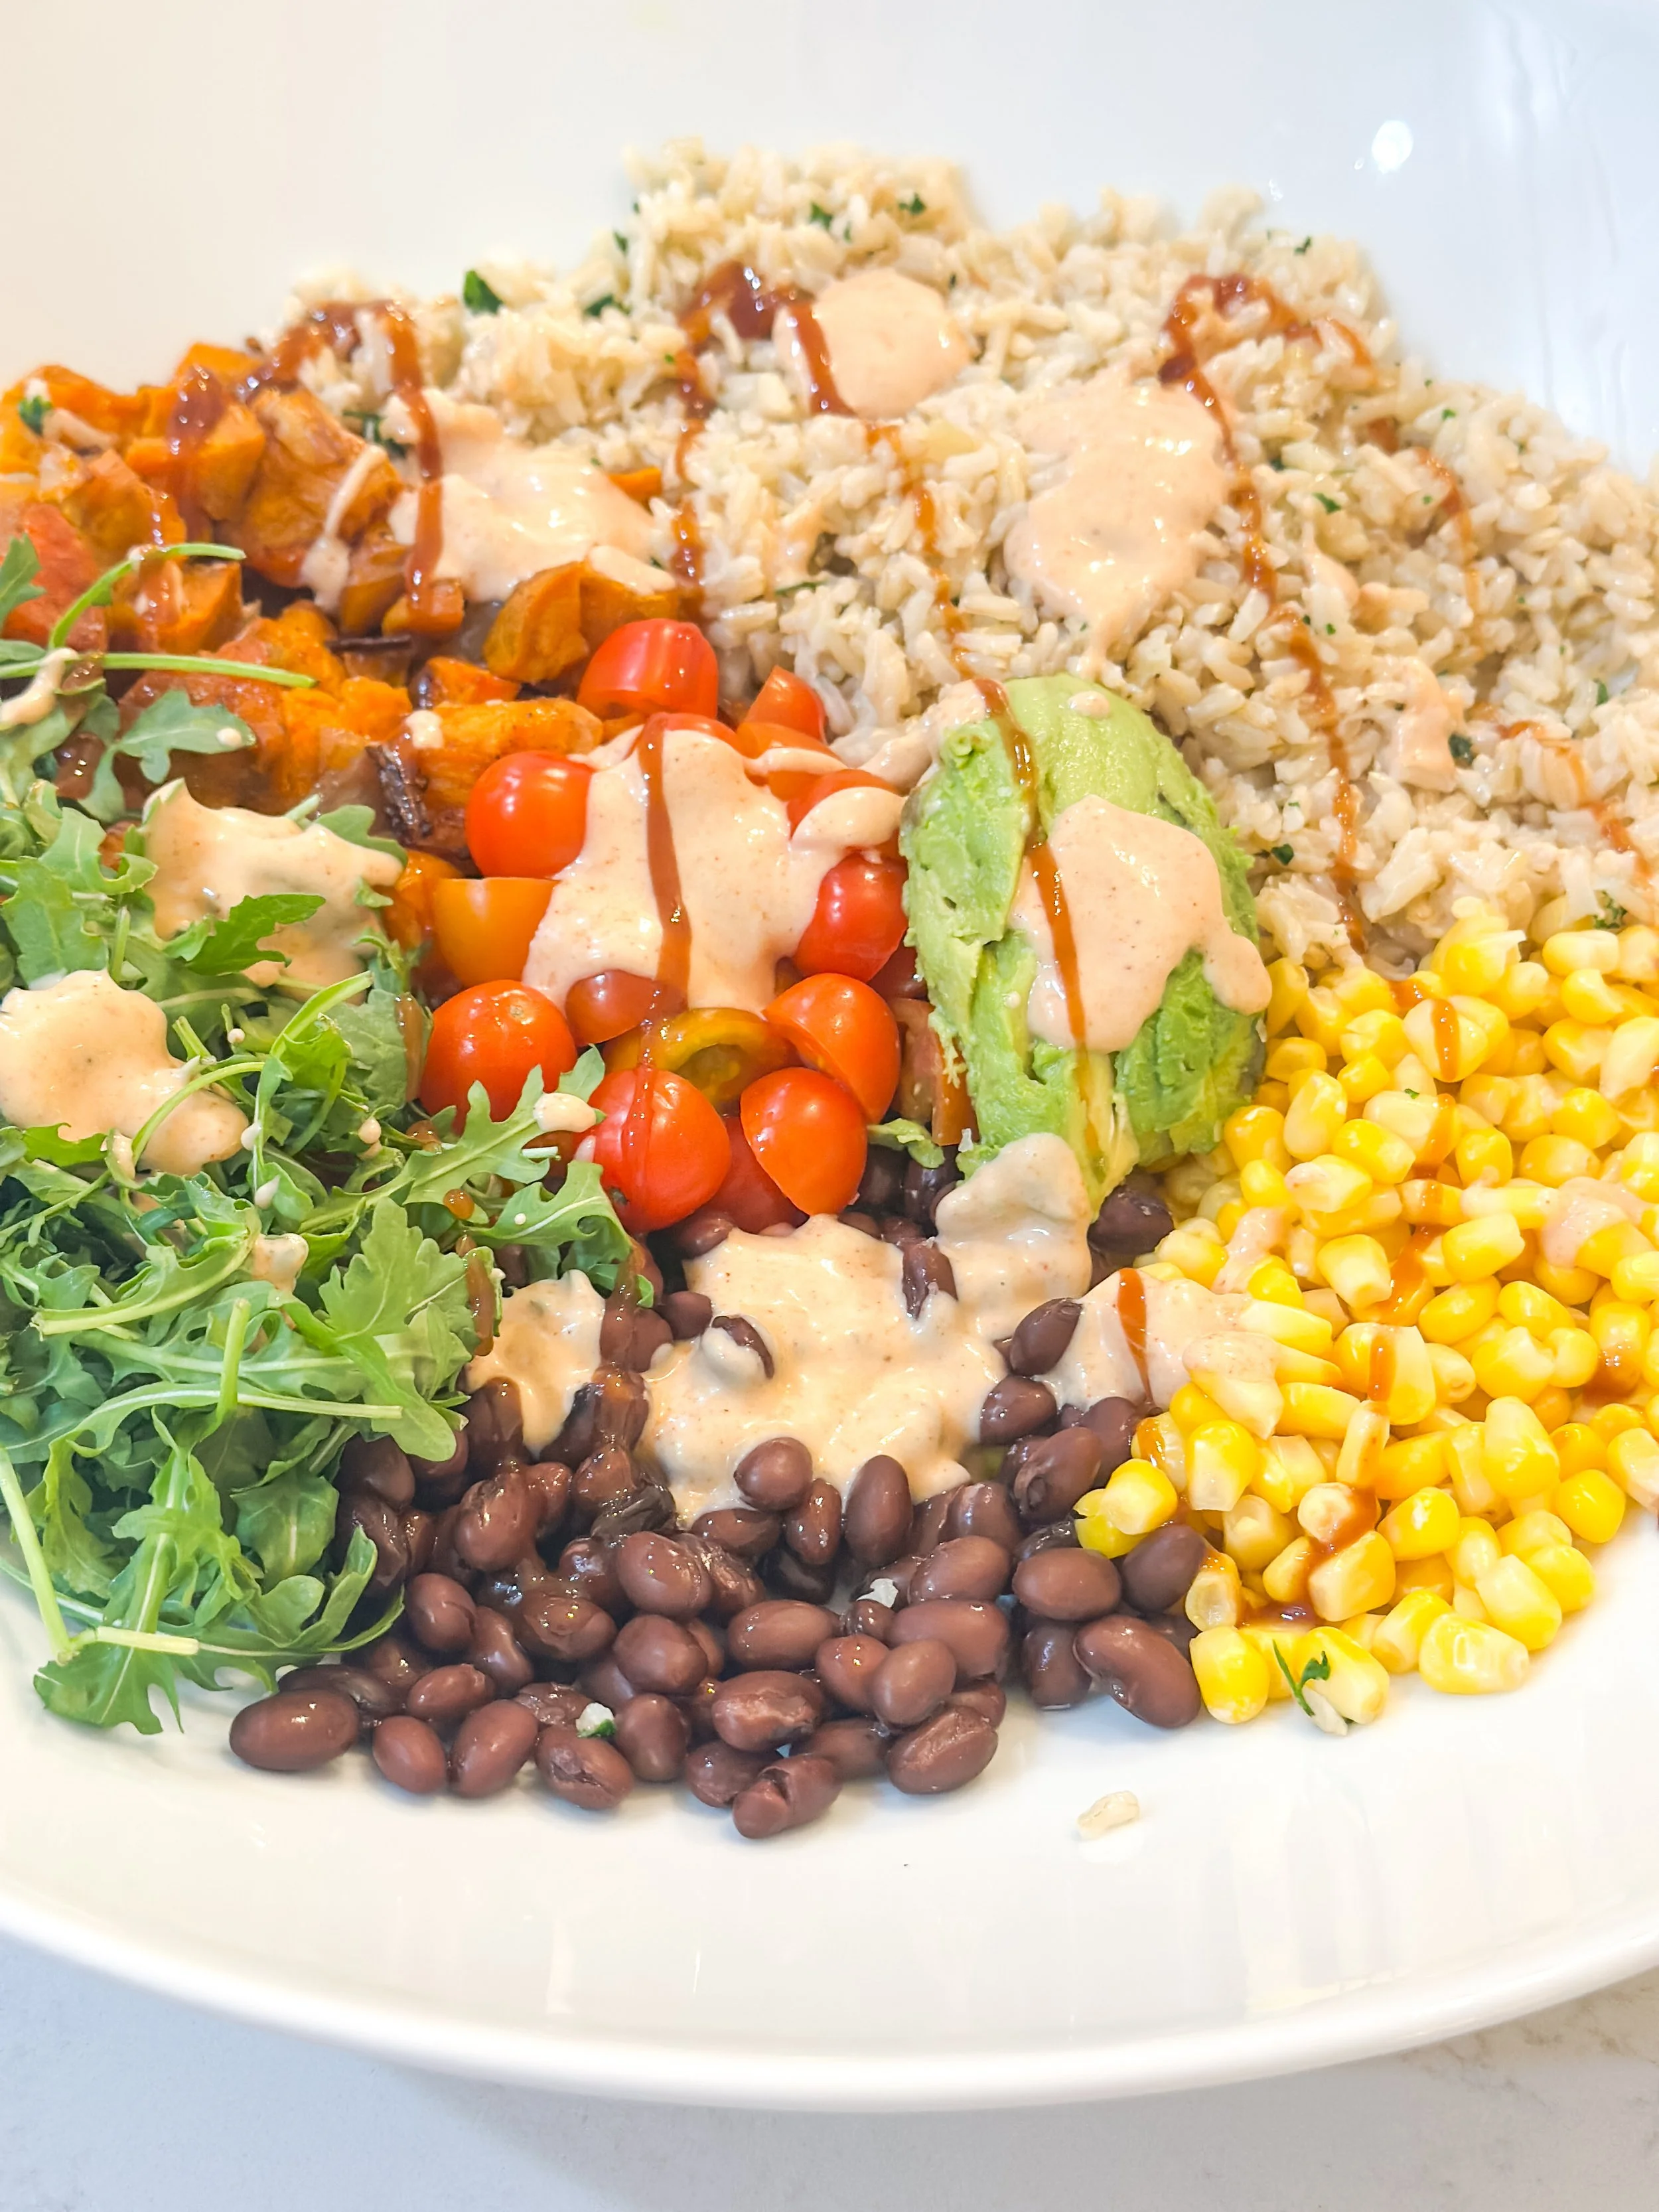
Life has been a little busy lately. Over the weekend I took a last-minute trip to New York City to see Connor Storrie on Saturday Night Live, and today we’re heading to Florida for a few days in the sunshine. But before all the travel, I had to share this bowl I made last week because it’s exactly the kind of simple, satisfying dinner I keep coming back to.
This Southwest Sweet Potato Burrito Bowl is hearty, smoky, and packed with flavor. Roasted sweet potatoes, brown rice, black beans, creamy avocado, and peppery arugula all come together in one cozy bowl, finished with a smoky BBQ southwest mayo drizzle that ties everything together.
It’s the kind of meal that feels nourishing and comforting at the same time — and it’s perfect for weeknight dinners or meal prep lunches.
Why You’ll Love This Bowl
• Packed with plant-based fiber and protein
• Easy to make with pantry staples
• Great for meal prep
• Naturally vegan and dairy-free
• Customizable with whatever you have on hand
Grain bowls are one of my favorite ways to cook because they’re flexible and forgiving. If you have a grain, a roasted vegetable, something creamy, and a great sauce, you’re already most of the way there.
Ingredients
For the Bowl
1 cup brown rice
2 medium sweet potatoes, peeled and cubed
1 tablespoon olive oil
1 teaspoon smoked paprika
1 teaspoon cumin
½ teaspoon chili powder
1 (15 oz) can black beans, drained and rinsed
2 cups arugula
1 avocado, sliced
1 lime, cut into wedges
Optional toppings:
pepitas, cilantro, pickled red onion, or corn
Smoky BBQ Southwest Mayo
½ cup mayonnaise (vegan if desired)
1–2 tablespoons BBQ sauce
½ teaspoon smoked paprika
½ teaspoon cumin
¼ teaspoon chili powder
juice of ½ lime
1–2 tablespoons water to thin
How to Make the Bowl
1. Roast the Sweet Potatoes
Preheat oven to 425°F.
Toss the cubed sweet potatoes with olive oil, smoked paprika, cumin, chili powder, and salt. Spread on a baking sheet and roast for 25–30 minutes, until caramelized and tender.
2. Cook the Rice
Cook the brown rice according to package directions. For extra flavor, cook it in vegetable broth instead of water.
Once cooked, fluff with a fork and squeeze a little lime juice over the top.
3. Warm the Beans
Heat the black beans in a small skillet with a pinch of cumin and salt until warmed through.
4. Make the Smoky BBQ Mayo
In a small bowl, whisk together the mayo, BBQ sauce, smoked paprika, cumin, chili powder, and lime juice. Add water a tablespoon at a time until the sauce is smooth and drizzle-able.
5. Assemble the Bowls
Divide the rice among bowls. Top with roasted sweet potatoes, black beans, arugula, and avocado. Drizzle generously with the smoky BBQ mayo and finish with a squeeze of lime.
Tips for the Best Burrito Bowl
Roast the sweet potatoes until deeply caramelized. That smoky sweetness is what anchors the whole bowl.
Don’t skip the sauce. The smoky BBQ mayo ties all the flavors together.
Add crunch. Pepitas or tortilla strips are great for texture.
Variations
This bowl is easy to customize depending on what you have on hand.
Try adding:
• grilled corn
• roasted cauliflower
• cilantro-lime rice
• shredded cabbage instead of arugula
• crispy chickpeas for extra protein
What’s Next
Now we’re off to Florida for a few days, and I’m excited to share some of the plant-based spots and meals we find in Naples while we’re there. Stay tuned for some travel food inspiration coming soon.
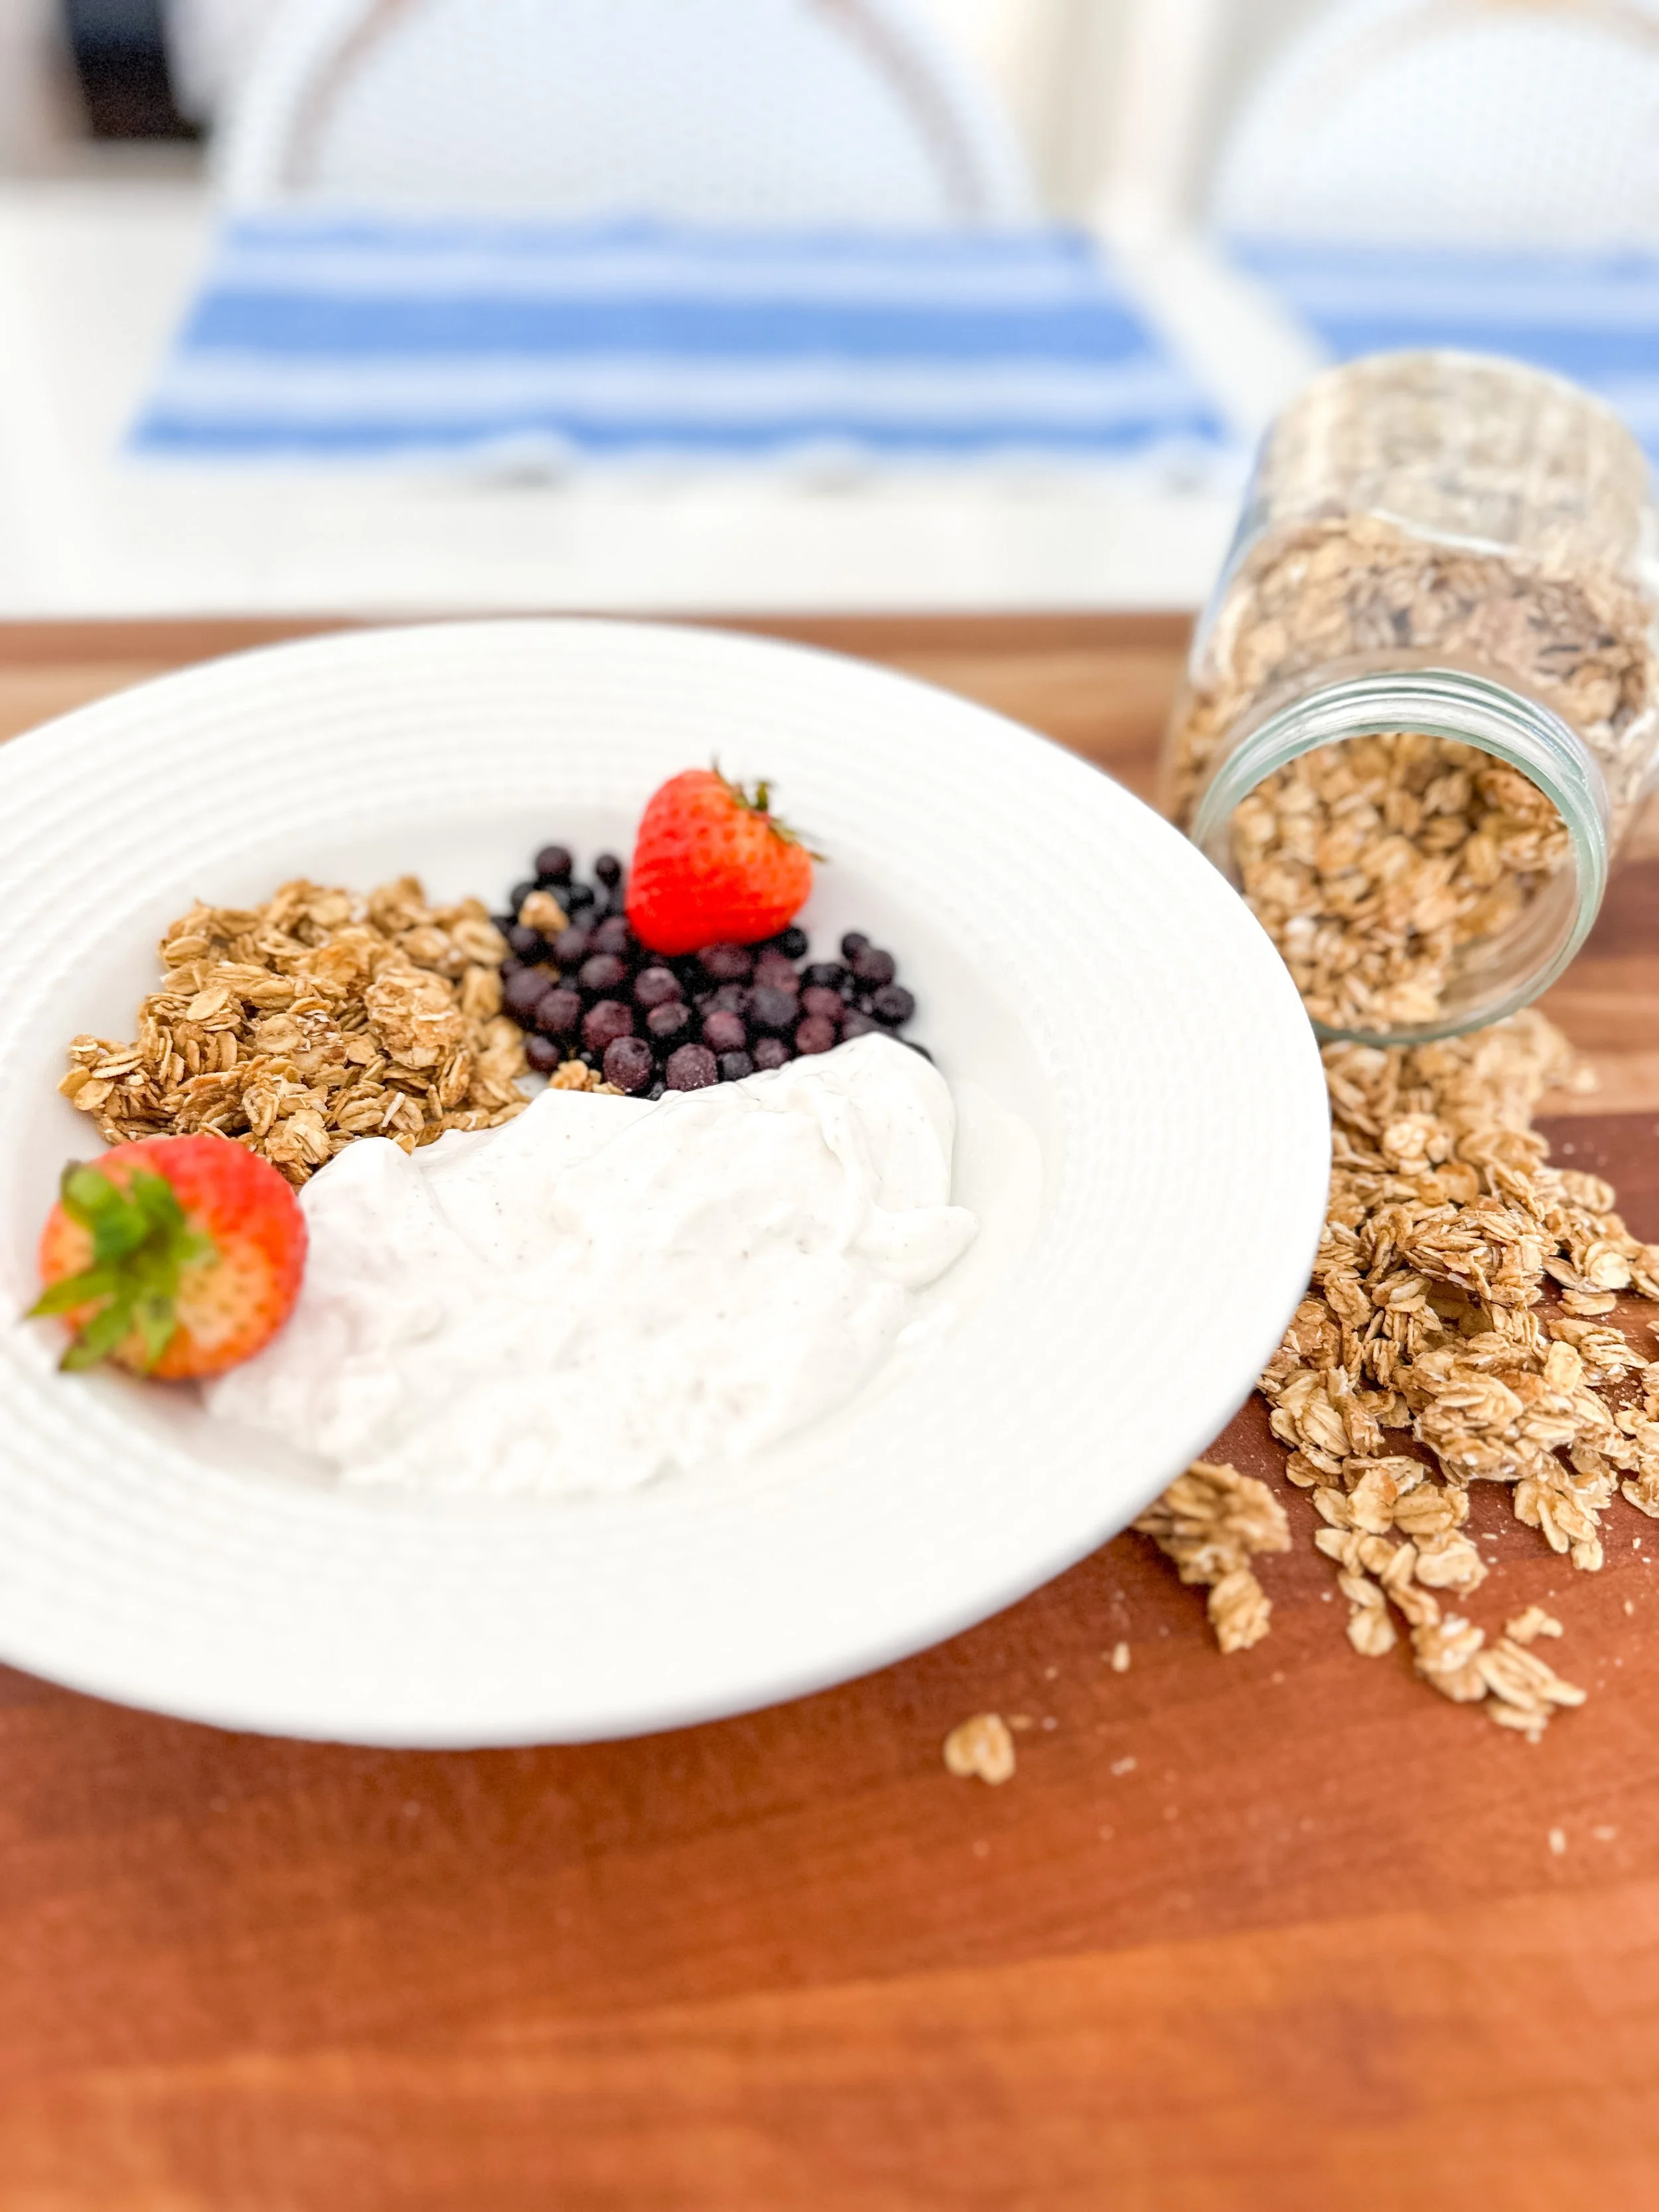
Healthy Peanut Butter Granola (Vegan + Naturally Sweetened)
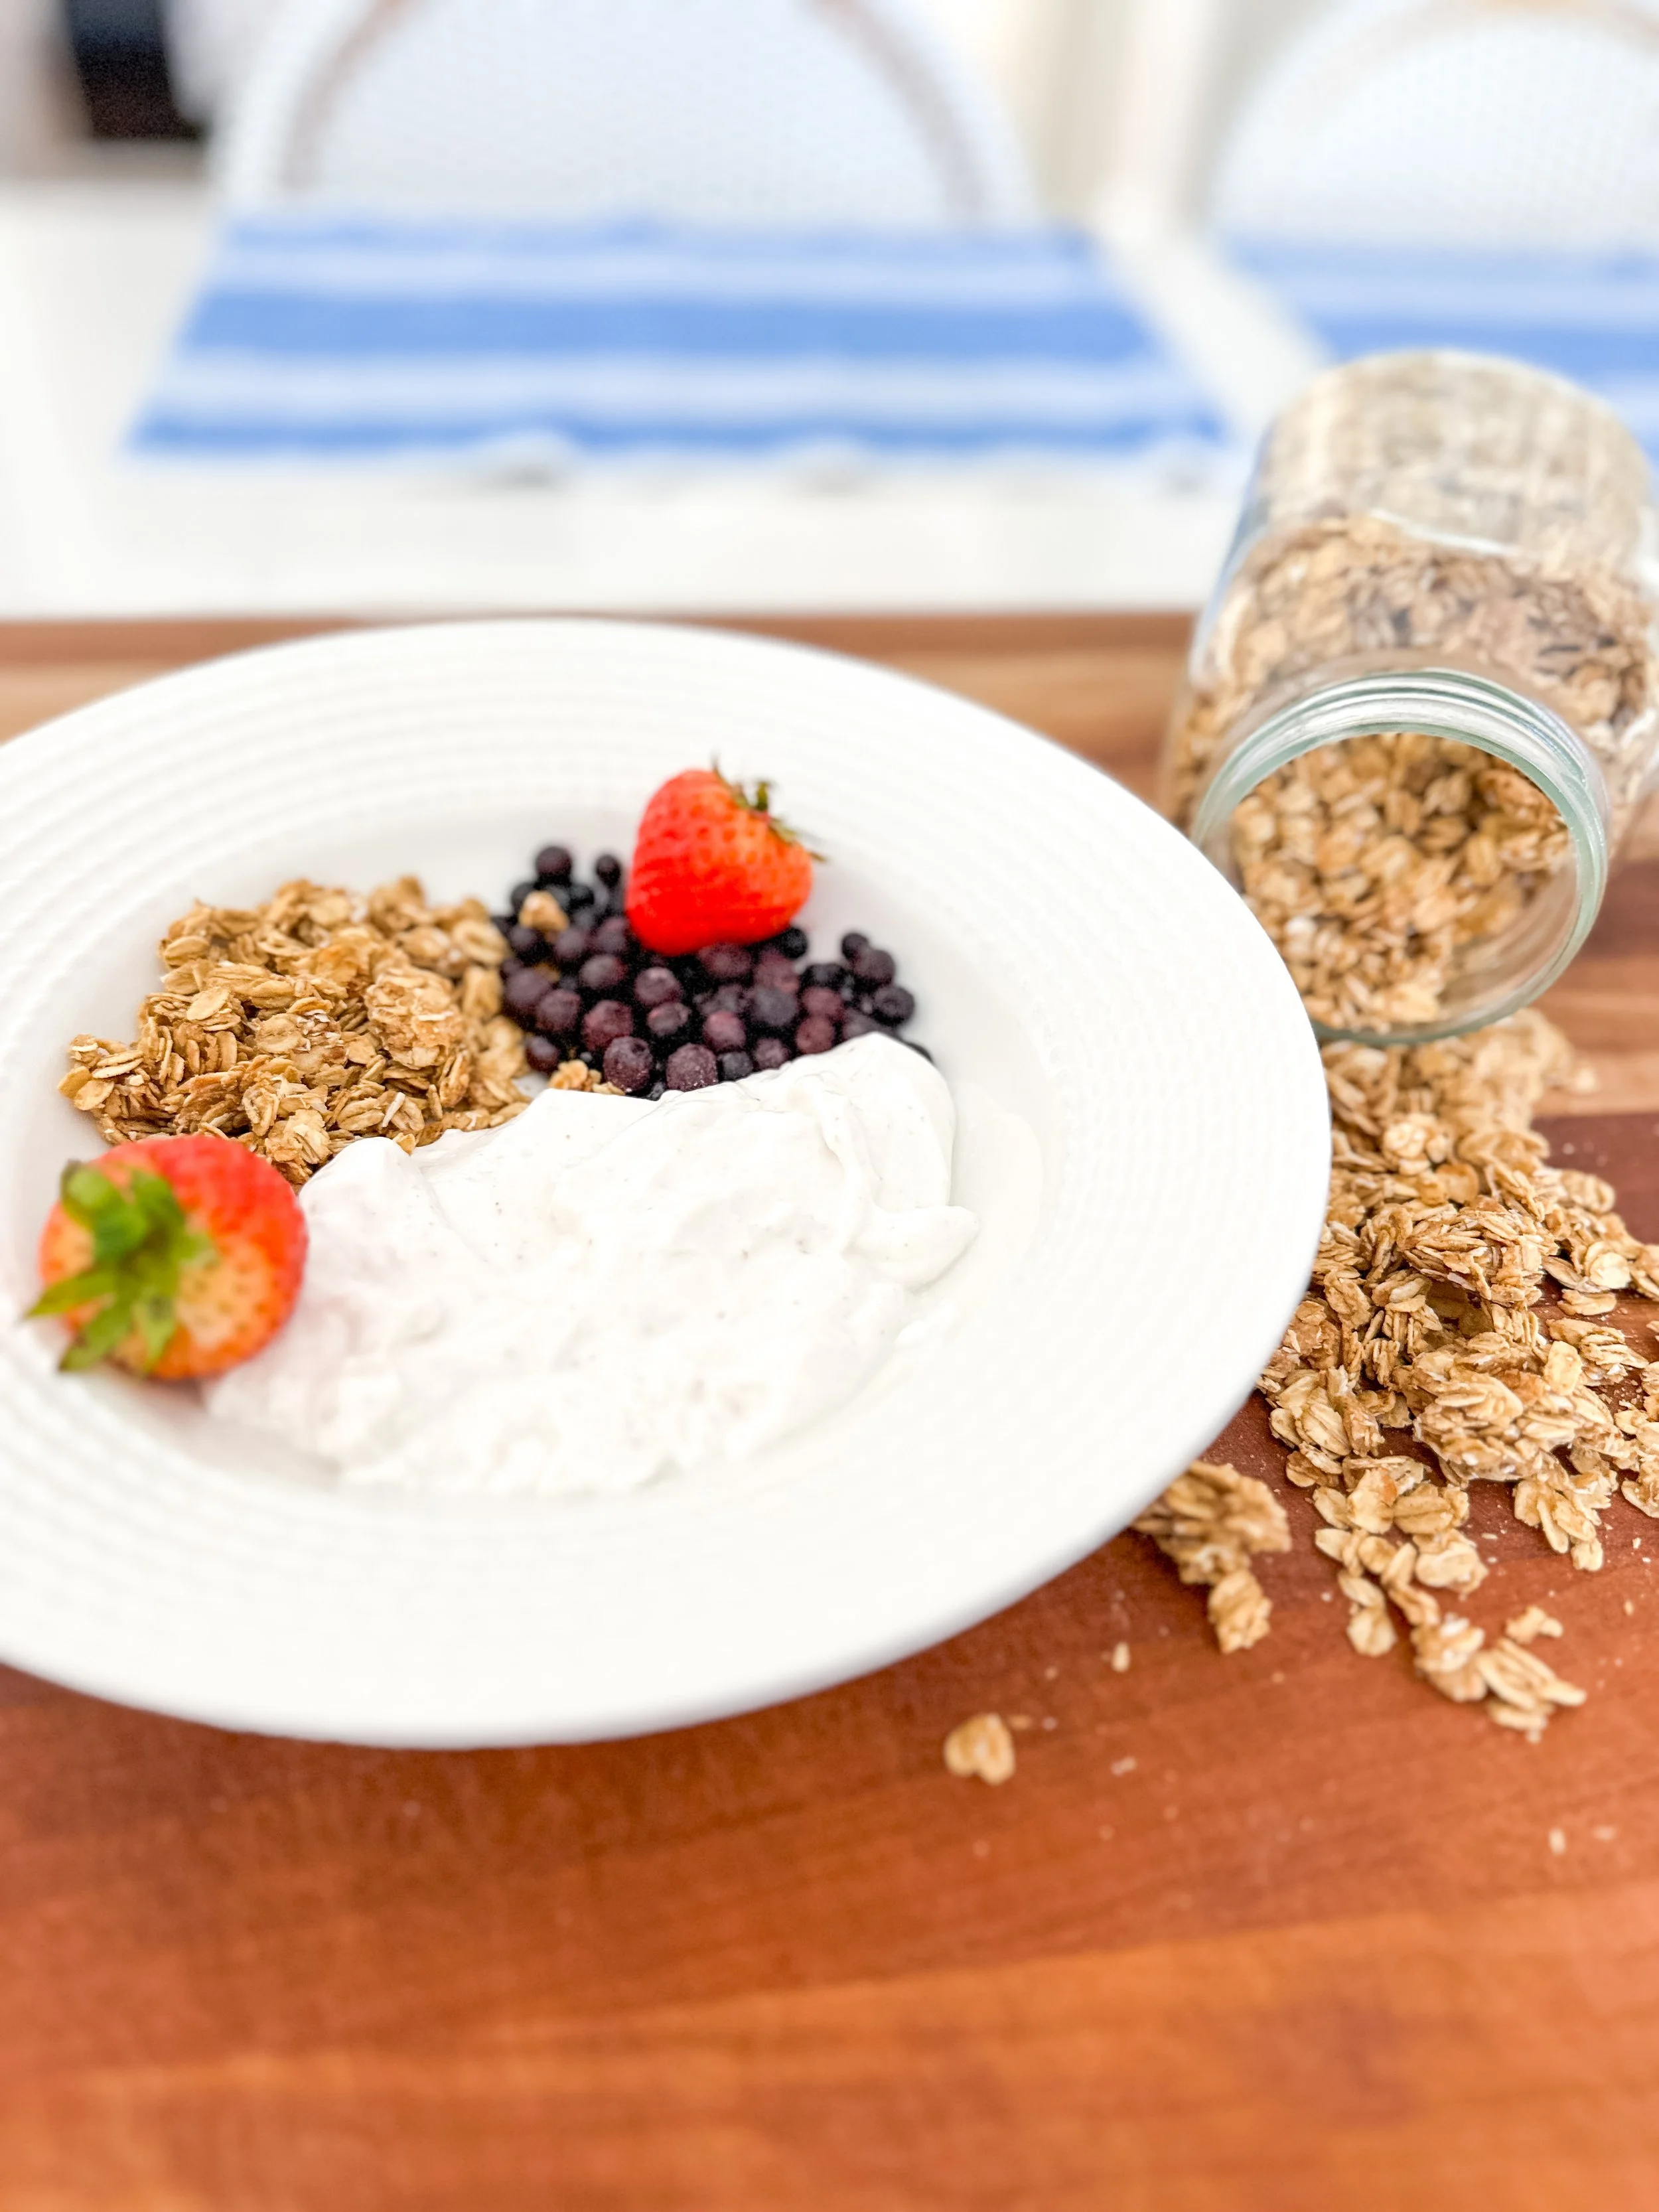
If you keep oats, peanut butter, and maple syrup in your pantry, you’re 20 minutes away from the coziest homemade granola.
This healthy peanut butter granola is lightly sweet, perfectly crunchy, and packed with fiber from ground flax. It smells like cinnamon and vanilla while it bakes — and tastes even better layered over creamy vegan yogurt with fresh fruit.
It’s one of those simple back-pocket recipes that makes weekday mornings feel put together.
And the best part? It’s naturally sweetened with maple syrup, made with pantry staples, and completely vegan.
Why You’ll Love This Peanut Butter Granola
✔️ Naturally sweetened with maple syrup
✔️ Made with simple pantry ingredients
✔️ High in fiber (thanks to ground flax + oats)
✔️ Vegan and dairy-free
✔️ Perfect for meal prep
✔️ Crunchy clusters every time
This homemade granola is hearty enough for breakfast, but simple enough to throw together on a Sunday afternoon while the kids are playing and the oven is already warm.
Ingredients You’ll Need
2 ½ cups rolled oats
½ cup natural peanut butter (drippy, unsweetened)
⅓ cup pure maple syrup
1 tablespoon ground flax (for fiber + texture)
1 teaspoon cinnamon
1 teaspoon vanilla extract
Pinch of sea salt
That’s it. No refined sugar. No oils. No fillers.
How to Make Peanut Butter Granola
Step 1: Mix
Preheat your oven to 325°F and line a baking sheet with parchment paper.
In a large bowl, stir together the peanut butter, maple syrup, vanilla, cinnamon, and salt until smooth. Fold in the oats and ground flax until everything is evenly coated.
Step 2: Spread
Spread the mixture onto your prepared baking sheet in an even layer. Gently press it down with the back of a spoon — this helps create those big crunchy clusters.
Step 3: Bake
Bake for about 20 minutes, stirring once halfway through.
If you love bigger clusters, stir gently and re-press slightly.
Step 4: Cool Completely
This is key. Let the granola cool fully before breaking it apart. It will crisp up as it cools.
How to Get Big Crunchy Granola Clusters
If you’re searching for how to make crunchy peanut butter granola, here are the tricks:
Use natural, drippy peanut butter
Don’t over-stir during baking
Press the granola down before baking
Let it cool completely before breaking
Patience = crunch.
How to Serve Peanut Butter Granola
This vegan peanut butter granola is incredibly versatile:
Layered with vanilla yogurt (I’ve been loving Cocojune lately) + fresh berries
Sprinkled over smoothie bowls
Mixed into overnight oats
With almond milk as a cereal
By the handful straight from the jar
Packed into snack containers for school or car rides
It also makes a beautiful addition to a brunch board or breakfast spread.
Storage Tips
Store in an airtight glass jar or container at room temperature for up to 1 week (though it rarely lasts that long here).
You can also freeze it for longer storage — just let it come to room temperature before serving.
Nutrition Notes
Oats provide complex carbohydrates and fiber
Ground flax adds omega-3s and additional fiber
Peanut butter offers plant-based protein and healthy fats
Maple syrup keeps it naturally sweetened without refined sugar
This makes it a balanced vegan breakfast option that keeps you full.
Variations
Want to switch it up?
Add chopped peanuts or pecans before baking
Stir in mini dark chocolate chips after cooling
Mix in shredded coconut
Add chia seeds for extra fiber
Fold in dried cherries or cranberries after baking
FAQs
Is this peanut butter granola gluten-free?
Yes — just make sure your rolled oats are certified gluten-free.
Can I make this nut-free?
You can substitute sunflower seed butter for a nut-free version.
Why isn’t my granola crunchy?
It likely needs more cooling time. Granola crisps as it cools — don’t skip that step.
The Bottom Line
This healthy peanut butter granola is simple, cozy, and endlessly adaptable. It’s the kind of recipe that makes your kitchen smell warm and inviting — and makes weekday mornings feel easier.
If you make it, tag me @KellysGreenKitchen so I can see your bowls 🤍
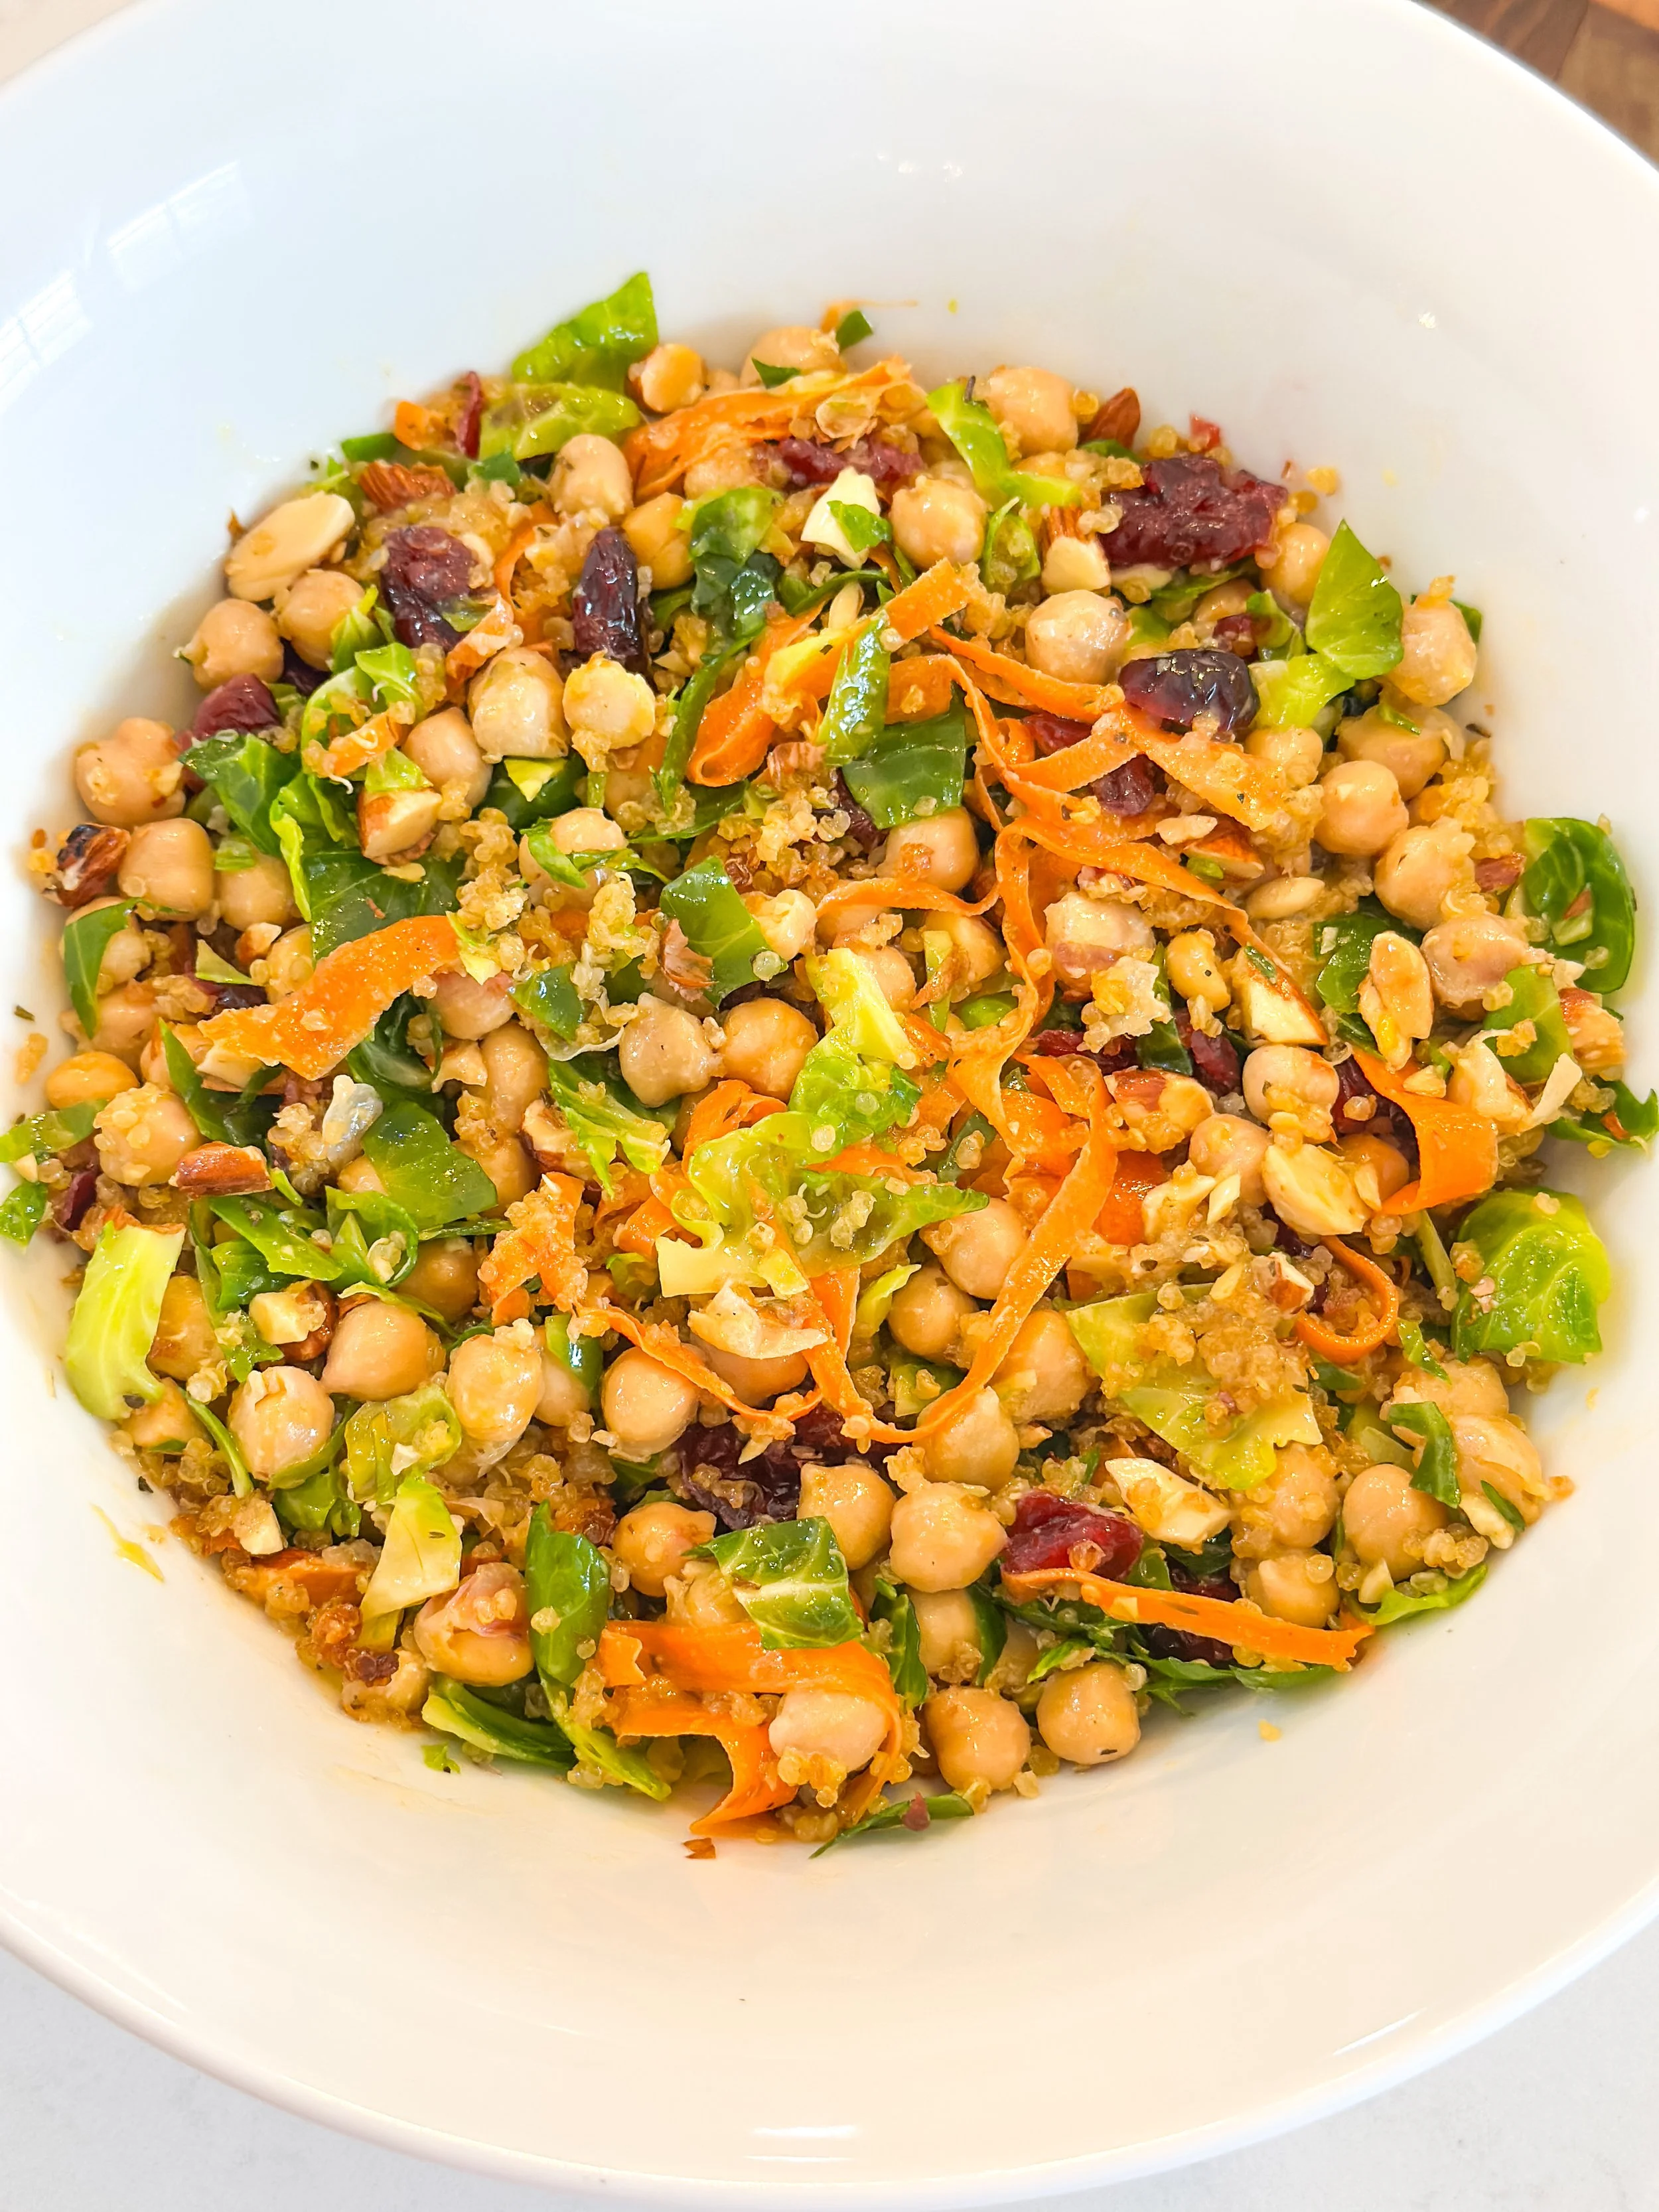
Shaved Brussels Sprouts Salad with Crispy Quinoa & Vegan Honey Dijon
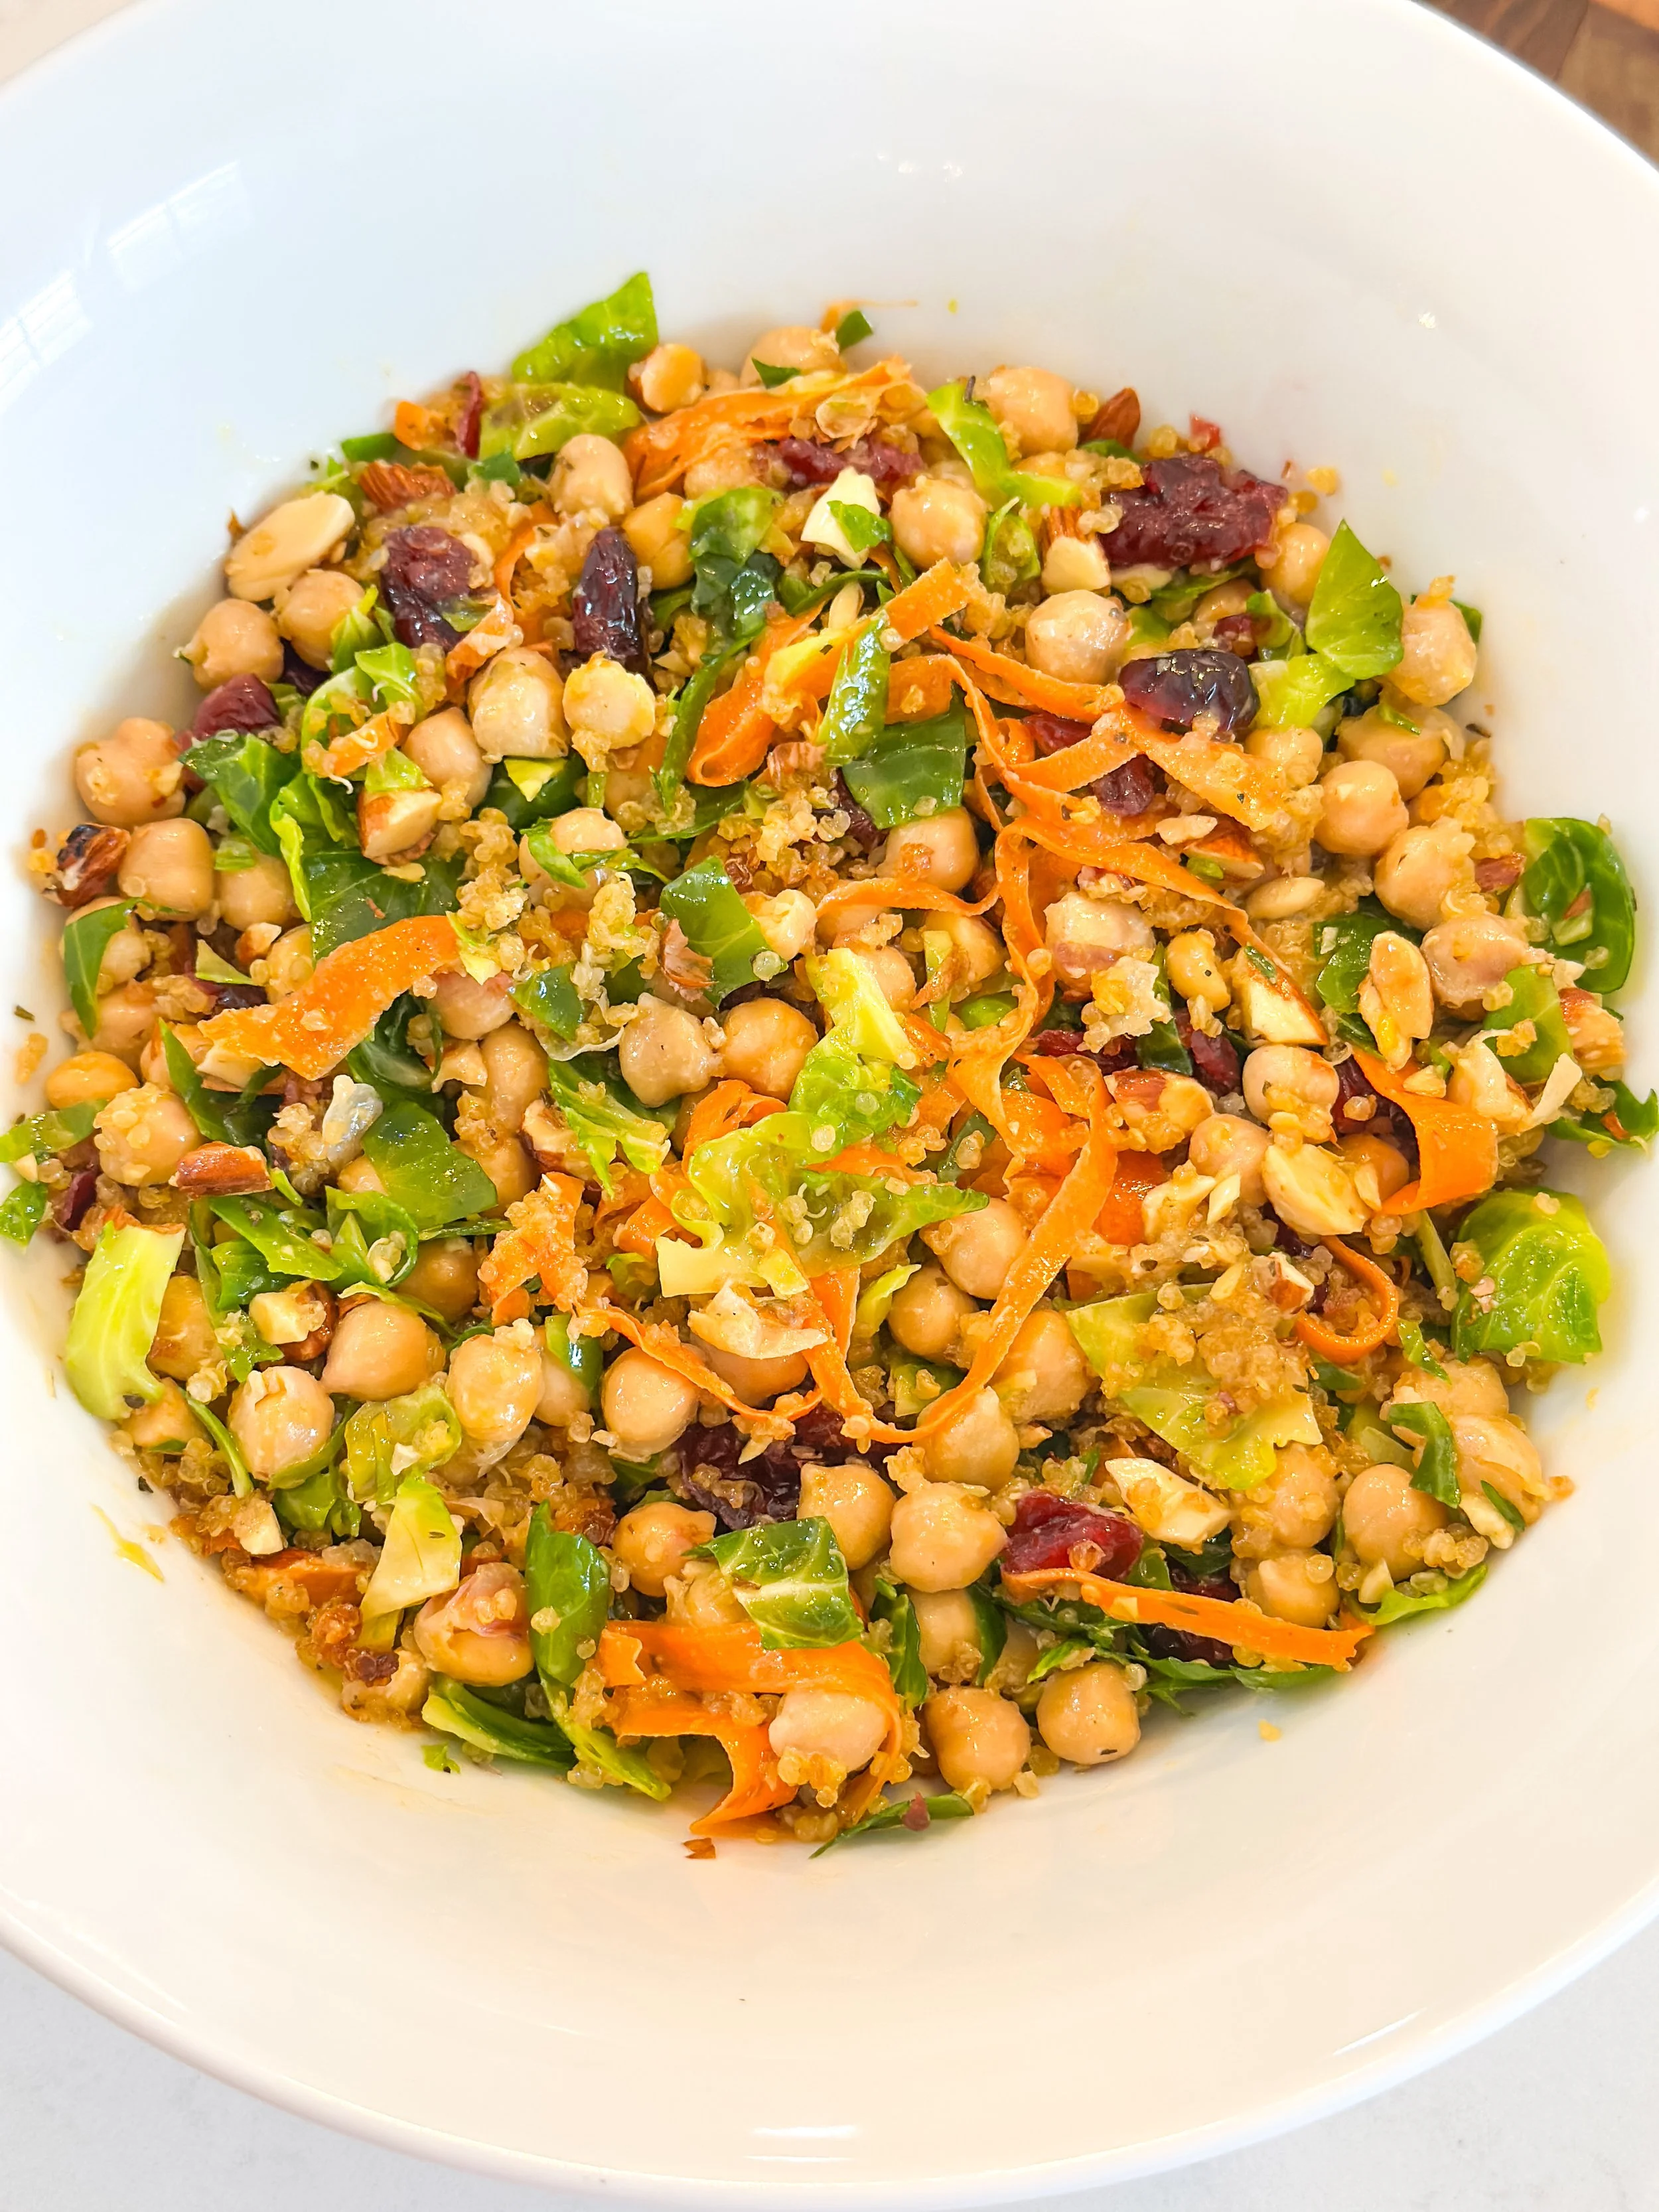
This shaved Brussels sprouts salad is packed with crispy baked quinoa, roasted chickpeas, carrot ribbons, and a creamy vegan honey Dijon dressing. A crunchy, high-protein winter salad that’s perfect for meal prep.
This recipe started because I was roasting Brussels sprouts for something else… and when I chopped them, I had a pile of loose leaves left on the cutting board.
Absolutely not throwing those away.
So I shaved them into a salad.
Then I remembered I had leftover cooked quinoa in the fridge. Instead of reheating it (again), I baked it until golden and crispy — basically turning it into little crunchy croutons.
Add chickpeas, sweet carrot ribbons, dried cranberries, toasted almonds, and a creamy vegan honey Dijon…
And suddenly we have a winter salad that actually feels exciting.
Why You’ll Love This Brussels Sprouts Salad
Naturally gluten-free
Plant-based and high in protein
Uses leftover cooked quinoa
Full of texture (crunch x 3)
Perfect for winter meal prep
Balanced sweet + savory + tangy
This is not a sad salad. This is a crunchy, cozy, satisfying bowl.
The Secret to Making Raw Brussels Sprouts Taste Better
If you’ve ever thought raw Brussels sprouts taste bitter, here’s the fix:
✨ Massage them with olive oil and salt.
After shaving, drizzle with a little olive oil and sprinkle with sea salt. Gently massage for 1–2 minutes. This softens the texture and removes the bitter edge.
It completely transforms them.
Ingredients
For the Salad
4 cups shaved Brussels sprouts
1 cup cooked quinoa
1 cup chickpeas (drained and patted dry)
1 tablespoon olive oil
½ teaspoon sea salt
1 cup carrot ribbons (use a vegetable peeler)
¼ cup dried cranberries
¼ cup toasted sliced almonds or pecans
For the Vegan Honey Dijon Dressing
3 tablespoons vegan mayo
1 tablespoon Dijon mustard
1 tablespoon maple syrup
1 tablespoon apple cider vinegar
1 teaspoon olive oil
Pinch sea salt
Fresh cracked pepper
Whisk until smooth and creamy. Add 1–2 teaspoons warm water if you prefer a thinner dressing.
How to Make Crispy Baked Quinoa
Preheat oven to 400°F.
Spread cooked quinoa on a towel and let dry for 20–30 minutes (this helps it crisp).
Toss quinoa and chickpeas with olive oil and sea salt.
Spread evenly on a parchment-lined baking sheet.
Bake on the top rack for 20–30 minutes, stirring halfway through.
Let cool completely — it crisps as it cools.
You want golden, crunchy bits that act like salad croutons.
Assemble the Salad
Massage shaved Brussels sprouts with olive oil and a pinch of salt.
Toss with half of the dressing and let sit 5–10 minutes.
Add carrot ribbons, dried cranberries, and toasted nuts.
Top with crispy quinoa and chickpeas just before serving.
Drizzle with remaining dressing and toss lightly.
Protein Content
Thanks to quinoa, chickpeas, and nuts, this salad provides approximately 10–14 grams of plant-based protein per serving, depending on portion size.
Variations
Add thinly sliced apple for extra sweetness
Toss in roasted delicata squash for a heartier winter version
Add avocado for creaminess
Sprinkle with vegan parmesan-style cheese
Mix in arugula for a softer base
Meal Prep & Storage Tips
Store dressing separately for best texture.
Crispy quinoa stays crunchy for 2–3 days in an airtight container.
Shaved Brussels sprouts can be prepped up to 24 hours in advance.
FAQs
Can you eat raw Brussels sprouts in salad?
Yes! When thinly shaved and massaged with olive oil, they become tender and mild.
How do you make quinoa crispy for salad?
Dry it thoroughly before baking and spread in a thin layer. Let it cool fully after baking for maximum crunch.
Is this salad gluten-free?
Yes — it’s naturally gluten-free and fully plant-based.
If you make this Shaved Brussels Sprouts Salad with Crispy Quinoa, tag @kellysgreenkitchen_ so I can see your crunchy creations 🤍
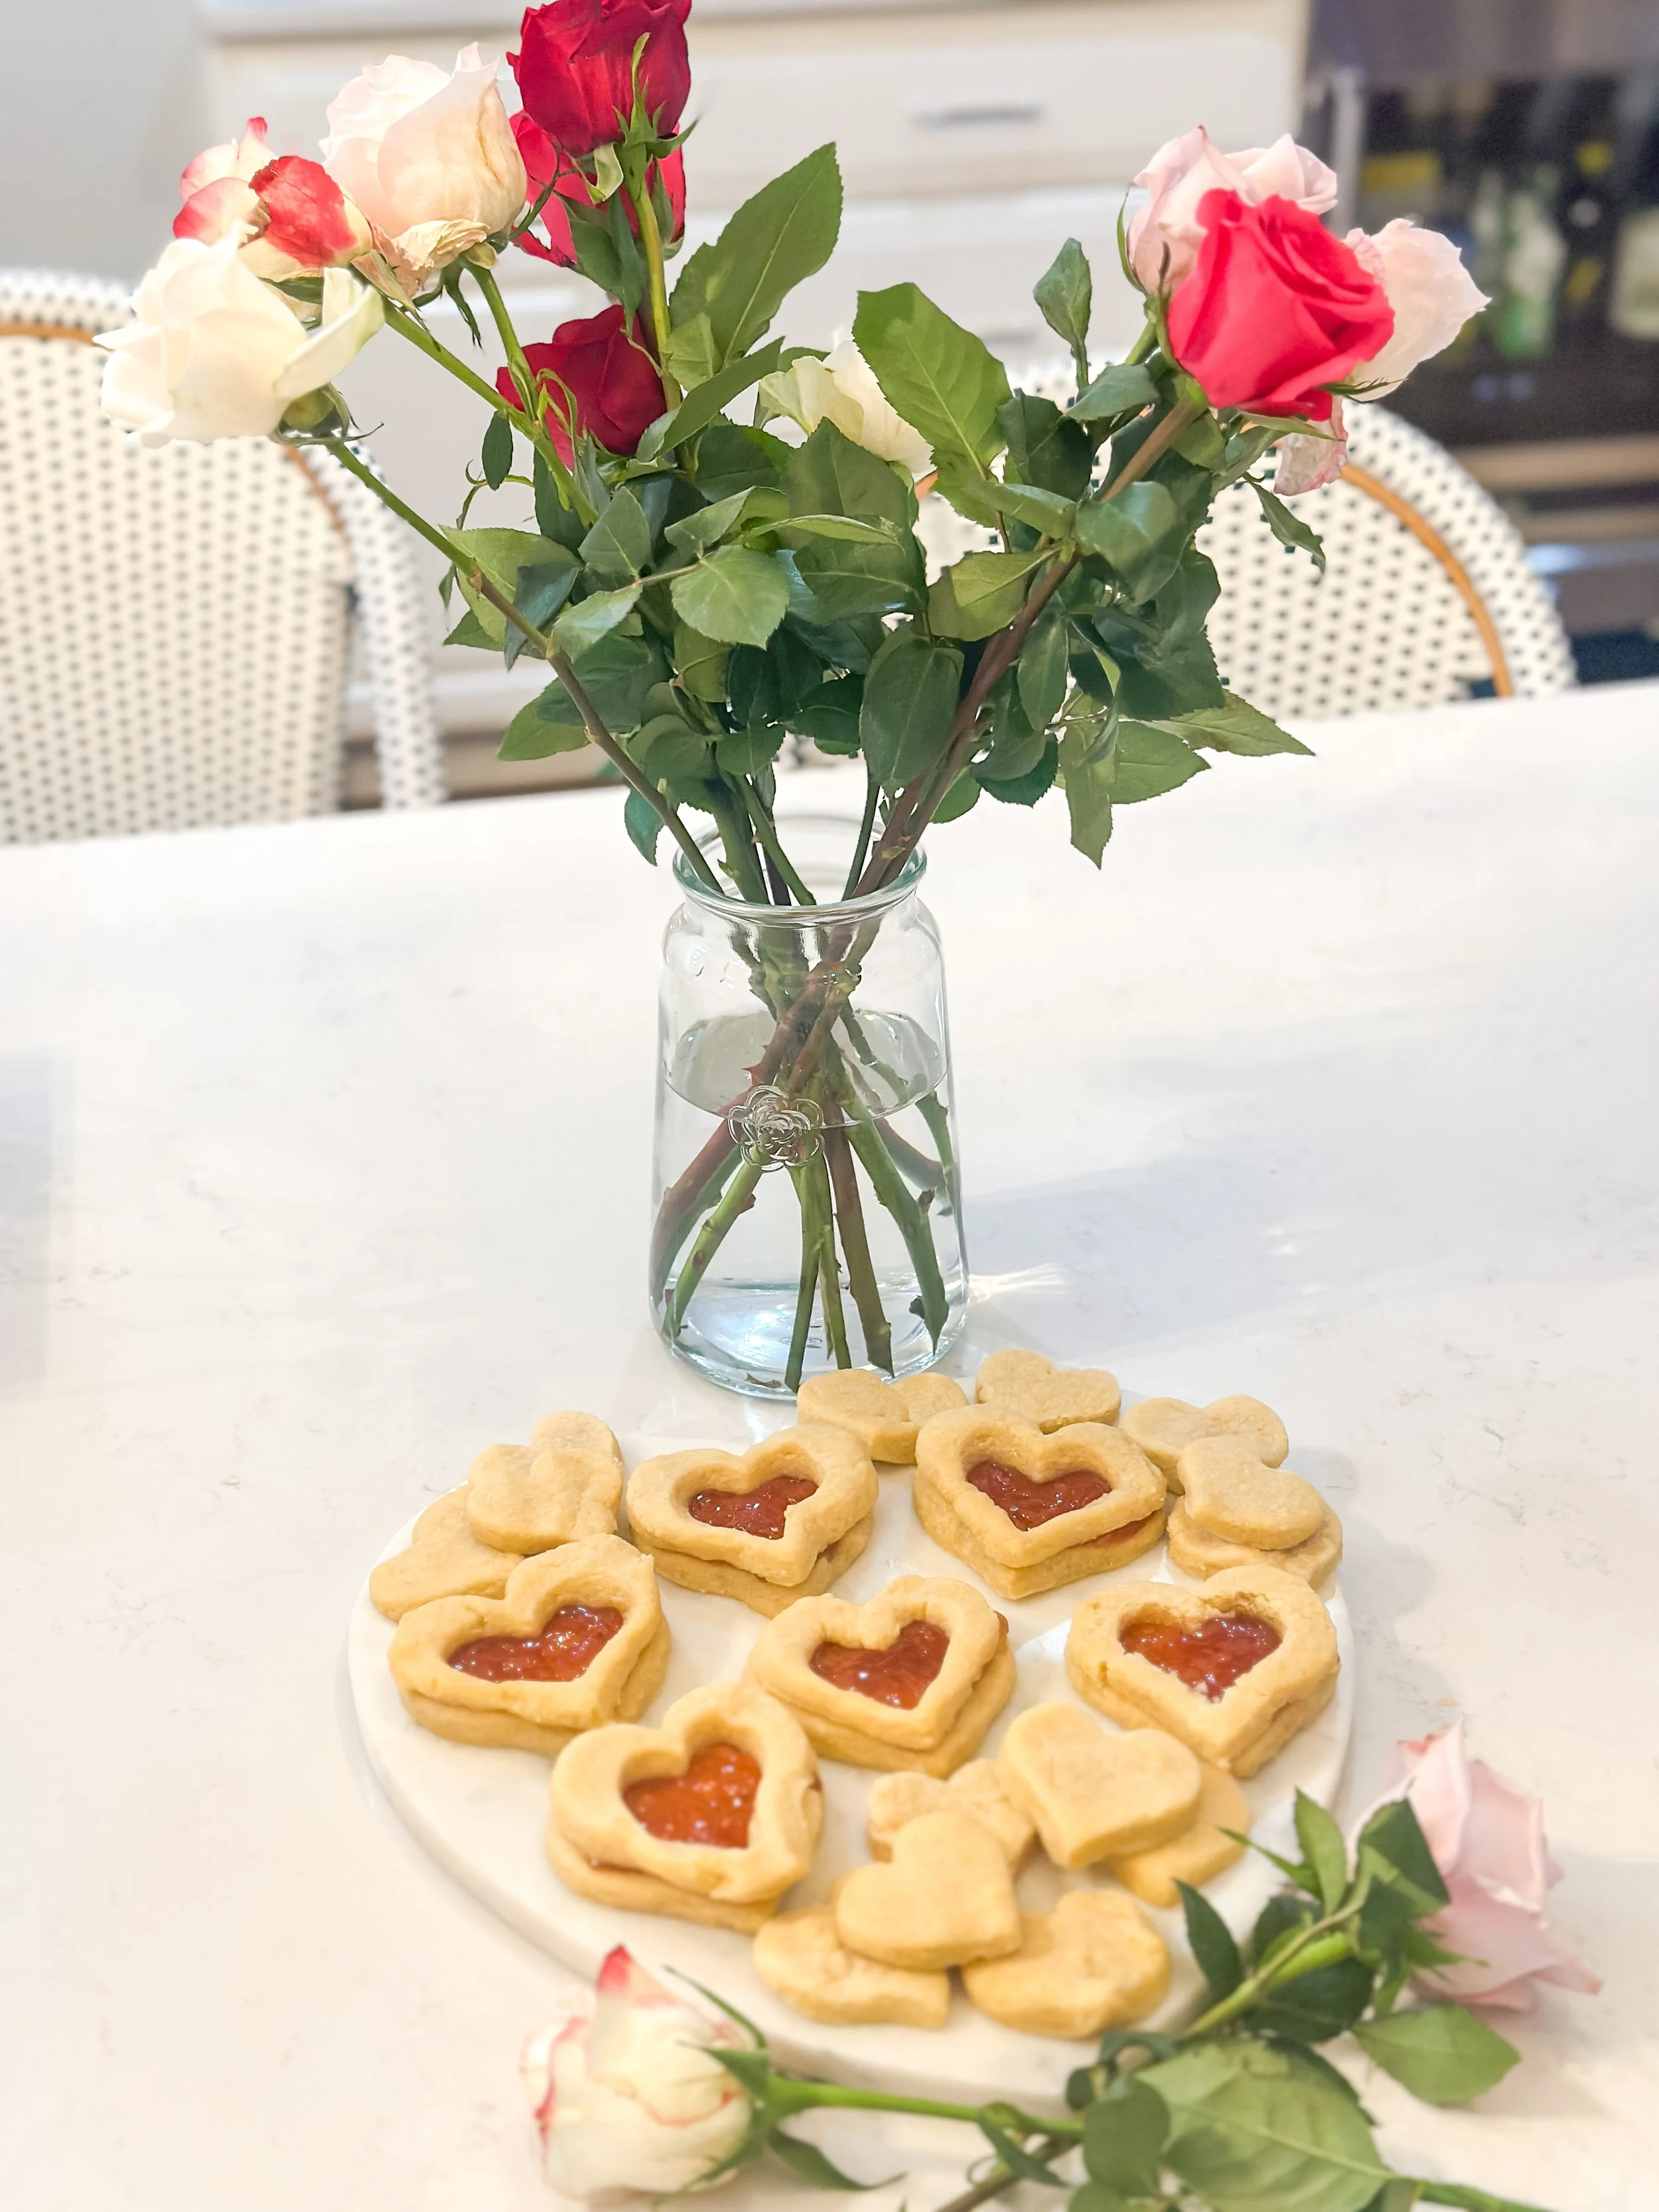
Vegan Jam Heart Cookies
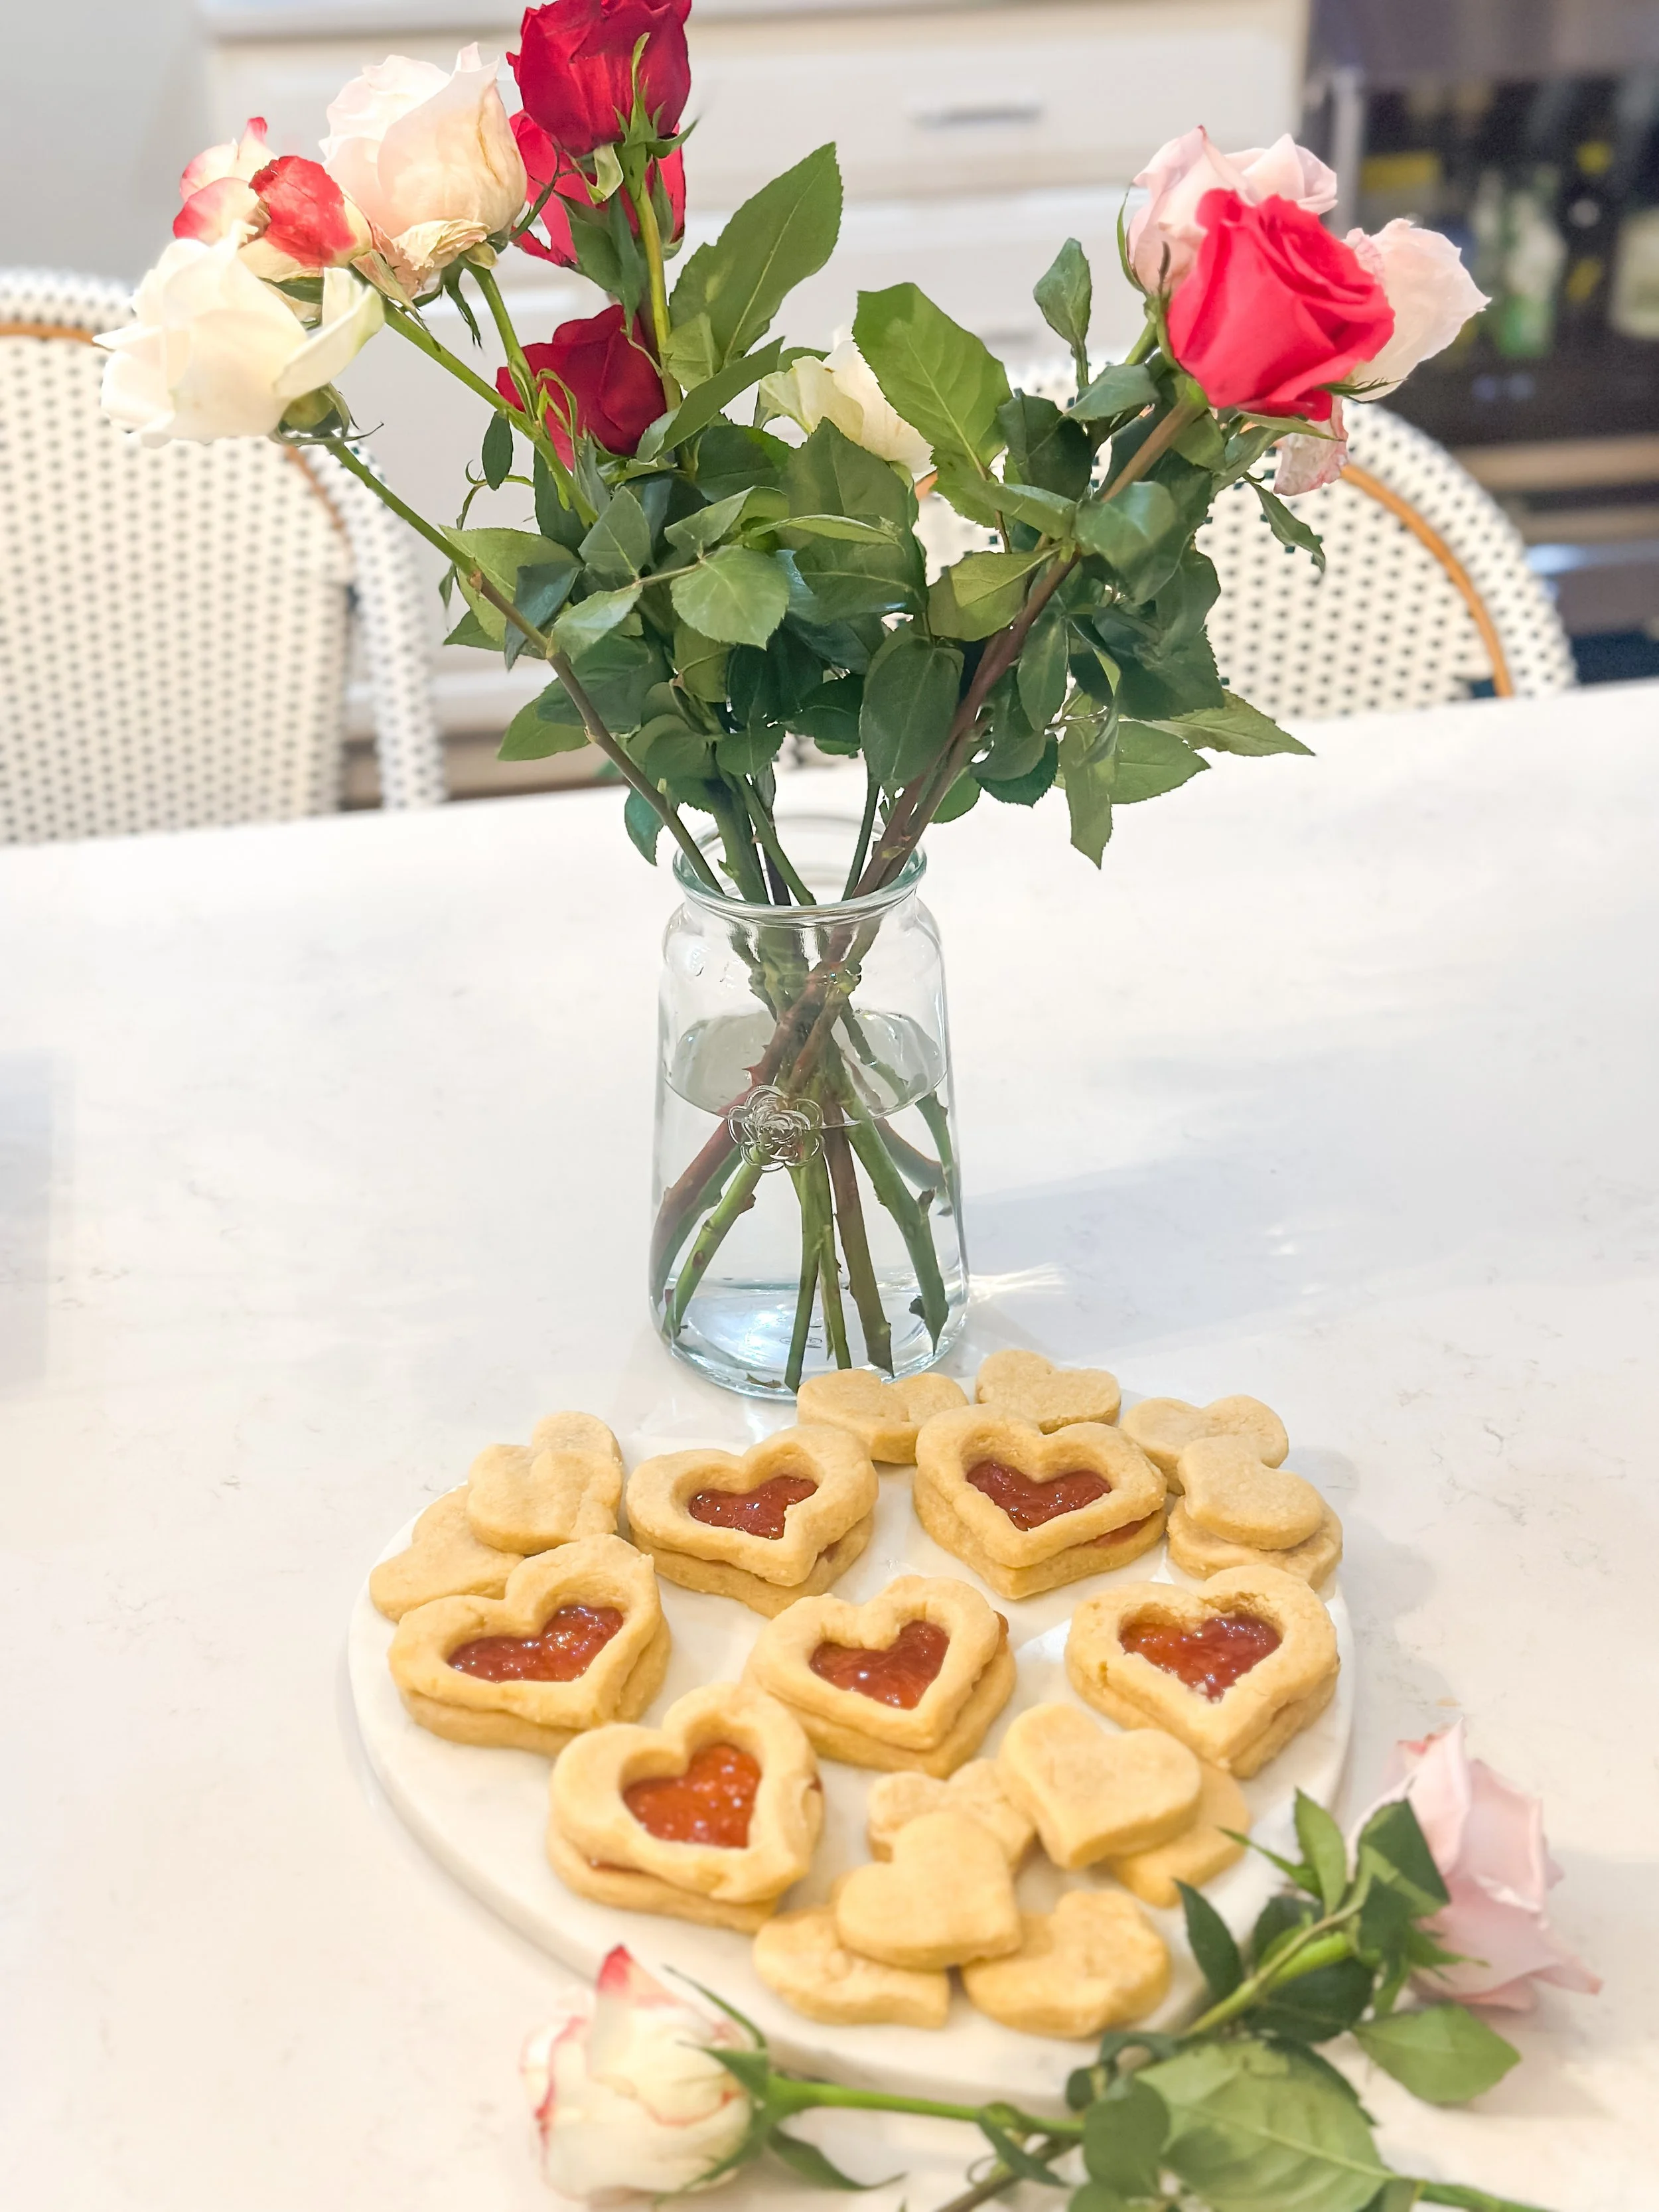
If I’m being honest…these were supposed to be ready on February 14th.
Instead, sickness has been living rent free in our house, so we made them on February 15th. Which honestly feels more realistic anyway.
Between school germs, lingering coughs, and the general February fatigue that seems to settle into New England this time of year, Valentine’s baking got pushed by exactly one day.
And you know what? They were still perfect.
These vegan jam heart cookies are soft, lightly almond-flavored, filled with homemade strawberry jam (made from frozen berries — because it’s February), and dusted with powdered sugar. They look bakery-level impressive but are surprisingly simple to make, even with kids helping.
Flour on the counter included.
Why You’ll Love These Vegan Jam Heart Cookies
Completely egg-free and dairy-free
Made with simple pantry ingredients
Frozen strawberries work beautifully for the jam
Perfect for Valentine’s Day… or February 15th
Soft, tender texture with a bright jam center
They feel special without being complicated — which is exactly the kind of baking I want this time of year.
Homemade Strawberry Jam
Using frozen strawberries in winter is not just convenient — it’s smart. They’re picked at peak ripeness and break down beautifully when simmered.
Ingredients
1 lb frozen strawberries
½ cup organic cane sugar
1 tbsp fresh lemon juice
Instructions
Add frozen strawberries and sugar to a saucepan.
Cook over medium heat until thawed and juicy (about 5–8 minutes).
Reduce to a simmer and cook 20–30 minutes, stirring occasionally, until thick and glossy.
Stir in lemon juice.
Cool completely before using.
For cookie filling, simmer until slightly thicker than traditional jam — you want it spreadable but not runny.
Vegan Almond Heart Cookies
These cookies are tender thanks to almond flour and have just a hint of almond extract that pairs perfectly with strawberry.
Ingredients
1 cup vegan butter, softened
¾ cup sugar
2 tbsp unsweetened almond milk
1 tsp vanilla extract
¼ tsp almond extract
1 ¾ cups all-purpose flour
¾ cup almond flour
½ tsp salt
Instructions
Cream butter and sugar until light and fluffy (2–3 minutes).
Add almond milk, vanilla, and almond extract.
Mix in flour, almond flour, and salt just until combined.
Form into a disk, wrap, and chill for 1 hour.
Preheat oven to 350°F.
Roll dough ¼-inch thick and cut heart shapes. Cut a small heart window in half of them.
Bake 8–10 minutes, just until edges are lightly golden.
Cool completely.
To assemble:
Spread jam on the bottom cookies.
Dust cut-out tops with powdered sugar.
Gently sandwich together.
Baking With Kids (The Real Version)
The hearts may not all be symmetrical. There may be powdered sugar in places powdered sugar should not be. Someone might eat jam with a spoon.
But that’s kind of the point.
These cookies felt simple, cozy, and exactly right for a slightly delayed Valentine’s celebration.
Because sometimes love looks less like perfect timing and more like making heart cookies on February 15th when everyone is finally feeling human again.
Storage Tips
Store assembled cookies in the refrigerator for up to 4 days.
Bring to room temperature before serving.
Jam can be made ahead and stored in the fridge for up to 2 weeks.
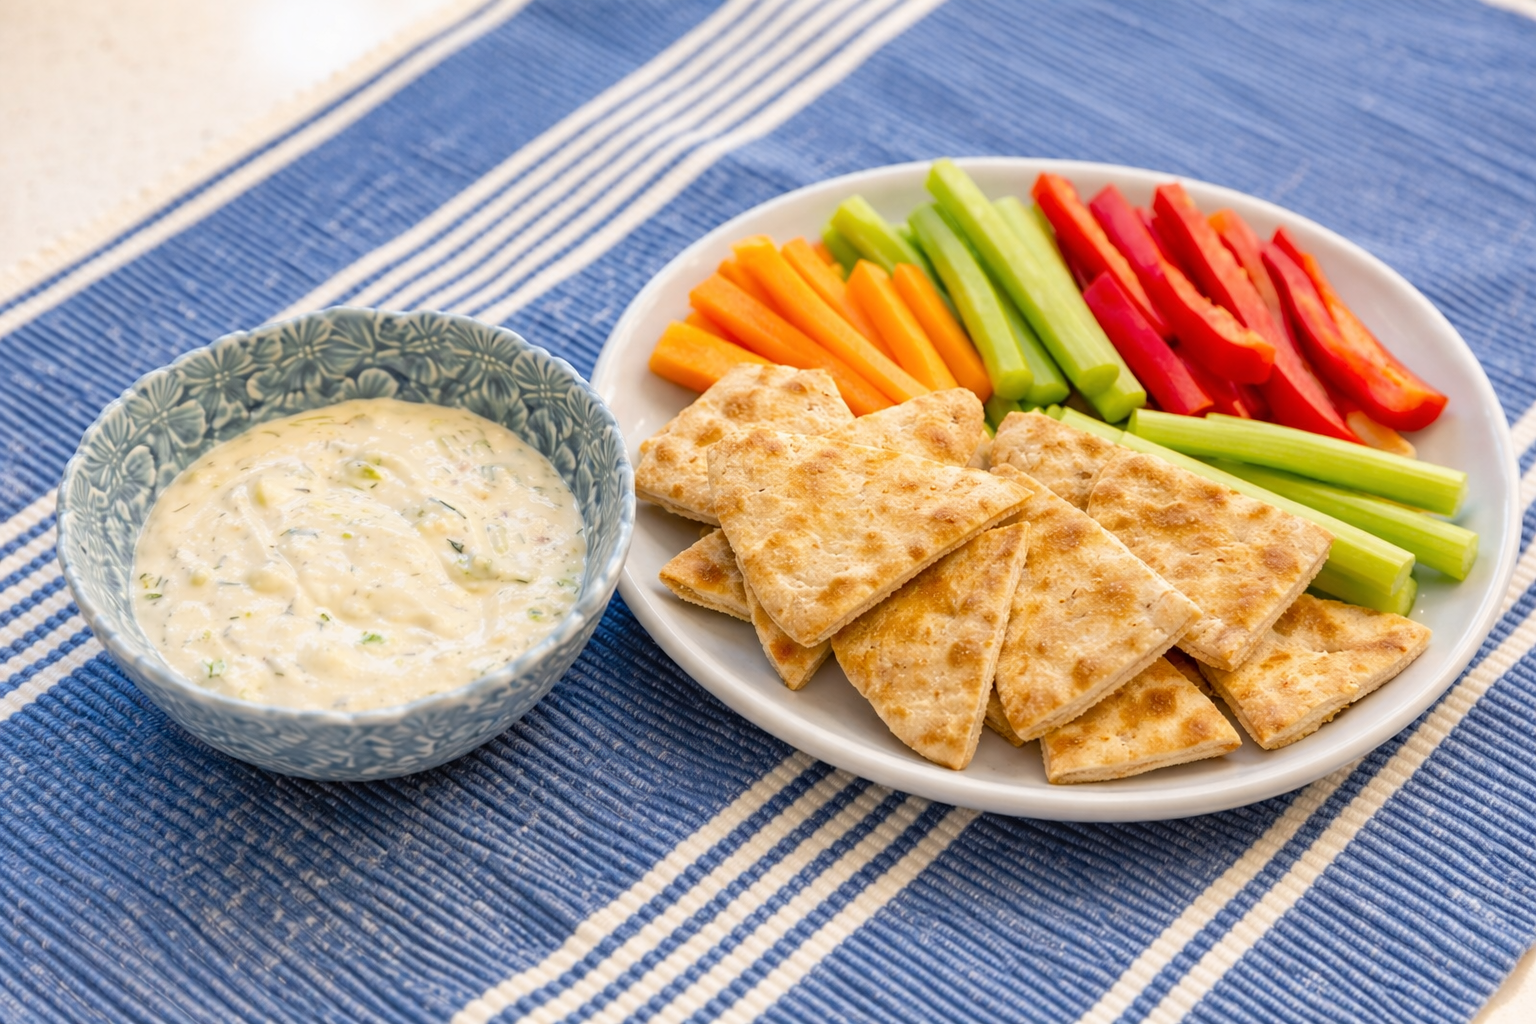
Creamy Dill + Chive Vegan Tzatziki
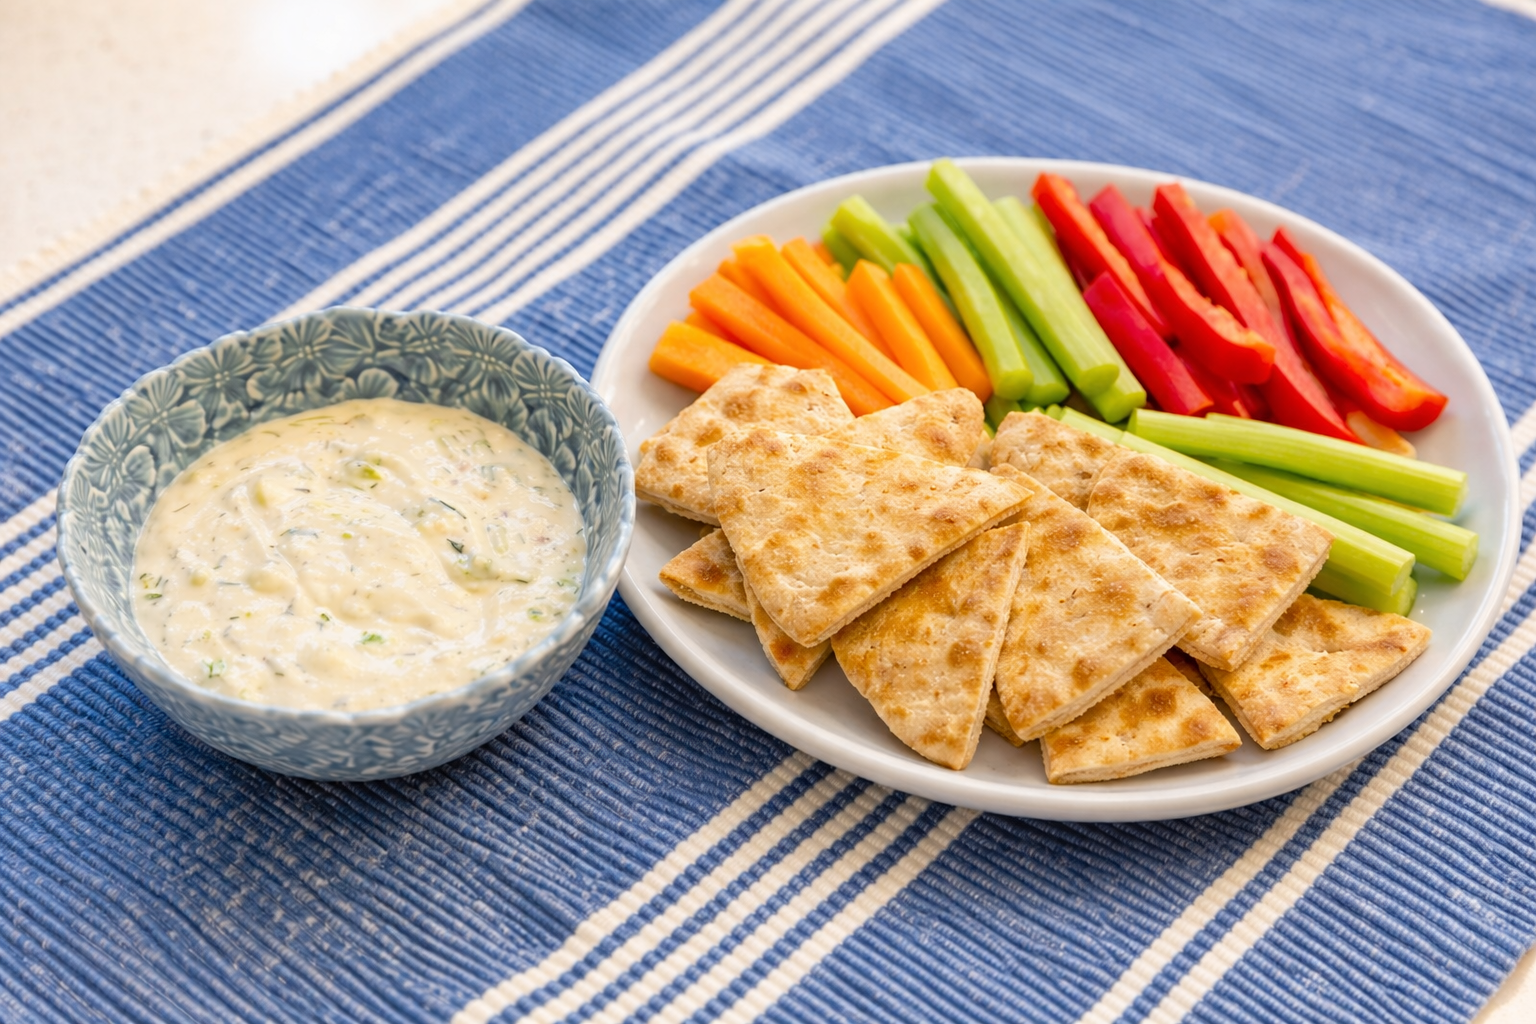
A fresh, dairy-free tzatziki perfect for dipping, drizzling, and dolloping on everything.
There are some recipes that quietly become staples in your kitchen — not flashy, not complicated — just reliable, fresh, and endlessly versatile.
This creamy dill + chive vegan tzatziki is exactly that.
It’s bright with lemon, garlicky (but not overpowering), packed with fresh herbs, and made with dairy-free yogurt for a light, plant-based twist on the classic Mediterranean sauce.
Serve it with warm pita and crunchy veggies, spoon it over grain bowls, or drizzle it across roasted vegetables and big leafy salads. It’s the kind of sauce that makes simple meals feel elevated.
And honestly? It gets even better the next day.
Why You’ll Love This Vegan Tzatziki
🌿 Completely dairy-free
🥒 Fresh, herby, and bright
✨ Ready in 10 minutes
🥗 Works as a dip and a sauce
🥙 Perfect for snack boards, bowls, and salads
🫙 Keeps 3–4 days in the fridge
Ingredients
1 cup plain unsweetened dairy-free yogurt (almond or coconut-based works well)
½ cup finely grated cucumber, excess liquid squeezed out
1 small garlic clove, grated
1–2 tablespoons fresh lemon juice
1 tablespoon good olive oil
1 tablespoon fresh dill, finely chopped
1 tablespoon fresh chives, finely chopped
¼ teaspoon sea salt
Fresh cracked pepper to taste
Optional:
Tiny splash red wine vinegar
Extra olive oil and herbs for topping
How to Make Vegan Tzatziki
Step 1: Prep the cucumber.
Grate the cucumber and squeeze out as much moisture as possible using a clean kitchen towel or paper towels. This keeps your tzatziki thick and creamy.
Step 2: Mix.
In a bowl, stir together the yogurt, cucumber, garlic, lemon juice, olive oil, dill, chives, salt, and pepper.
Step 3: Chill.
Let it rest in the fridge for at least 30 minutes. The herbs bloom and the flavors deepen beautifully.
Step 4: Finish.
Before serving, drizzle with olive oil and sprinkle with extra herbs.
How to Use Tzatziki
This isn’t just a dip — it’s a “put it on everything” sauce.
Try it:
With warm pita triangles
Alongside carrots, celery, and bell peppers
Dolloped over quinoa or farro bowls
Spoonfuls over roasted chickpeas and sweet potatoes
Drizzled across big herby salads
Spread inside wraps or sandwiches
For grain bowls or salads, thin it slightly with a teaspoon or two of water or extra lemon juice.
Tips for the Best Tzatziki
Squeeze the cucumber well. This is key.
Use fresh herbs. Dried won’t give the same brightness.
Let it rest. Even 30 minutes makes a difference.
Taste and adjust. Add more lemon if you love brightness, more garlic if you want more punch.
Storage
Store in an airtight container in the refrigerator for up to 4 days. Stir before serving.
Frequently Asked Questions
Can I use regular yogurt?
Yes! If you’re not dairy-free, full-fat Greek yogurt works beautifully.
What kind of dairy-free yogurt is best?
Plain, unsweetened varieties with a thicker consistency work best. Avoid flavored or sweetened options.
Can I make this ahead?
Absolutely — it actually tastes better after a few hours in the fridge.
If you make this, tag me @kellysgreenkitchen — I love seeing how you use it on bowls and snack boards 🥒🌿
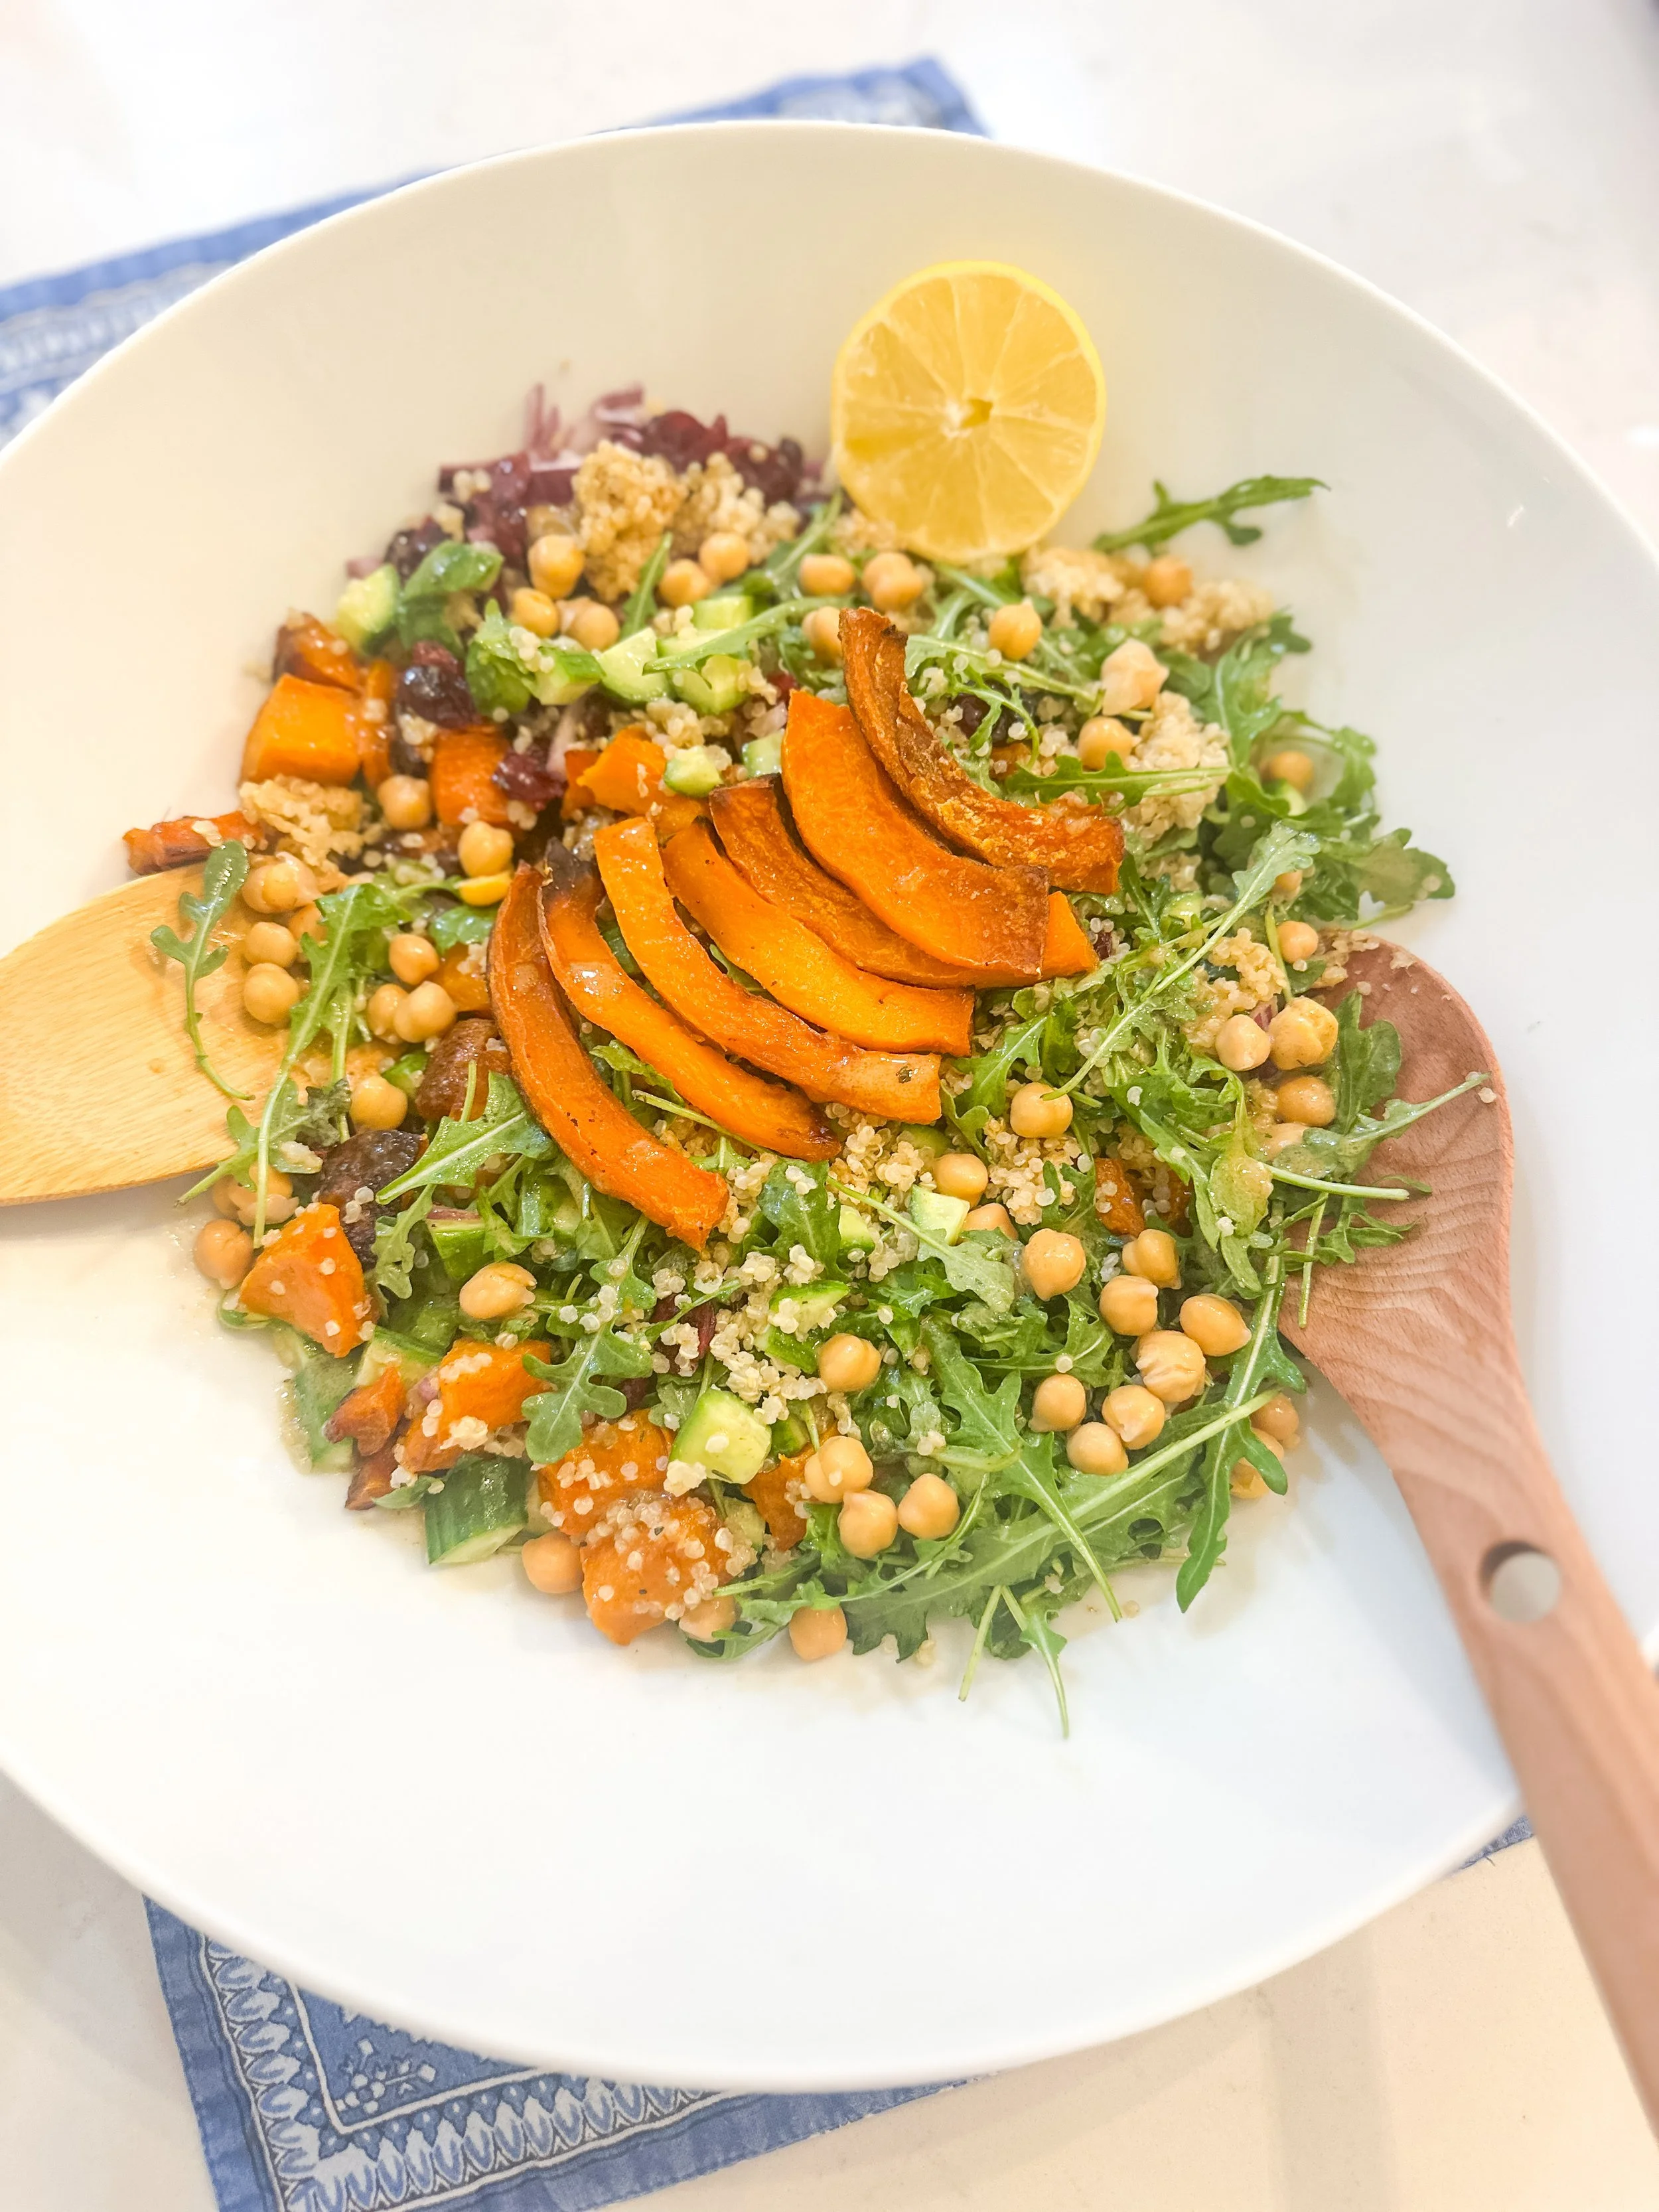
Herby Lemon–Dijon Quinoa (Gluten-Free Mediterranean Bowl)
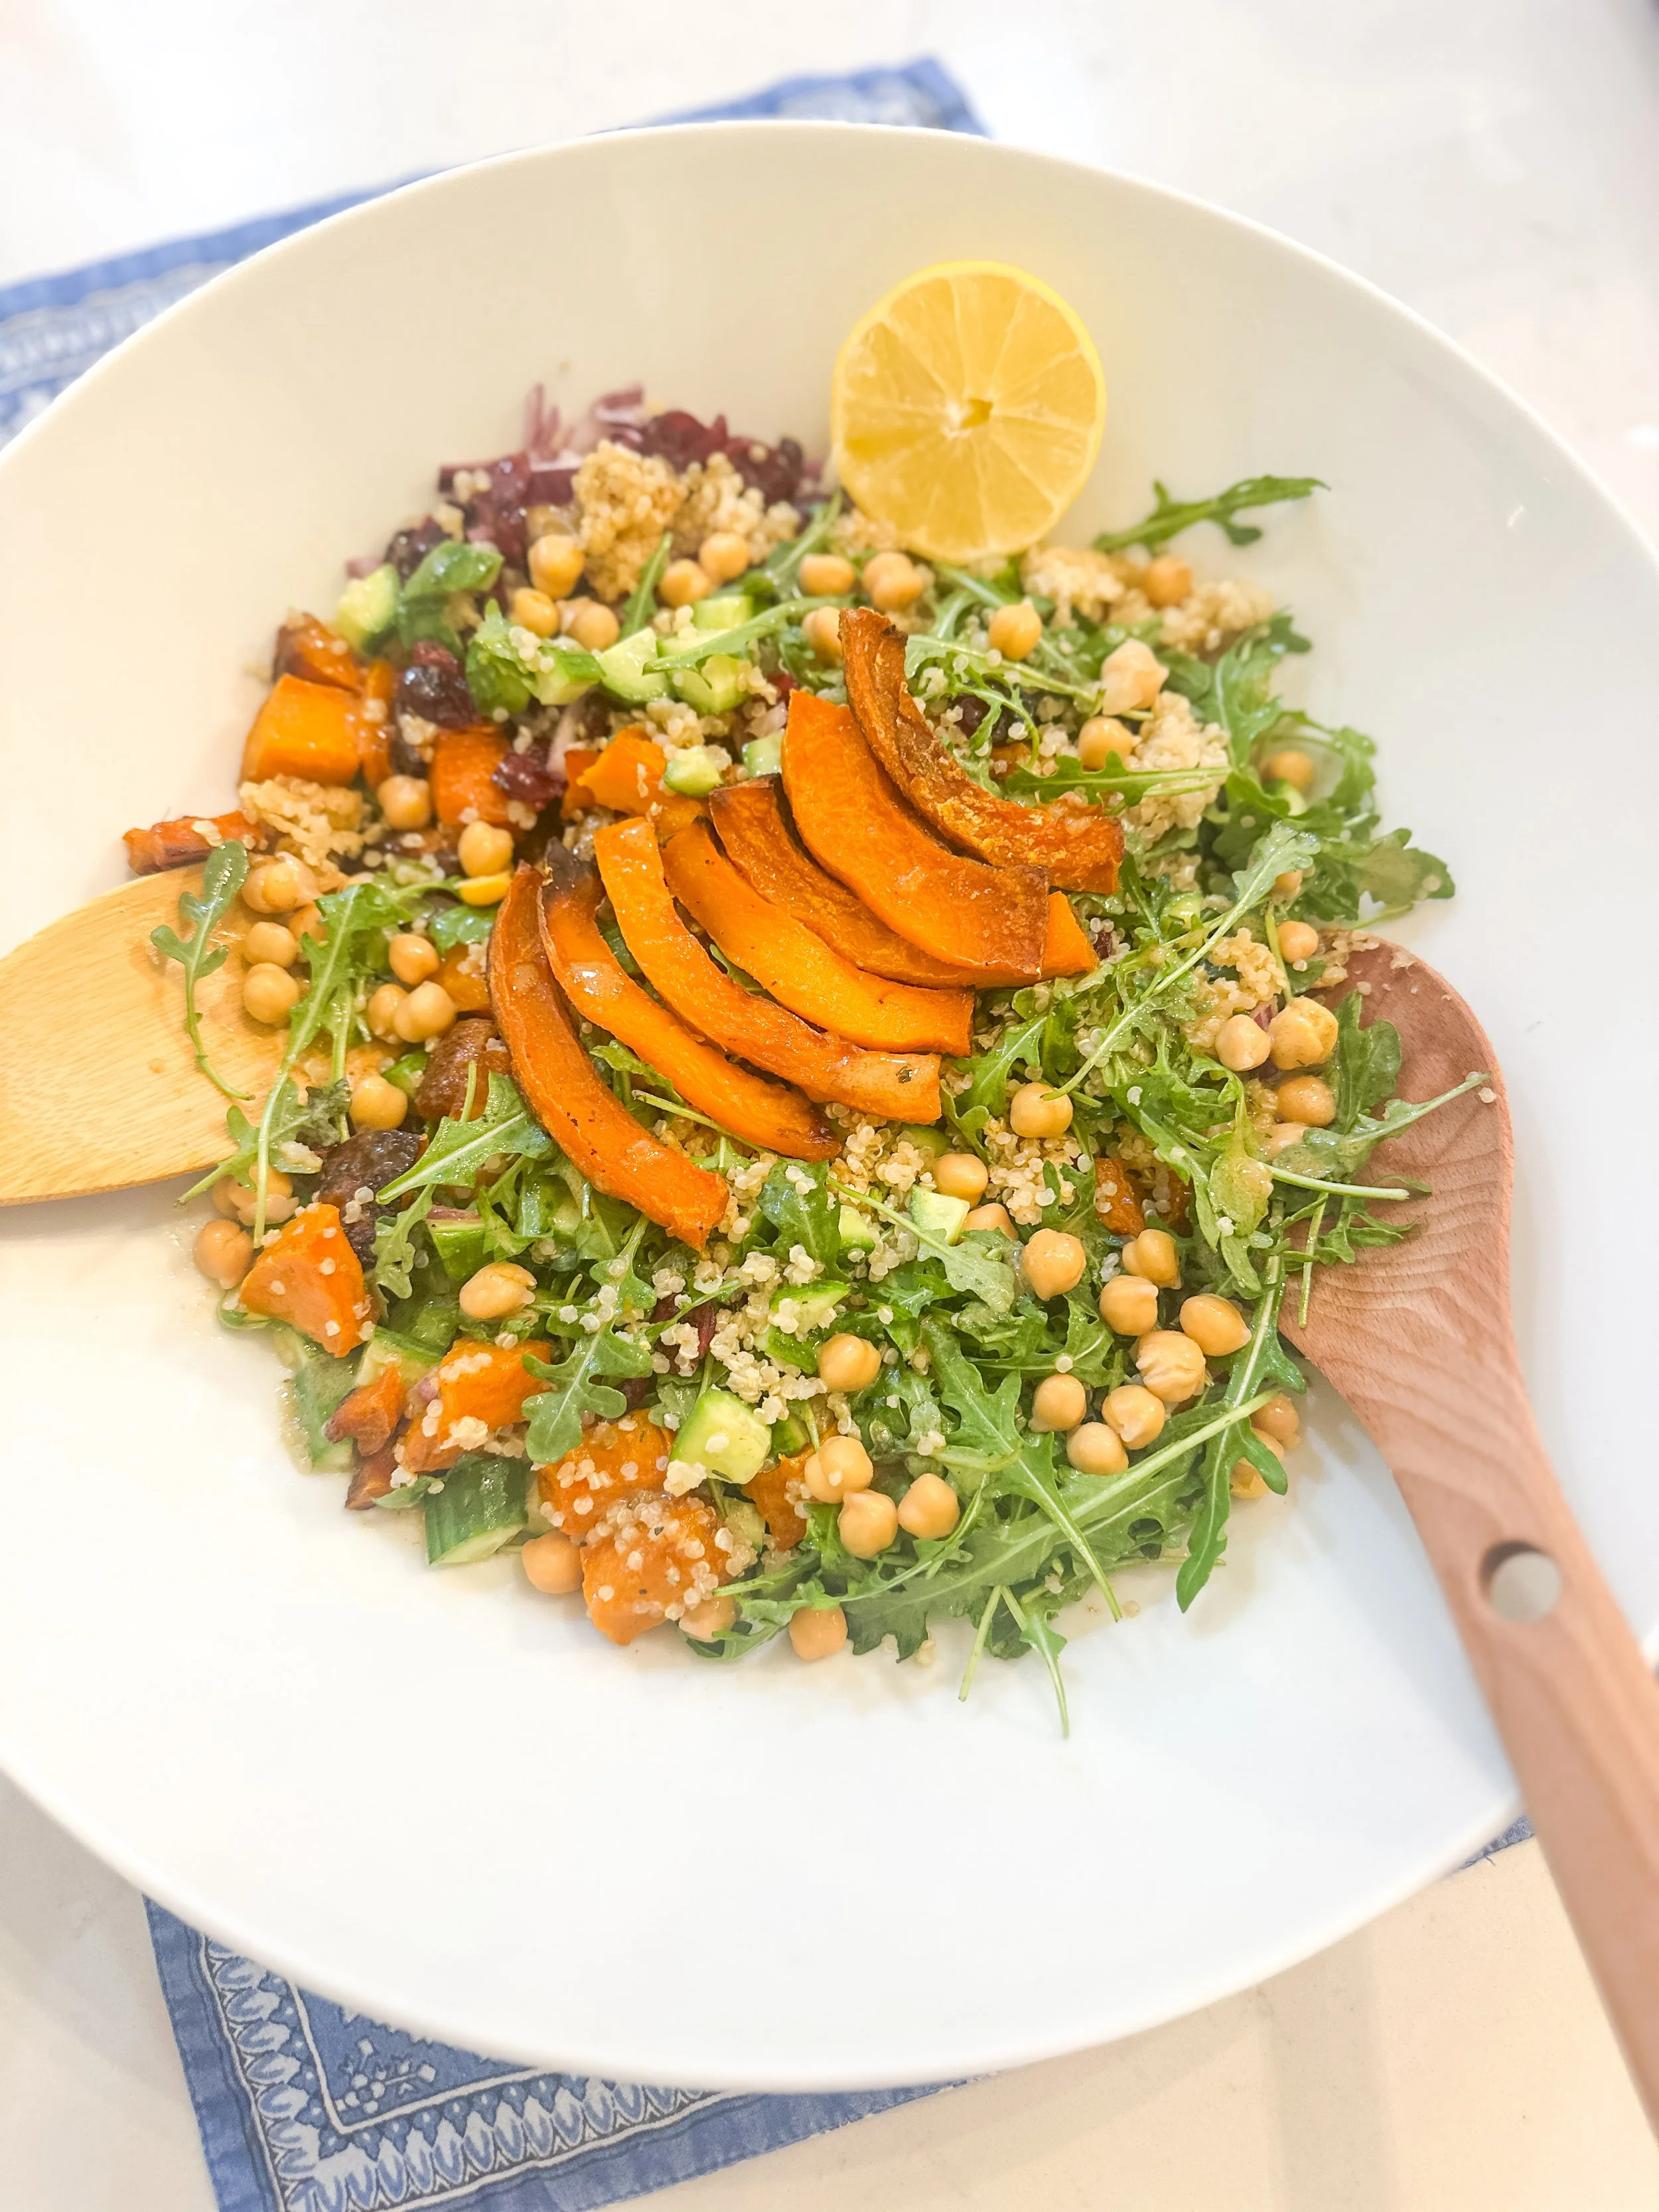
Gluten-free • Plant-based • ~15g protein per serving
After a night of chips, chips, and more chips, this was exactly what my body was craving. Fresh herbs, fluffy quinoa, sweet roasted squash, peppery arugula, and a bright lemon–Dijon dressing made with Brightland olive oil — simple, nourishing, and deeply satisfying.
This bowl works beautifully warm or chilled and makes an ideal make-ahead lunch or easy weeknight dinner.
Ingredients
For the quinoa bowl
1 cup dry quinoa, rinsed
2 cups water or vegetable broth
2 cups roasted squash (butternut or delicata), cubed
1 (15-oz) can chickpeas, drained and rinsed
¼ cup thinly sliced red onion
1 cup chopped cucumber
2 big handfuls arugula
¼ cup chopped fresh herbs (parsley, dill, mint, or a mix)
Salt & black pepper
For the Lemon–Dijon dressing
¼ cup extra-virgin olive oil (I use Brightland)
2½ tbsp fresh lemon juice
1½ tsp Dijon mustard
1 tsp maple syrup
1 small garlic clove, finely grated
1 tsp herbs de provence
½ tsp kosher salt
Fresh black pepper
Instructions
1. Cook the quinoa
Bring quinoa and liquid to a boil. Cover, reduce heat, and simmer for 15 minutes. Remove from heat and let steam for 5 minutes, then fluff with a fork.
2. Roast the squash
Preheat oven to 425°F. Toss squash with olive oil, salt, and pepper. Roast for 25–30 minutes, until caramelized and tender.
3. Make the dressing
Whisk all dressing ingredients in a small bowl until smooth and emulsified.
4. Assemble the bowl
In a large bowl, toss warm quinoa with chickpeas, roasted squash, red onion, and most of the dressing.
5. Finish fresh
Fold in cucumber, arugula, and fresh herbs. Taste and adjust seasoning. Add more dressing if needed.
Serving Tips
Serve warm, room temp, or chilled
Add vegan feta, toasted pine nuts, or avocado if desired
For meal prep: store without arugula and add greens just before serving
Why You’ll Love This Bowl
✔️ Naturally gluten-free
✔️ ~15g plant protein per serving
✔️ Fresh but still cozy
✔️ Perfect post–Super Bowl reset (no deprivation energy here)
Variations
Swap the grain: farro (not GF) or brown rice
Add crunch: toasted almonds or pumpkin seeds
Boost protein: add lentils or extra chickpeas
Final Thoughts
This is one of those bowls that feels resetting without feeling restrictive — bright, herby, nourishing, and deeply comforting. Exactly what I want when I’m easing back into the week.
If you make this, tag me @kellysgreenkitchen_— I love seeing your bowls 💚
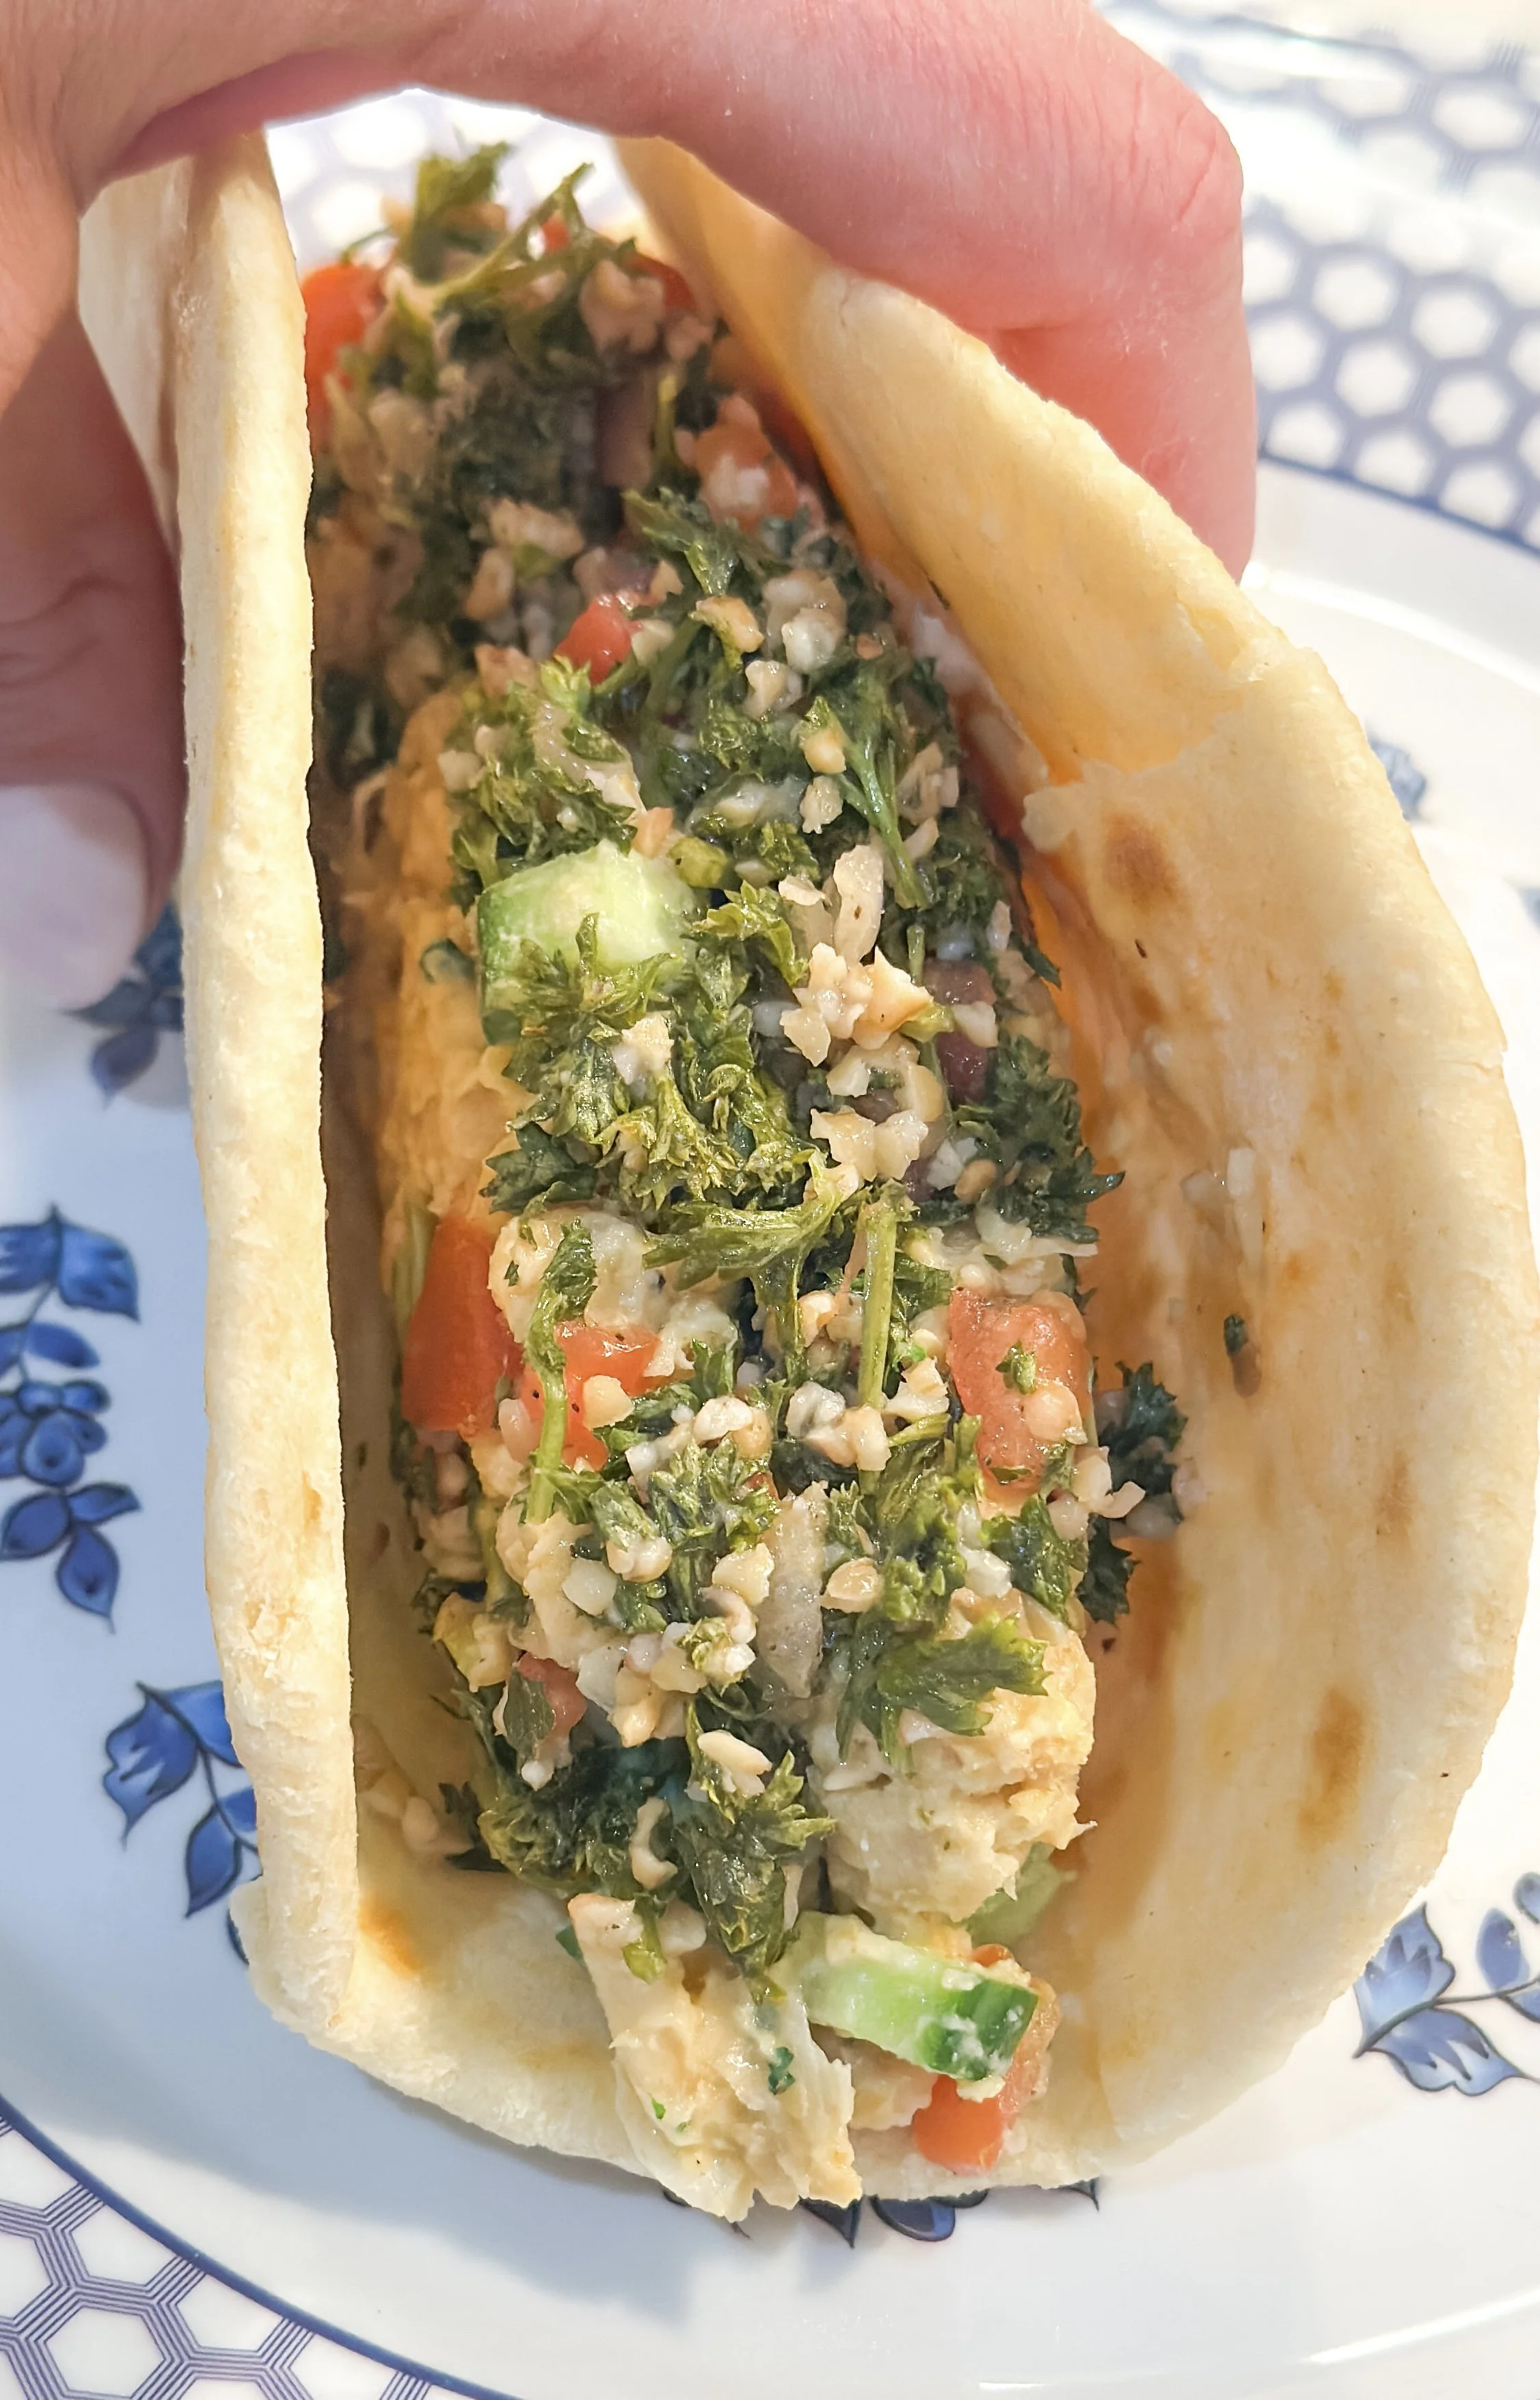
Smoky Chickpea Salad & Tabbouleh Wraps
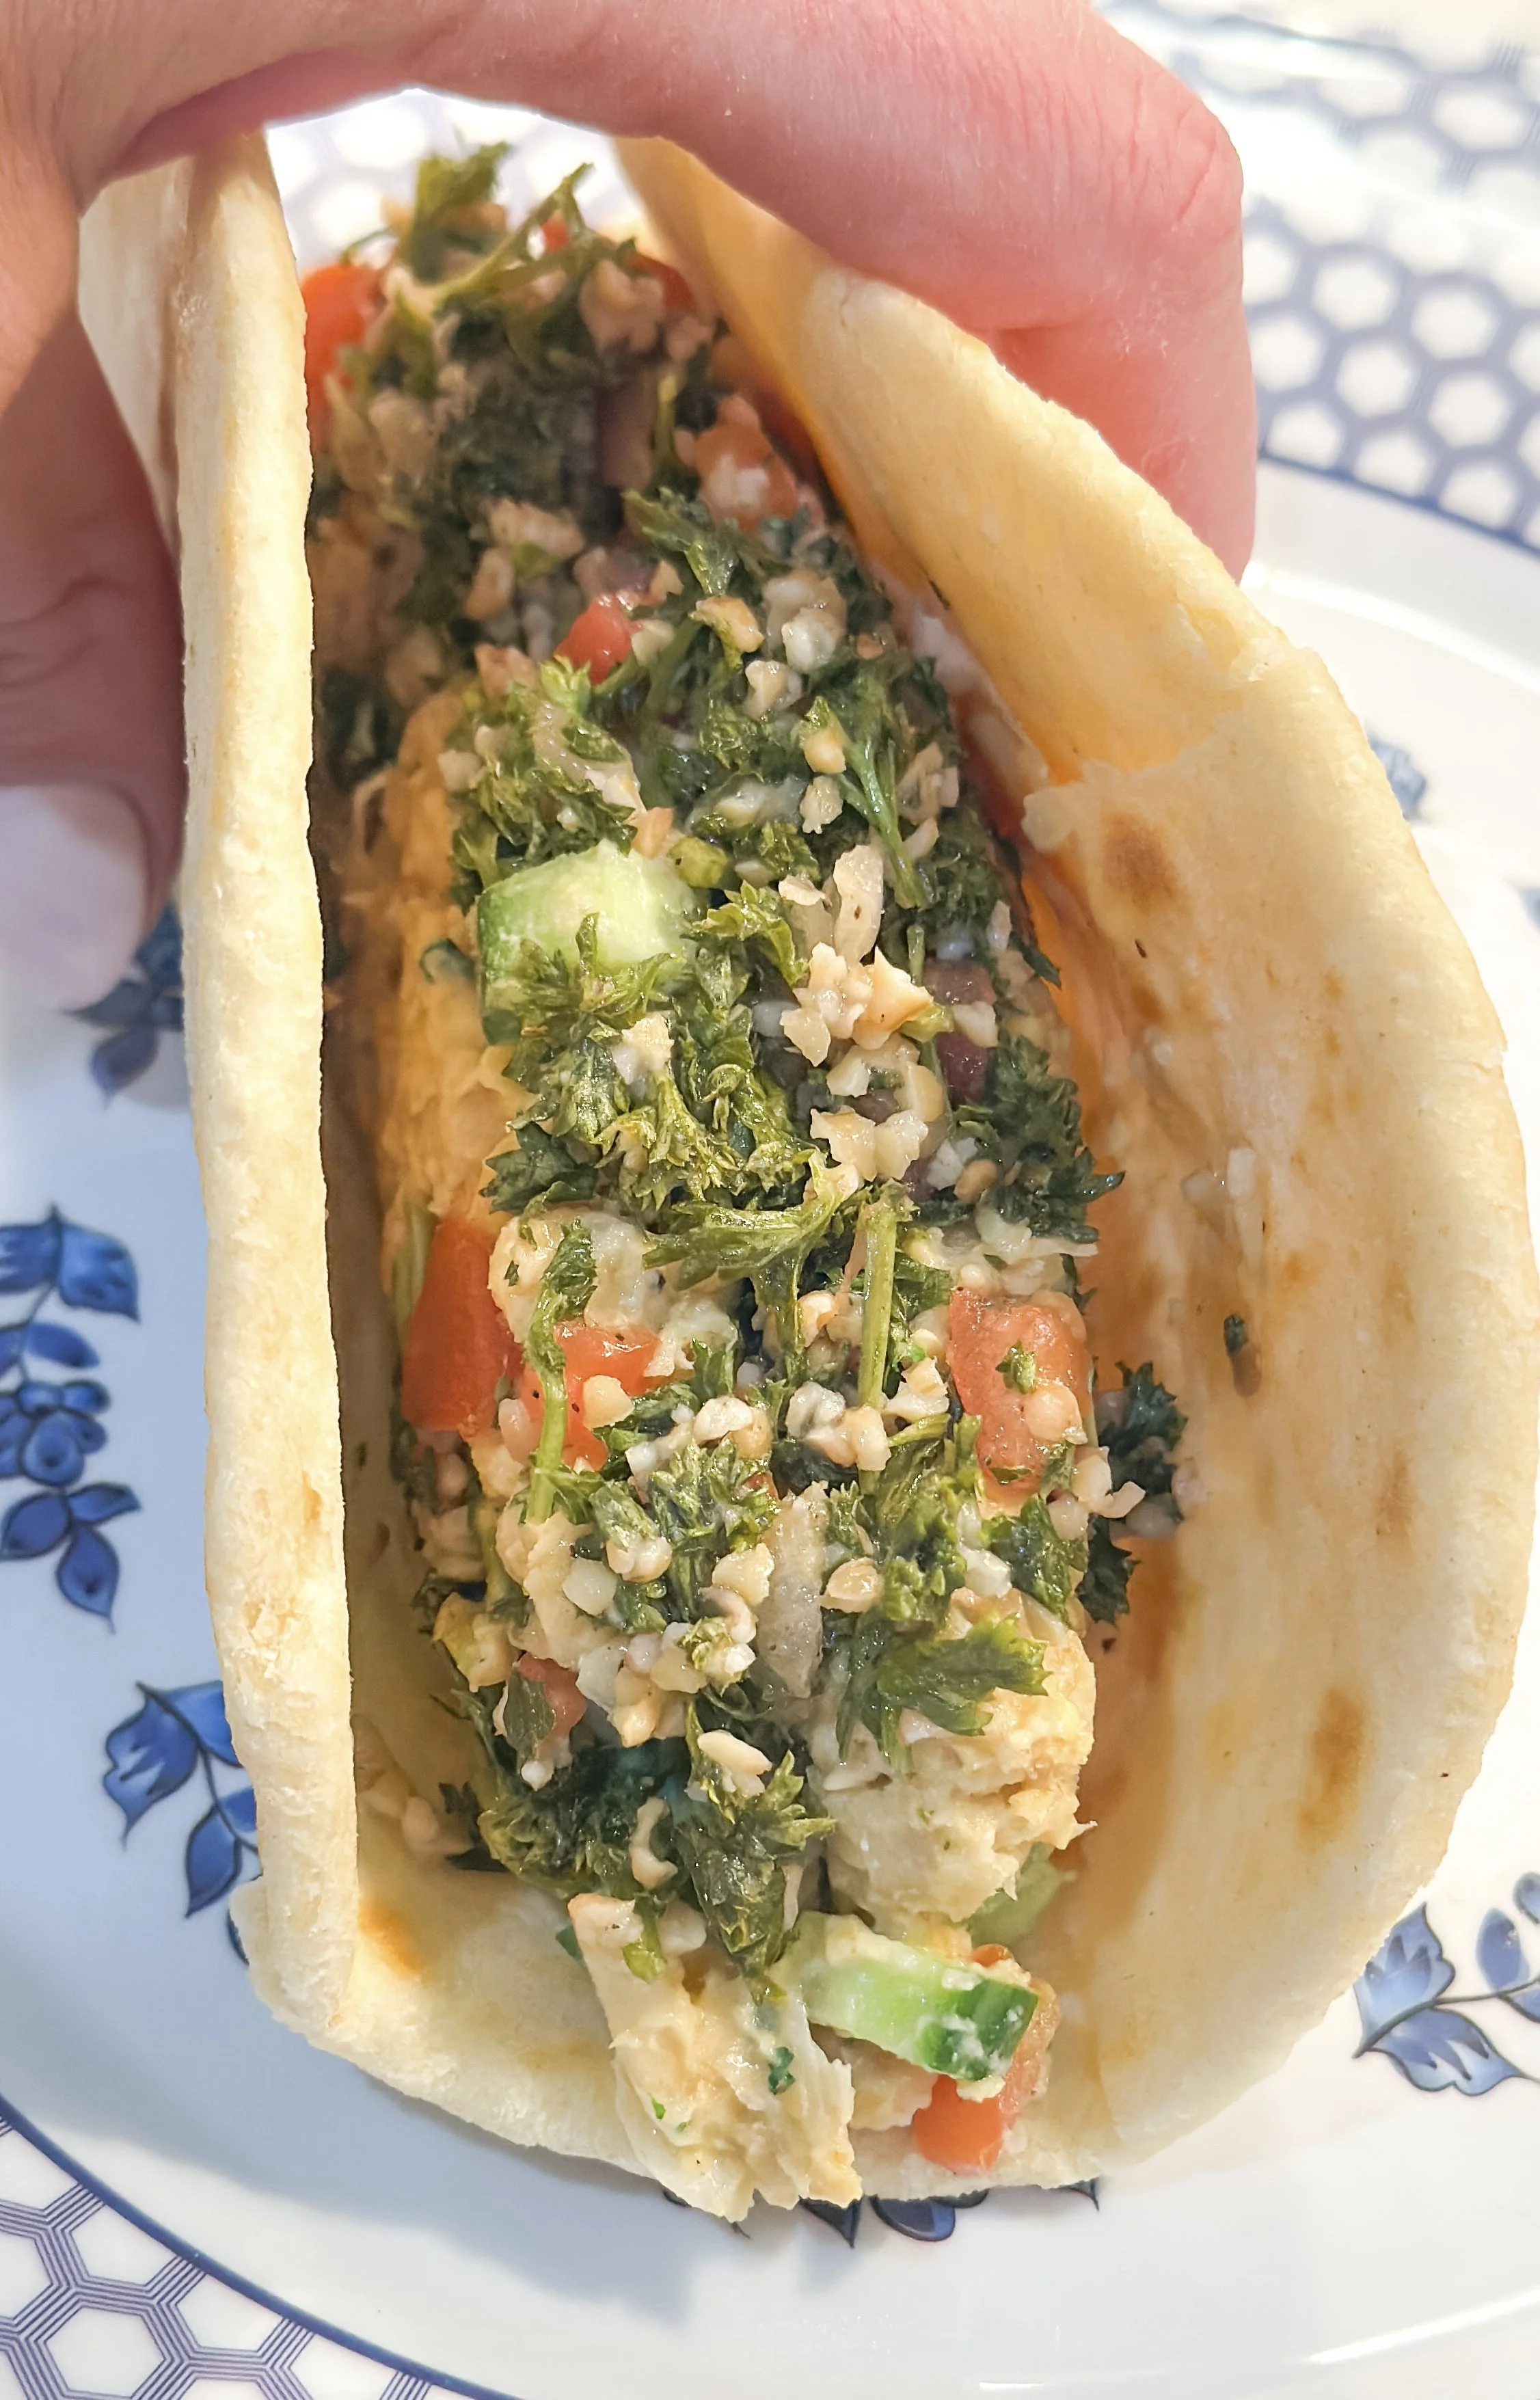
These Smoky Chickpea Salad & Tabbouleh Wraps are one of those recipes I keep coming back to when I want something fresh, filling, and packed with plants, without turning lunch into a whole production.
The base is a creamy smashed chickpea salad with cool crunchy cucumbers and a small but mighty smoky twist (hello, BBQ sauce 👀). Paired with bright, lemony tabbouleh and wrapped up in warm homemade tortillas, this combo hits that sweet spot between nourishing and satisfying.
They’re perfect for weekday lunches, meal prep, or slicing in half and packing up for a picnic. And if you’re intimidated by homemade tortillas — don’t be. They’re simpler than you think, and I’ve linked my go-to recipe below.
Why You’ll Love These Wraps
Plant-packed & filling thanks to chickpeas, herbs, and veggies
Fresh + creamy with lots of texture
Easy to prep ahead (just assemble when ready)
Flexible — swap herbs, add greens, or throw in extra veggies you have on hand
Serves 4 (makes about 4–6 wraps)
Ingredients
Chickpea Salad
2 cups cooked chickpeas, drained and rinsed
2 Tbsp olive oil
½ cup vegan mayo
1 tbsp Dijon mustard
2 tsp BBQ sauce
½ cup finely chopped cucumber (seeded if very juicy)
½ tsp each of garlic powder, onion powder, smoked paprika and cumin
Salt and black pepper, to taste
Tabbouleh
2 cups finely chopped fresh parsley
2 Tbsp chopped fresh mint
½ cup finely chopped tomato
2 scallions, thinly sliced
Juice of 1 lemon
2 Tbsp olive oil
Salt, to taste
For Serving
Homemade tortillas (or store-bought if you are short on time)
Optional: extra herbs, leafy greens, or a drizzle of tahini
Instructions
1. Make the chickpea salad
Add chickpeas to a bowl and lightly mash with a fork — you want some texture left. Stir in olive oil, mayo, Dijon, BBQ sauce, chopped cucumber, salt, pepper and other spices. Taste and adjust seasoning as needed.
2. Make the tabbouleh
In a separate bowl, combine parsley, mint, tomato, and scallions. Toss with lemon juice, olive oil, and salt until bright and well mixed.
3. Warm the tortillas
Heat tortillas briefly in a dry skillet or wrapped in a clean kitchen towel in the oven until soft and pliable.
4. Assemble the wraps
Spoon chickpea salad down the center of each tortilla, top with tabbouleh, and add any extras you love. Roll tightly and serve whole or sliced in half.
Tips & Variations
Add shredded romaine or baby arugula for extra crunch
Swap bulgur-style tabbouleh for quinoa if you want more heft
Make both fillings ahead and assemble just before serving
These are great cold, but exceptional with warm tortillas
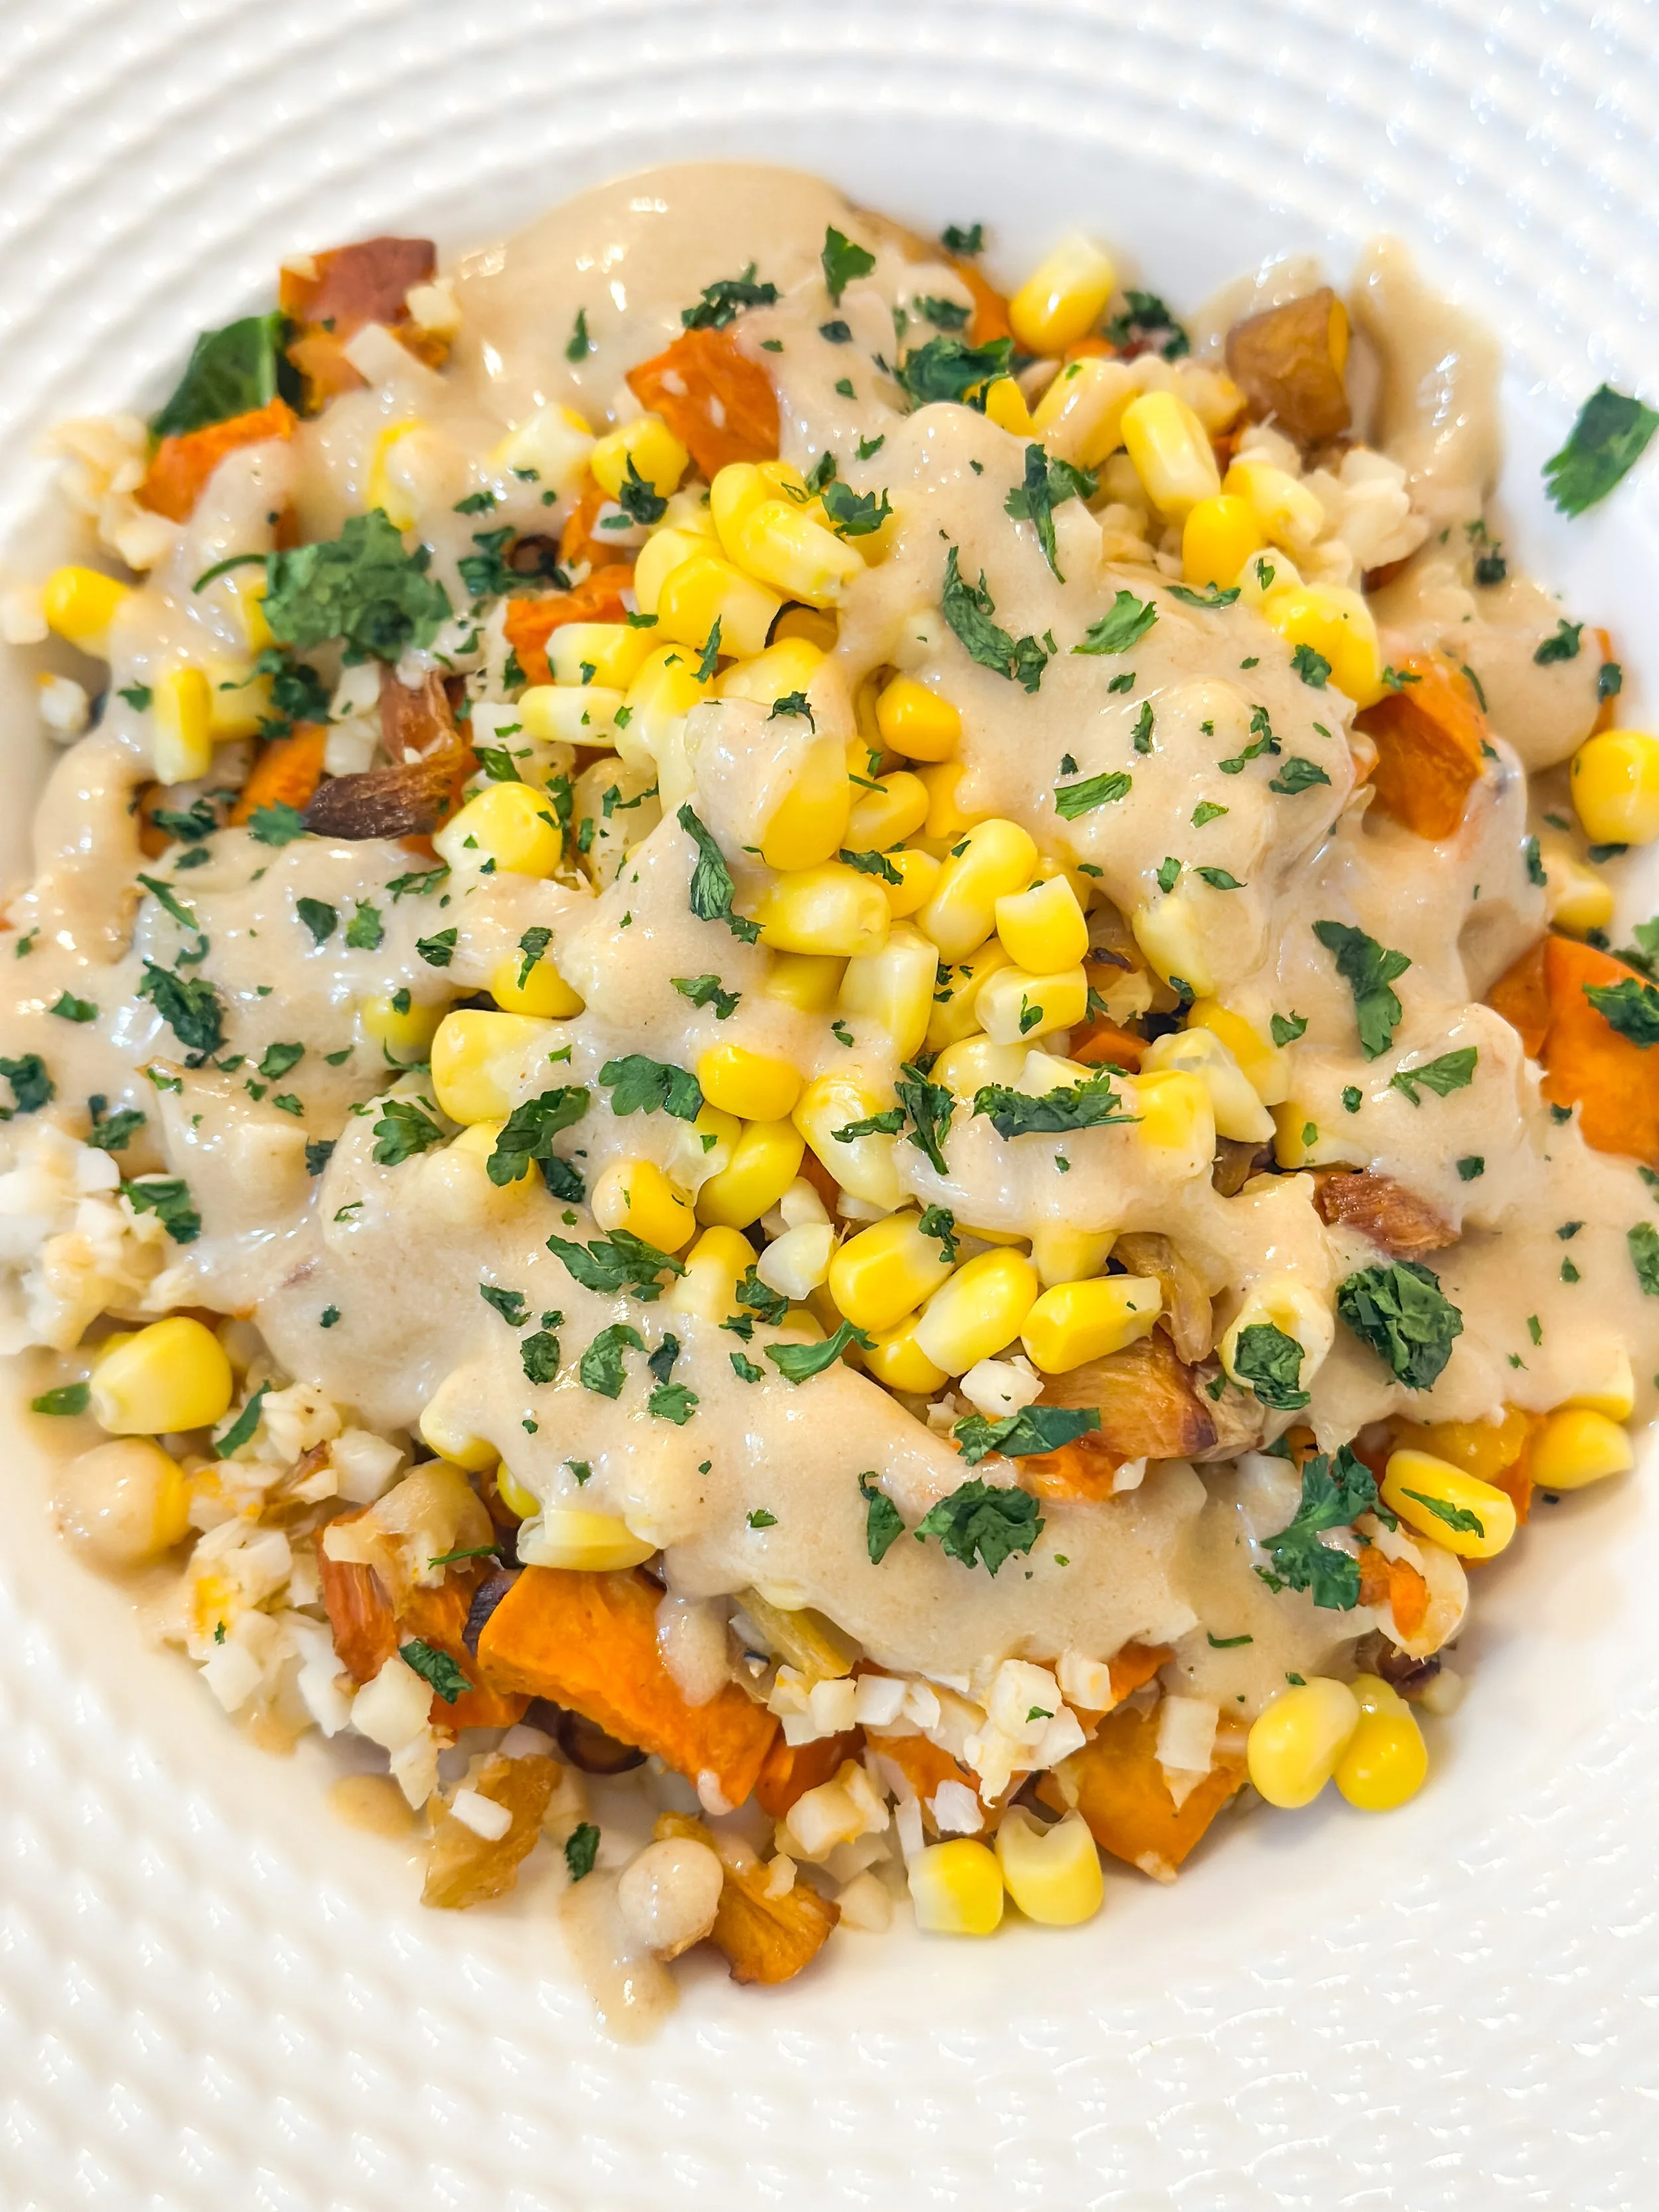
Winter Harvest Bowl with Creamy Maple Tahini
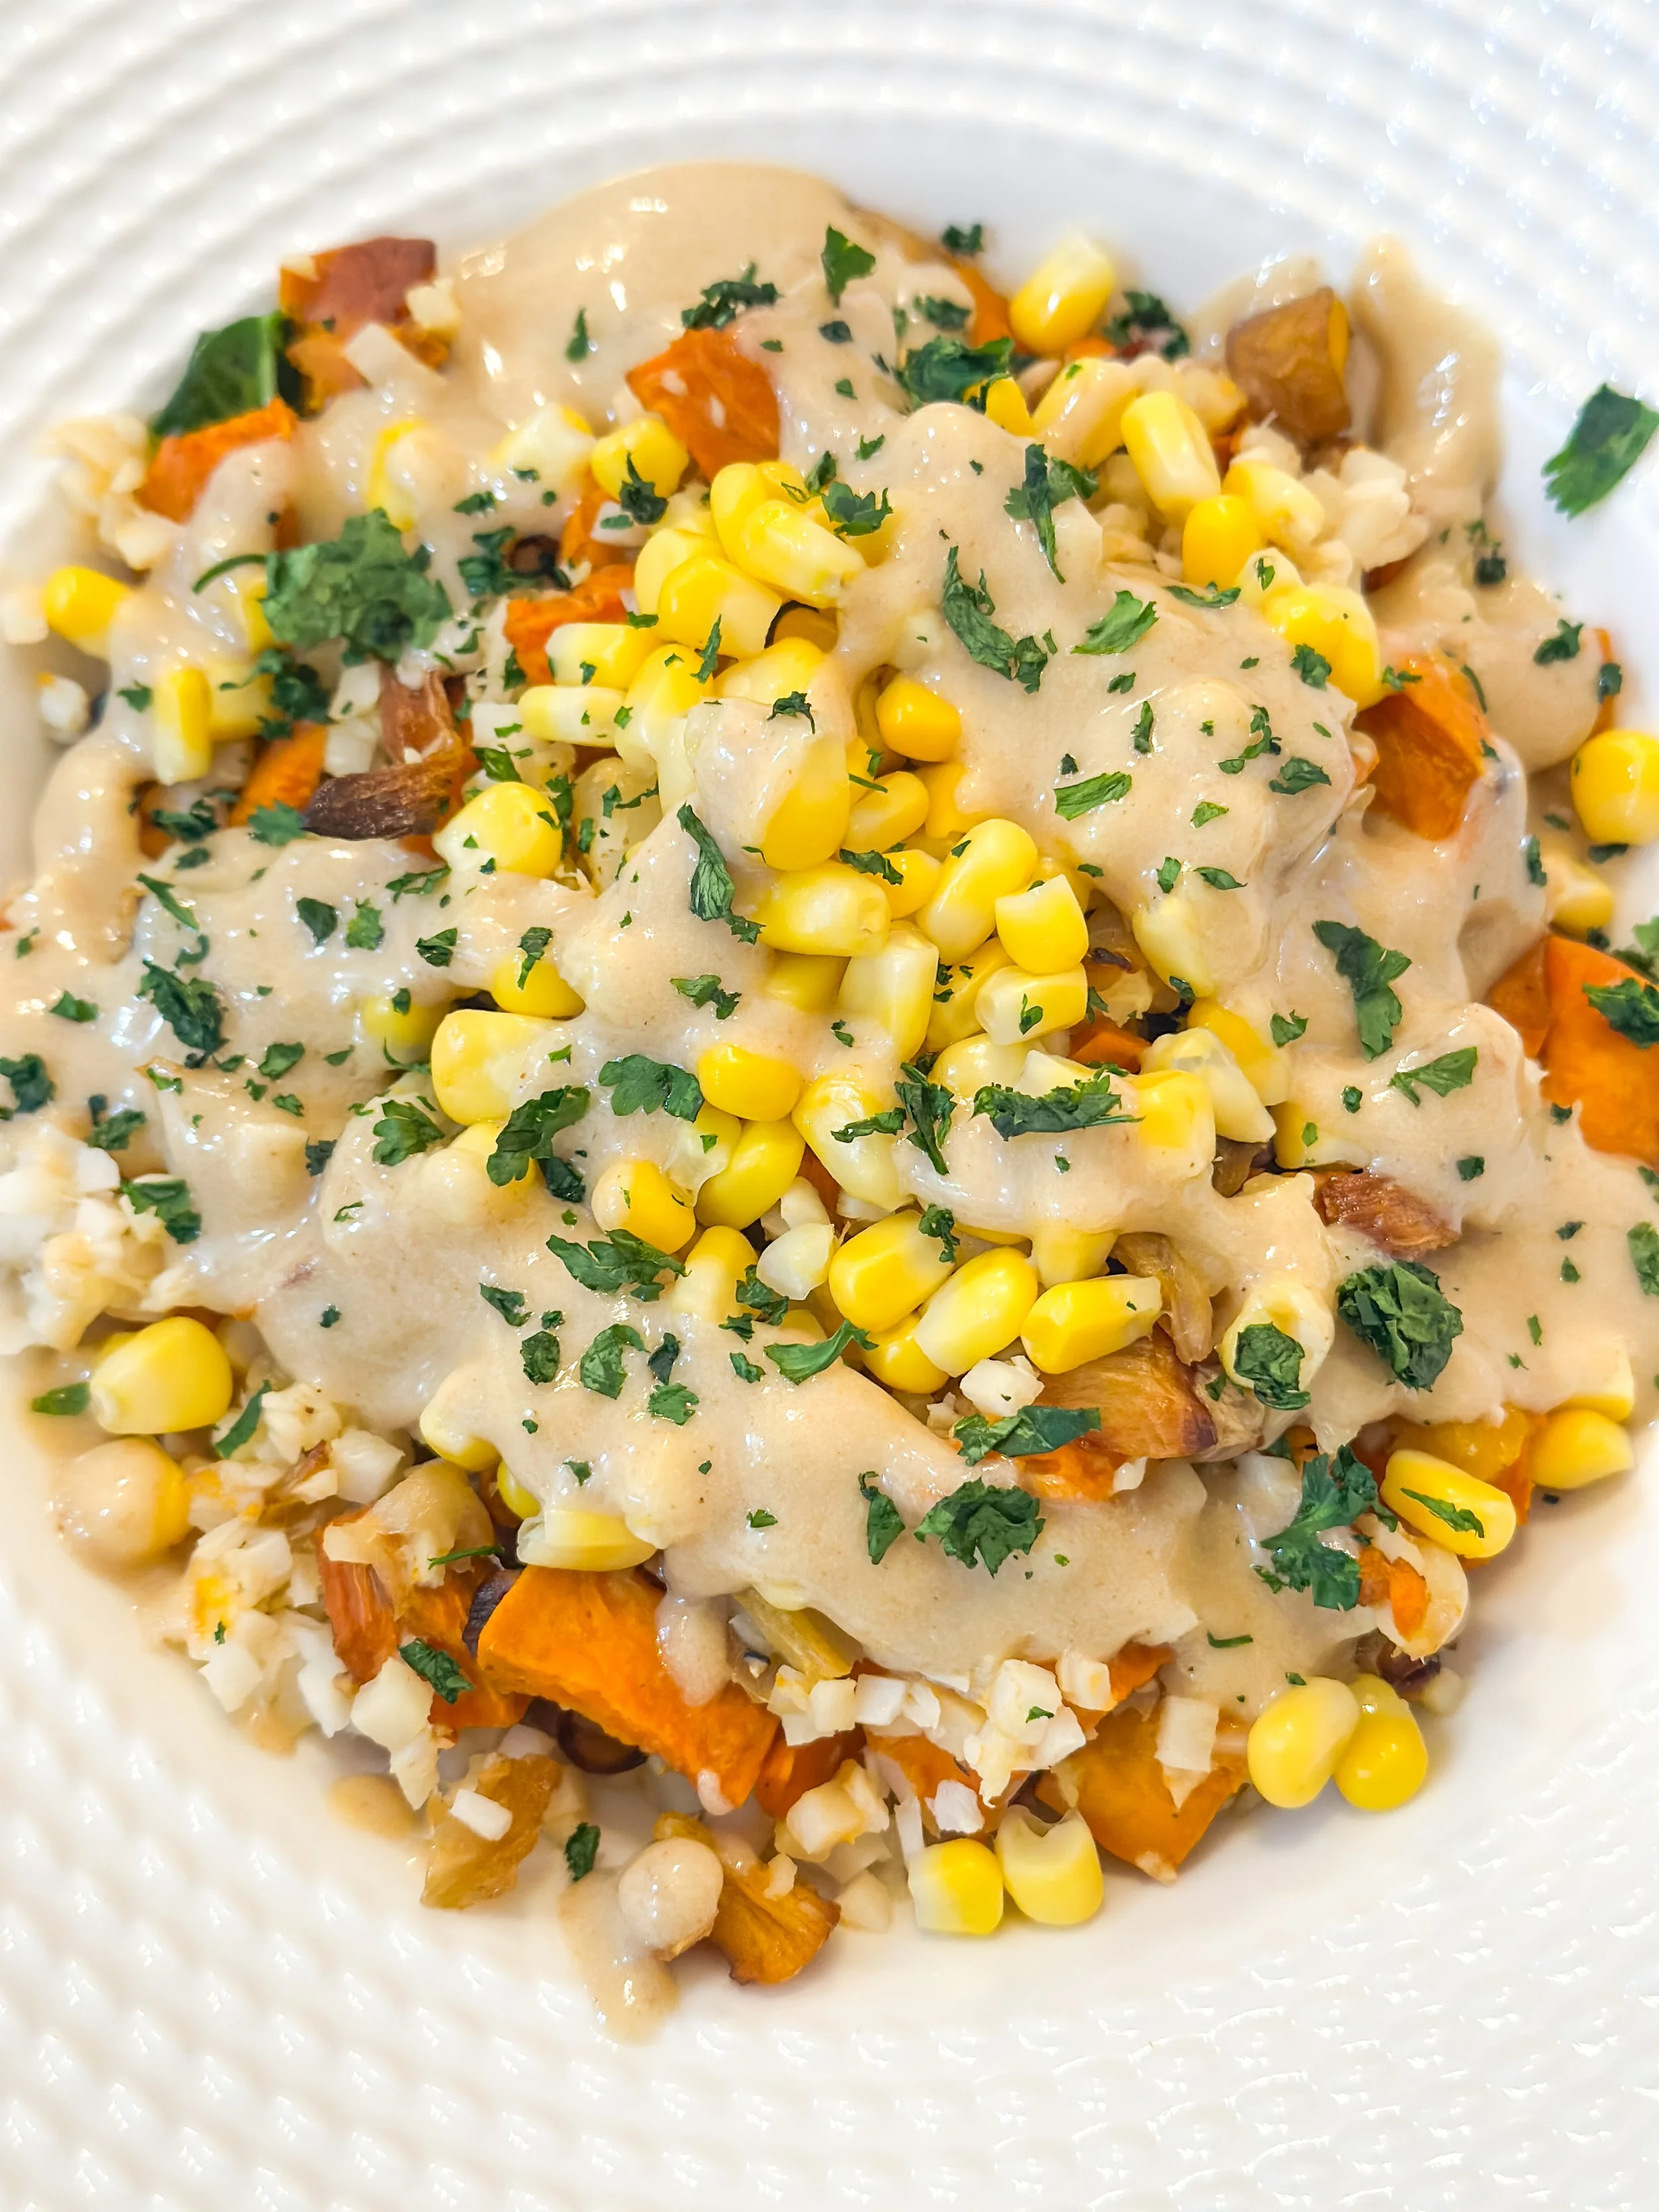
With February here, I’m leaning into simple, cozy bowls made with winter vegetables that are easy to find and easy to love. This Winter Harvest Bowl is built around roasted sweet potatoes, carrots, onion, and corn, served over Palmini rice and finished with a creamy maple tahini dressing.
It’s the kind of meal that works just as well for a weeknight dinner as it does for make-ahead lunches — comforting without being heavy, nourishing without trying too hard.
This bowl includes 7 different plants, making it naturally fiber-rich, balanced, and satisfying.
Why this bowl works
Sweet potatoes & carrots are winter staples and rich in beta-carotene, supporting skin and immune health
Onions add depth and flavor as they caramelize in the oven
Corn brings contrast and a touch of natural sweetness
Palmini rice, made from hearts of palm, keeps the base light while still feeling hearty
Tahini adds healthy fats and creaminess without dairy
Ingredients (serves 2–3)
Roasted vegetables
1 medium sweet potato, peeled and diced
2–3 carrots, sliced into coins or half-moons
1 small onion, sliced
1 cup corn (fresh or frozen, thawed)
Olive oil
Kosher salt and black pepper
Base
1 package Palmini rice, rinsed and drained
Creamy maple tahini dressing
¼ cup tahini
1½ tablespoons maple syrup
1–2 tablespoons lemon juice
1 small garlic clove, grated (optional)
Warm water, to thin
Salt, to taste
Instructions
Roast the vegetables
Preheat oven to 425°F.
Toss sweet potatoes, carrots, onion, and corn with olive oil, salt, and pepper. Spread evenly on a sheet pan and roast for 25–30 minutes, flipping once, until tender and lightly caramelized.Prepare the Palmini rice
Rinse and drain the Palmini rice well. Warm in a skillet over medium heat with a drizzle of olive oil and a pinch of salt for 3–4 minutes, until heated through.Make the maple tahini dressing
Whisk tahini, maple syrup, lemon juice, garlic (if using), and salt. Add warm water a tablespoon at a time until smooth and pourable.Assemble the bowls
Spoon Palmini rice into bowls, top with roasted vegetables, and drizzle with the maple tahini dressing.
Variations & swaps
Add chickpeas or white beans for extra protein
Swap Palmini rice for quinoa, farro, or brown rice
Finish with red pepper flakes or chili crisp for heat
Add fresh herbs (parsley or cilantro) if you have them
Make-ahead tips
Roast vegetables and dressing can be made up to 3 days ahead
Store components separately for best texture
Dressing may thicken in the fridge — thin with warm water before serving
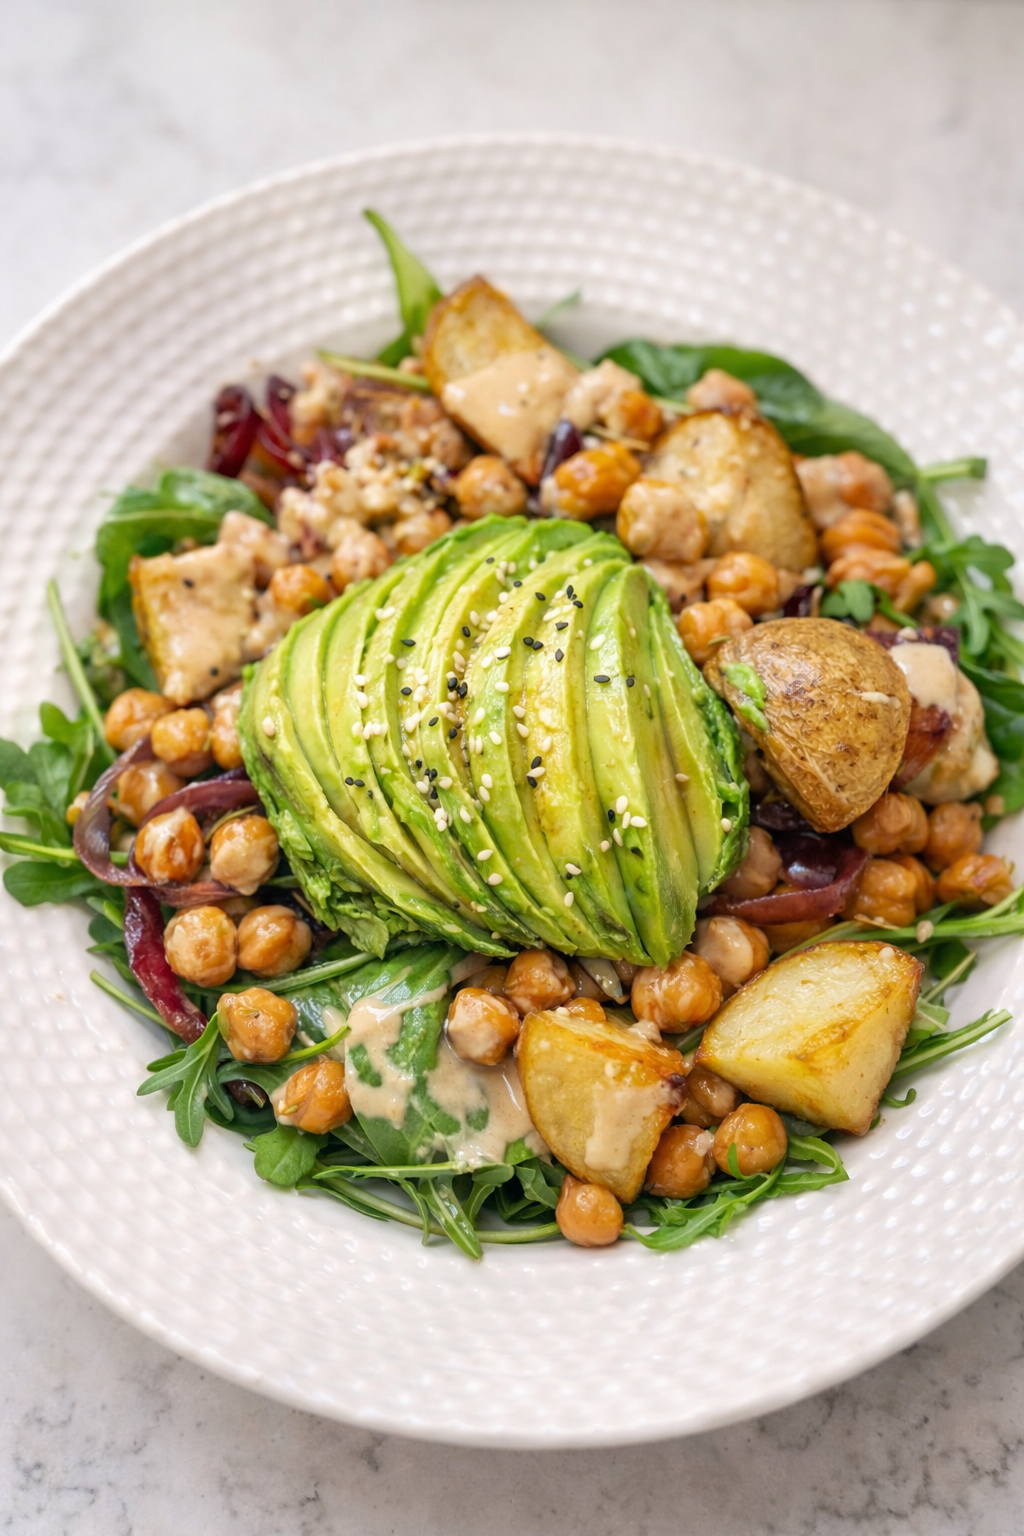
Dijon Tahini Roasted Veggie Bowl
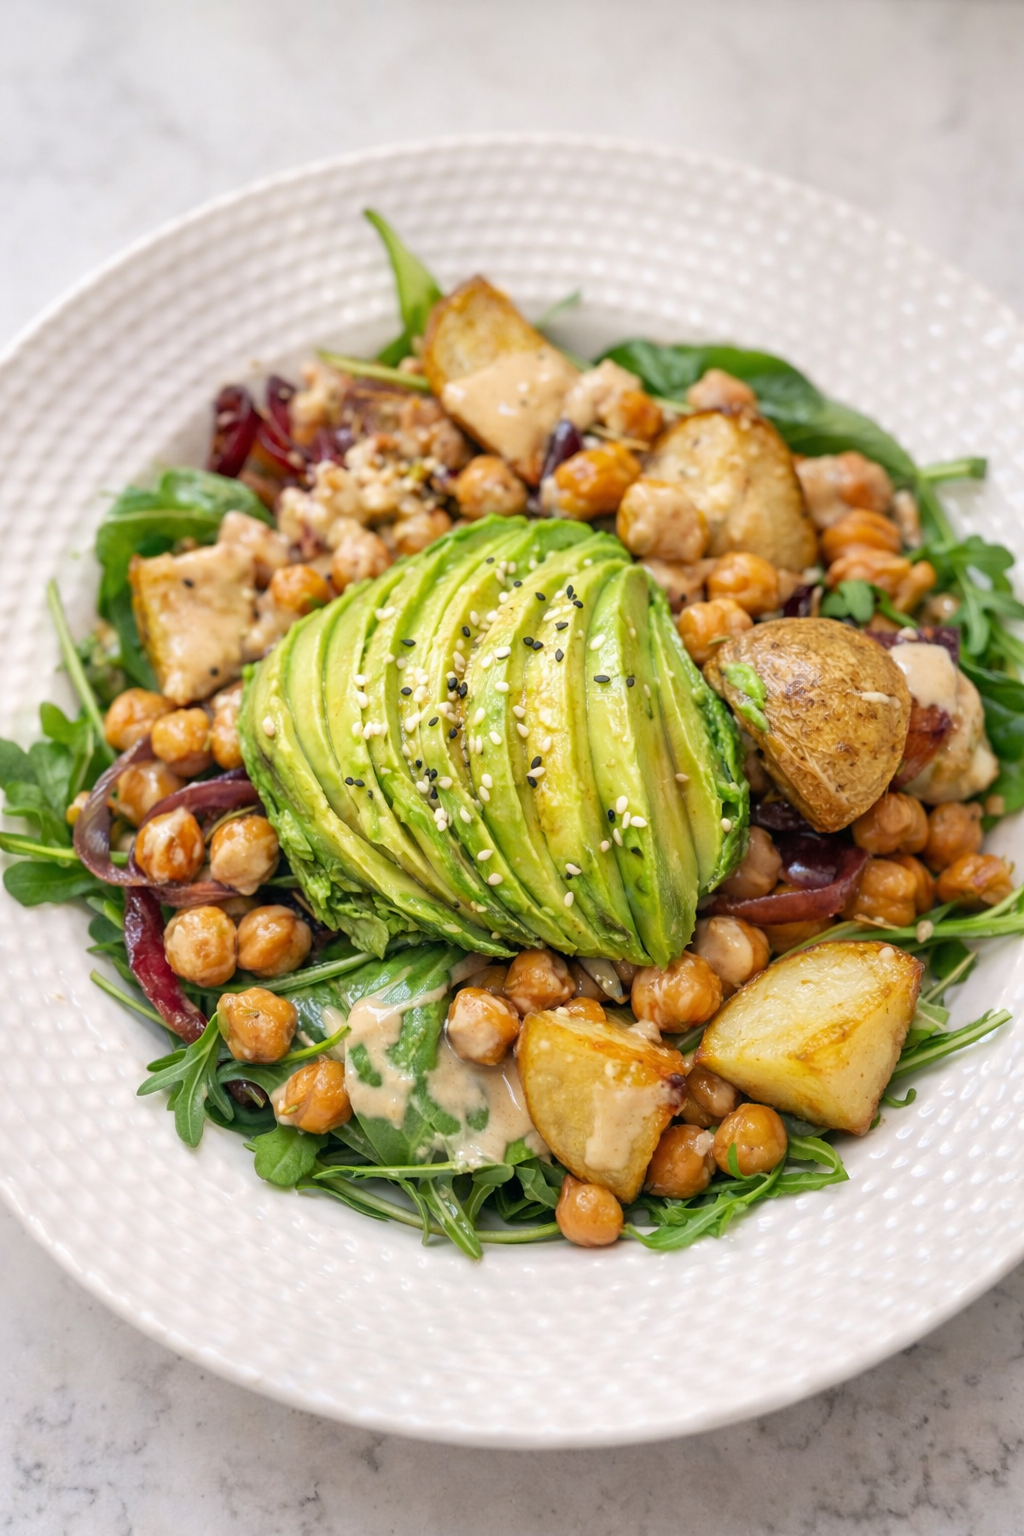
This Dijon Tahini Roasted Veggie Bowl is one of those recipes that quietly becomes a staple. It’s simple, flexible, and deeply satisfying — the kind of meal that works just as well for a quick lunch as it does for an easy, feel-good dinner.
Crispy rosemary-roasted potatoes and chickpeas come straight off the sheet pan and land on a bed of fresh greens, finished with creamy avocado slices and a generous drizzle of Dijon tahini. Warm, fresh, savory, and balanced — no complicated steps, just good ingredients doing their thing.
Why You’ll Love This Bowl
One sheet pan + one bowl
Cozy but still fresh and light
Pantry-friendly ingredients
Naturally plant-based and filling
Easy to customize based on what you have
Ingredients
For the Roasted Veggies
1½–2 lbs baby potatoes, halved
1 can chickpeas, drained, rinsed, and patted dry
1 small red onion, sliced into wedges
3 tbsp olive oil
2–3 cloves garlic, minced or smashed
1½ tbsp fresh rosemary, finely chopped
(or 1 tsp dried)Salt and black pepper
Optional: ½ tsp smoked paprika
For the Bowl
Mixed greens, arugula, or baby spinach
1–2 ripe avocados, sliced
For the Dijon Tahini Sauce
¼ cup tahini
1–2 tbsp Dijon mustard (to taste)
2 tbsp lemon juice
1 small clove garlic, finely grated (optional)
2–4 tbsp warm water
Salt, to taste
Instructions
1. Roast the Potatoes & Chickpeas
Preheat your oven to 425°F and line a large sheet pan with parchment paper.
Add the potatoes, chickpeas, red onion, olive oil, garlic, rosemary, salt, pepper, and smoked paprika (if using) to the pan. Toss well to coat everything evenly, then spread into a single layer.
Roast for 30–35 minutes, flipping once halfway through, until the potatoes are tender and golden and the chickpeas are lightly crisp.
2. Make the Dijon Tahini Sauce
In a small bowl, whisk together the tahini, Dijon mustard, lemon juice, and garlic (if using). The mixture will thicken at first — this is normal.
Slowly whisk in warm water, one tablespoon at a time, until the sauce is smooth and drizzleable. Season with salt and adjust lemon or Dijon to taste.
3. Assemble the Bowl
Add a generous handful of greens to each bowl. Top with the warm roasted potatoes and chickpeas, then layer on avocado slices.
Drizzle with the Dijon tahini sauce and finish with cracked black pepper or fresh herbs if you like.
Serve immediately while the veggies are warm.
Tips & Variations
Massage the greens with a little olive oil and lemon if they’re hearty
Add grains like rice, farro, or quinoa for a more filling bowl
Kid-friendly option: serve the sauce on the side
Meal prep: roast the veggies and make the sauce ahead; assemble fresh
This is the kind of bowl you can come back to again and again — simple, nourishing, and endlessly adaptable.
If you make it, I’d love to see how you serve it 💚
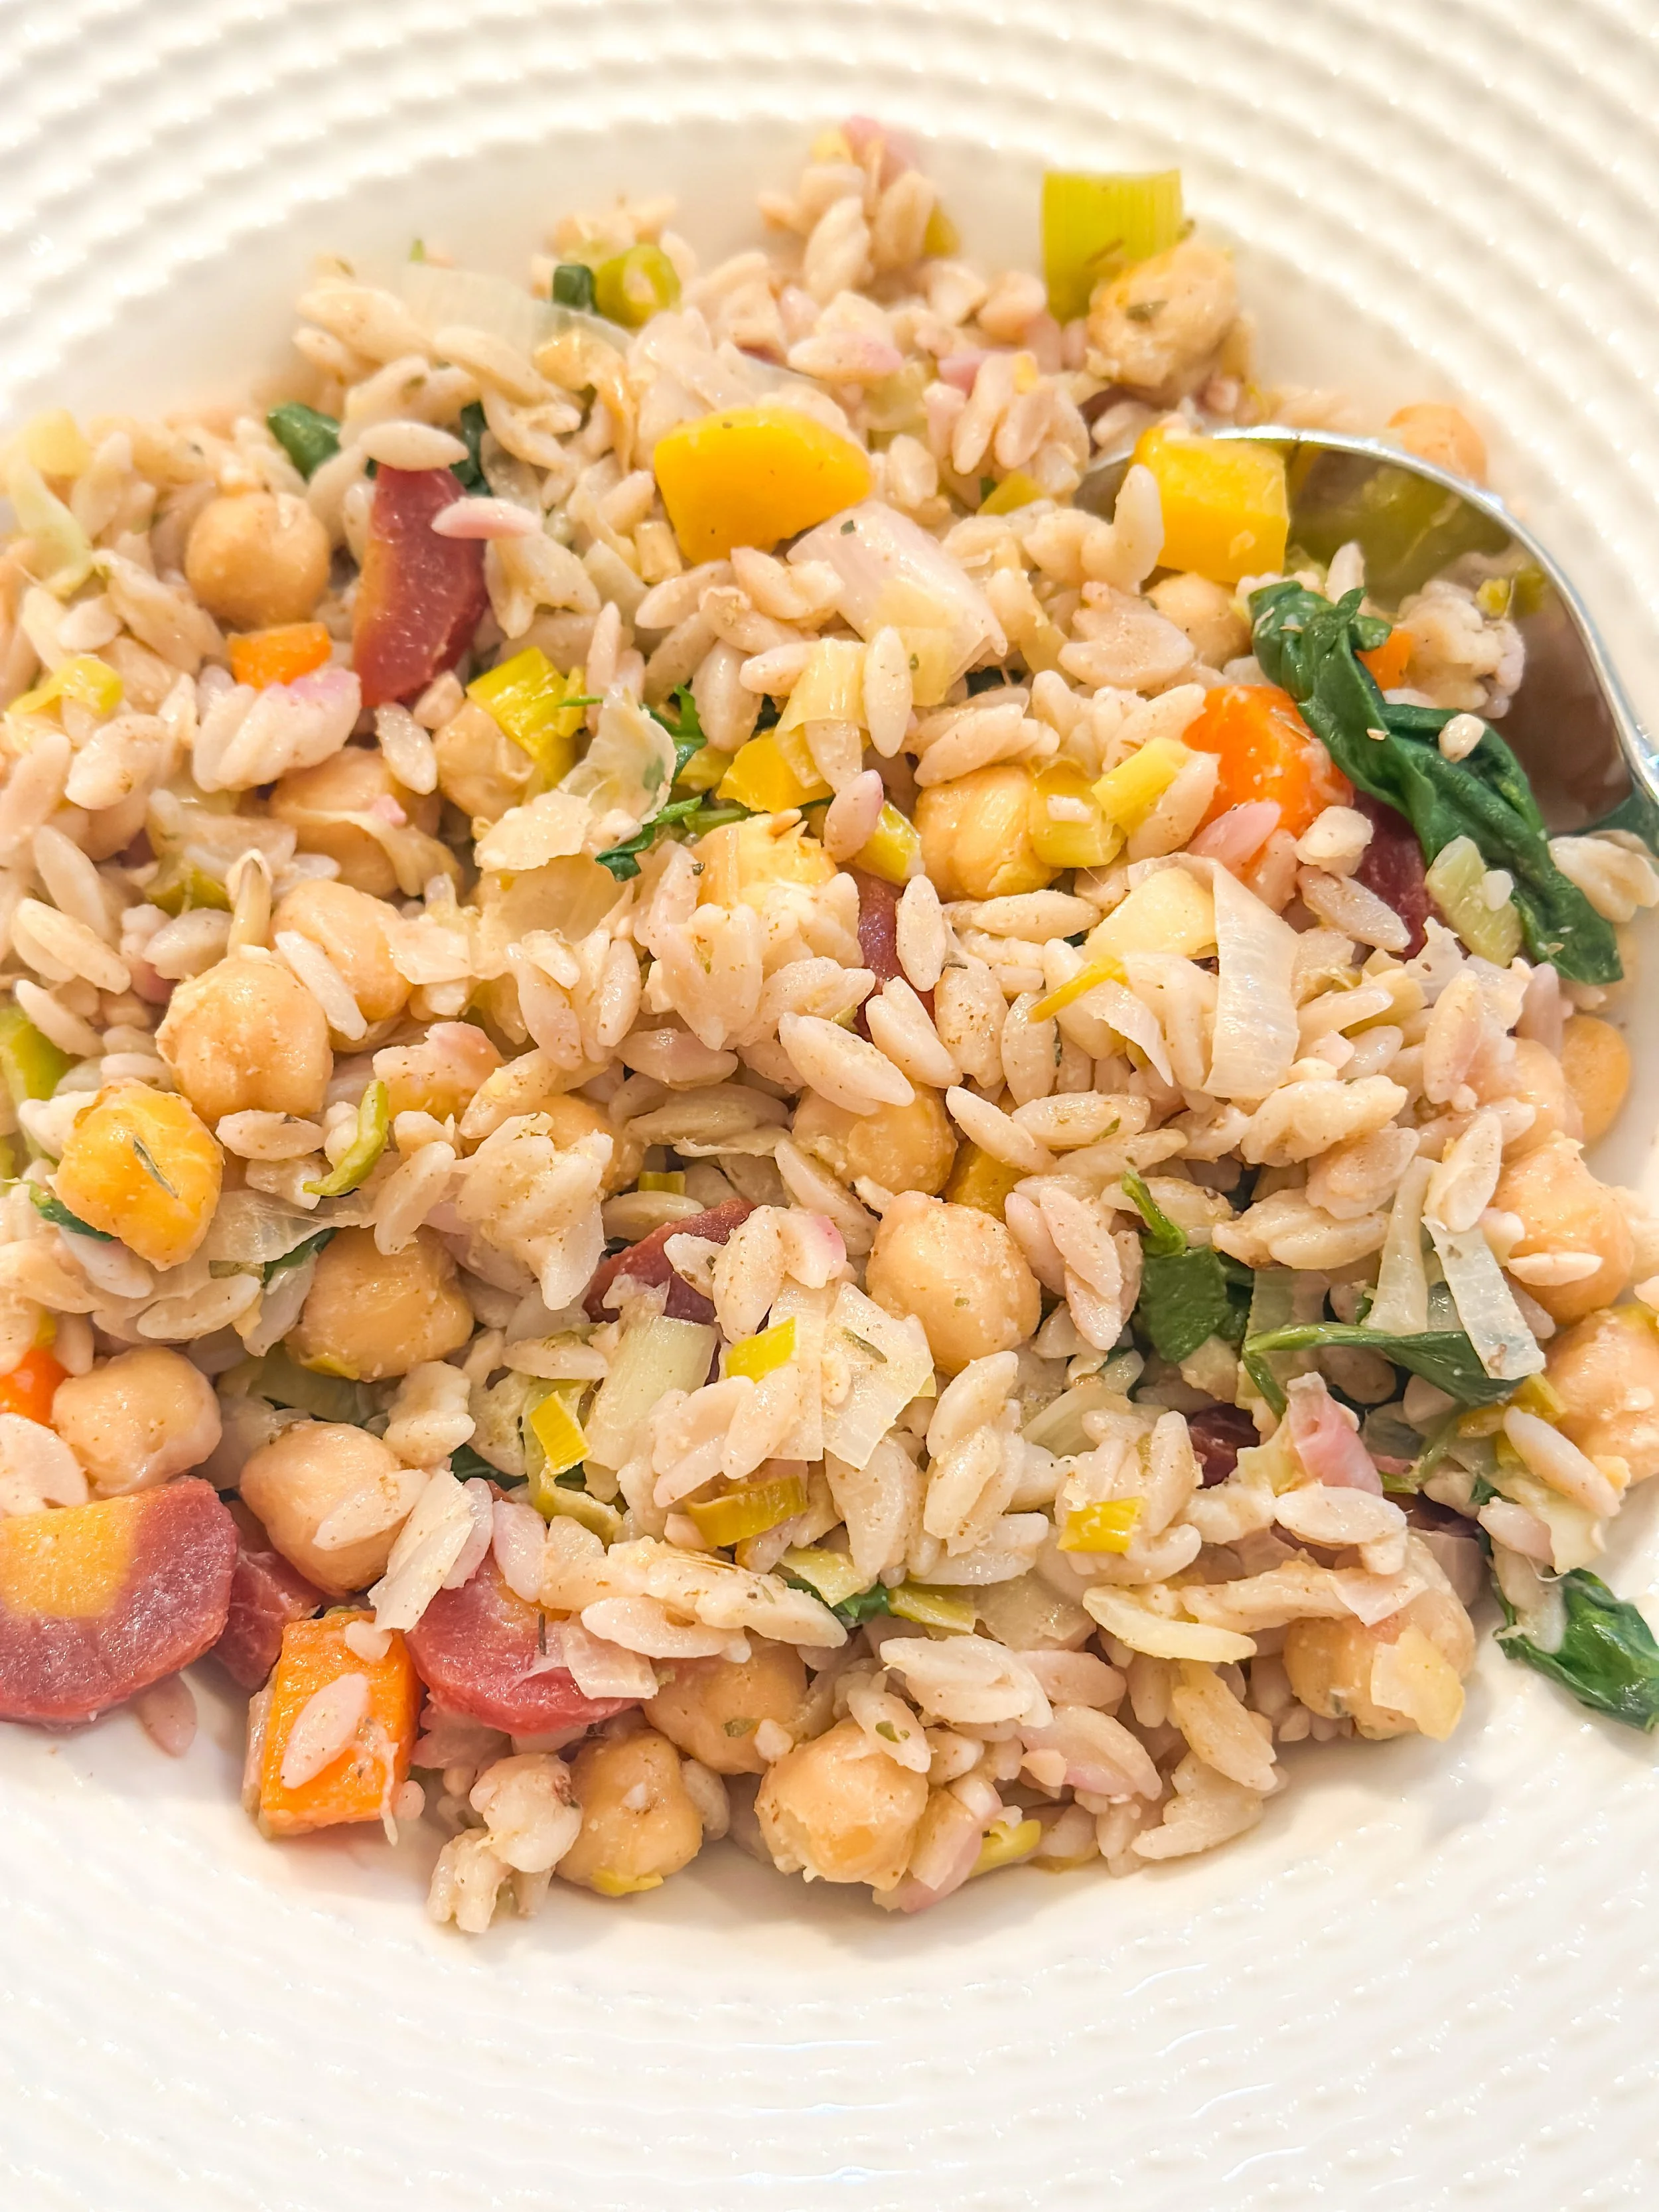
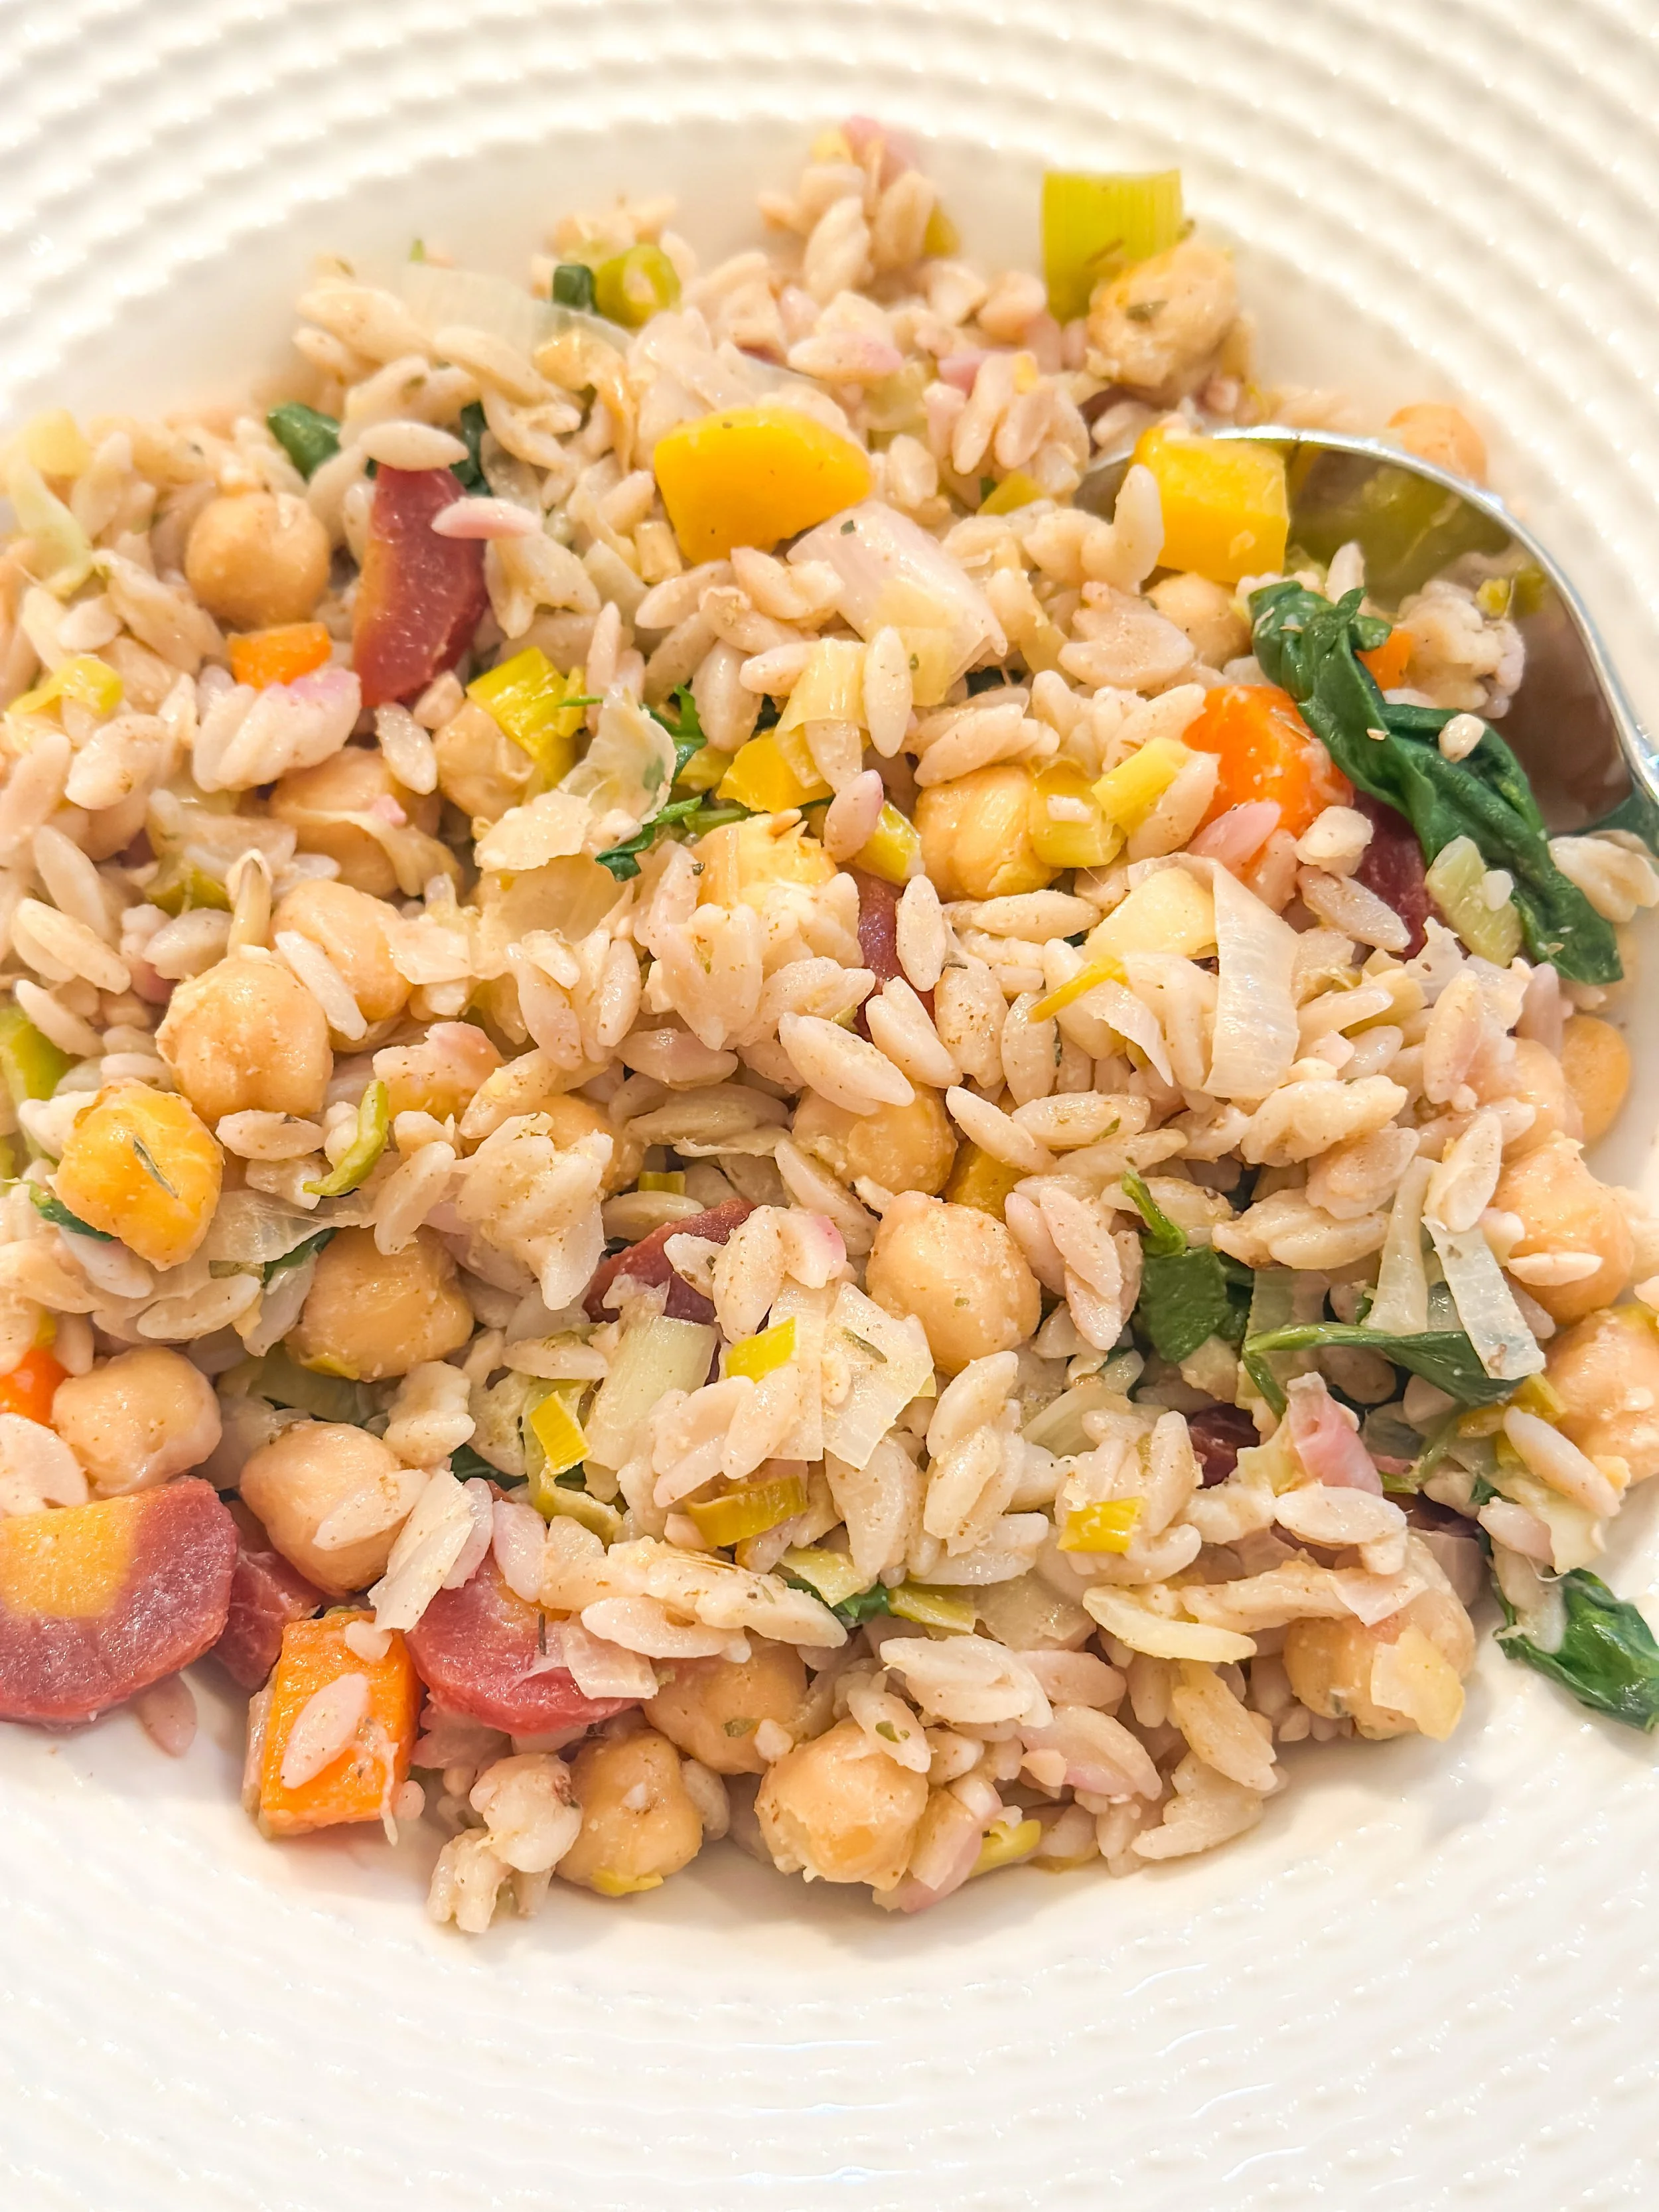
Lemon Leek Glow Orzo (with Chickpeas & Rainbow Carrots)
Vegan • Easily Gluten-Free • Weeknight-Friendly
There’s something about winter cooking that makes me crave food that feels cozy but still bright — comforting enough for cold days, but not heavy. This Lemon Leek Glow Orzo hits that sweet spot perfectly.
It’s built around leeks, one of my favorite cold-weather vegetables. They peak in late fall through winter and early spring, and when you cook them slowly, they turn soft, sweet, and almost jammy — the kind of flavor that makes a simple dish feel special without much effort.
Add in rainbow carrots for color, chickpeas for staying power, tender orzo, and lots of lemon, and you’ve got a one-pan meal that feels nourishing, fresh, and deeply satisfying.
This is the kind of recipe you make once… and then keep coming back to.
Why Leeks?
Leeks are part of the allium family (like onions and garlic), but they’re milder and slightly sweet — especially when cooked low and slow. They’re also rich in prebiotic fiber, which supports gut health, plus antioxidants and vitamin K. In other words: cozy and nourishing.
Ingredients
1 cup orzo (gluten-free or regular)
2 leeks, thinly sliced (white + light green parts)
1 cup rainbow carrots, thinly sliced
1 can chickpeas, drained and rinsed
2–3 cups baby spinach
1 lemon (zest + juice)
Olive oil
Salt & black pepper
1 teaspoon Dijon mustard (this is the secret ingredient that takes the flavor over the top!)
Fresh herbs (parsley, dill, or chives)
Red pepper flakes (optional)
How to Make It
Cook the orzo according to package instructions. Drain and set aside.
Heat olive oil in a large skillet over medium heat. Add the sliced leeks and a pinch of salt. Cook slowly, stirring occasionally, until soft and lightly golden — about 8–10 minutes.
Add the rainbow carrots and cook for another 3–4 minutes, until just tender.
Stir in the chickpeas, black pepper, and a pinch of red pepper flakes if using. Let everything warm through.
Add the cooked orzo to the skillet and toss to combine.
Fold in the spinach and let it wilt.
Finish with lemon zest, lemon juice, and the Dijon mustard. Drizzle with olive oil and adjust seasoning to taste.
Serve warm, with extra lemon if you like things bright.
Make It Your Own
This recipe is incredibly flexible:
Use regular orzo if gluten-free isn’t needed
Swap chickpeas for white beans or another protein of your choice
Toss in other seasonal veggies you love
Cozy, Bright, and Nourishing
This Lemon Leek Glow Orzo is proof that simple ingredients can still feel exciting. It’s cozy enough for winter nights, brightened up with lemon, and packed with seasonal produce that makes you feel good after you eat it.
If you make it, I’d love to hear how you customize it 🤍
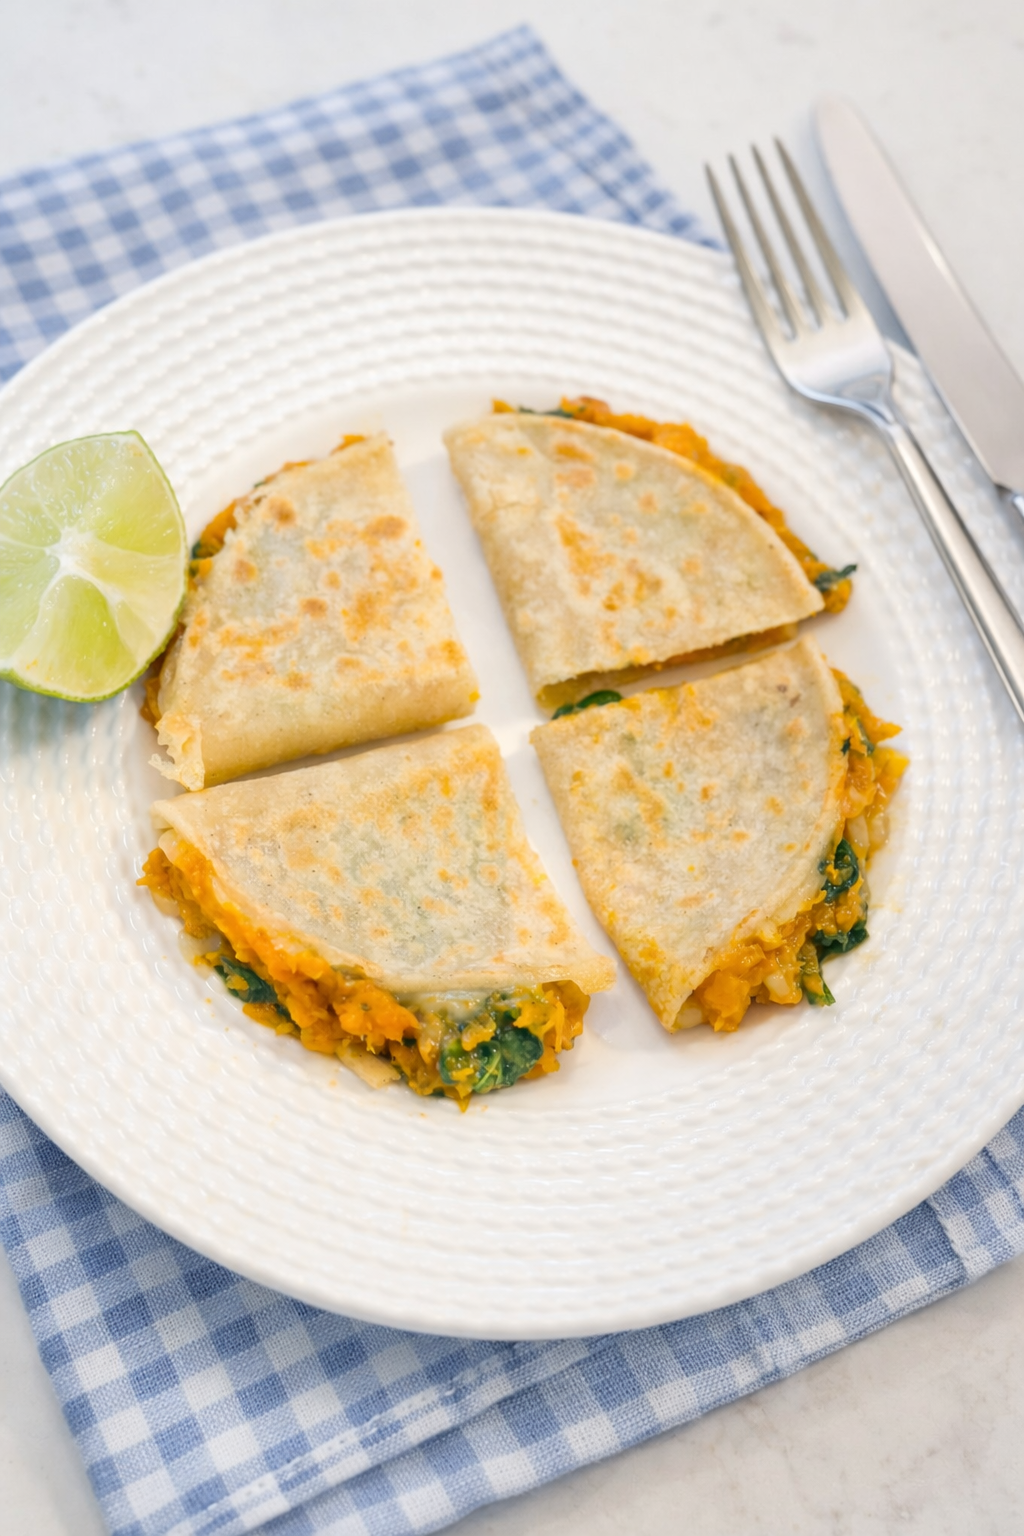
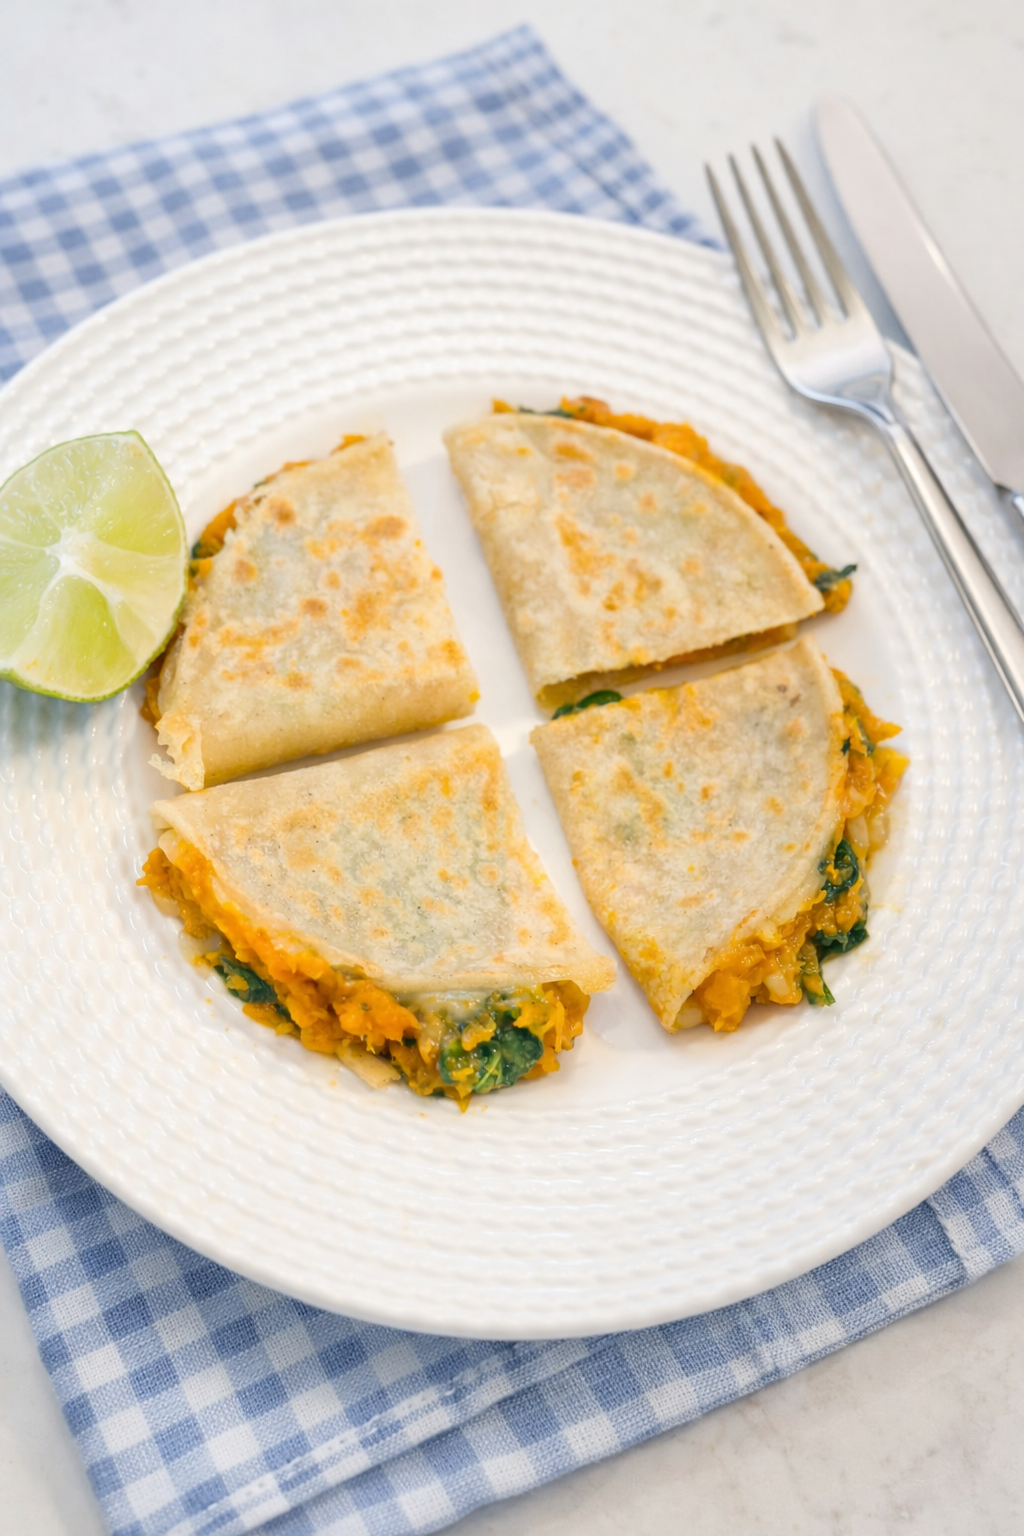
Butternut Squash, Spinach & Corn Quesadillas
There’s something about a snow day that calls for comfort food that doesn’t require a lot of effort. In between sledding, skiing, or just being outside in the cold, this is the kind of dinner that hits just right—warm, cozy, and easy enough to pull together without much thought.
These butternut squash quesadillas are one of those meals that feels both nourishing and comforting. Roasted squash gets lightly mashed and mixed with sweet corn, wilted spinach, and warm spices, then folded into tortillas with melty vegan cheese and crisped until golden. They’re kid-friendly, adult-approved, and perfect for those nights when you want something satisfying without a big production.
Simple ingredients. Cozy flavors. Exactly what you want waiting when everyone comes back inside.
Ingredients
2 cups butternut squash, peeled and cubed
Olive oil
Salt and pepper
½ teaspoon cumin
¼ teaspoon garlic powder
¾ cup corn (fresh or frozen, thawed)
2 cups fresh spinach, chopped
Shredded vegan cheese (I love using Violife for its meltiness
Flour tortillas
Optional for serving: avocado slices, guacamole, vegan sour cream, salsa
Instructions
1. Roast the butternut squash
Preheat the oven to 425°F. Toss the cubed squash with olive oil, salt, pepper, and cumin. Spread on a baking sheet and roast for 25–30 minutes, until tender and lightly caramelized.
2. Mash the filling
Transfer the roasted squash to a bowl and lightly mash with a fork. You want it mostly creamy with a little texture.
3. Add the veggies
Stir in the corn and garlic powder. In a skillet, quickly sauté the spinach just until wilted, then fold it into the squash mixture. Taste and adjust seasoning as needed.
4. Assemble the quesadillas
Lay out a tortilla and spread a generous layer of the squash mixture on one half. Sprinkle with shredded vegan cheese and fold the tortilla over.
5. Cook until golden
Heat a skillet over medium heat with a little olive oil. Cook each quesadilla for 2–3 minutes per side, until golden brown and the cheese is melted.
6. Slice and serve
Cut into wedges and serve warm with your favorite toppings.
Serving Notes
Keep them simple and plain for kids
Add avocado, guacamole, or a drizzle of crema for adults
These are perfect alongside a simple green salad or a mug of soup on extra-cold days
Why You’ll Love This Recipe
Cozy and comforting without feeling heavy
Naturally plant-based and easy to customize
Perfect for snow days, winter weekends, or any busy weeknight
This is one of those recipes that quickly becomes part of the winter rotation—easy, reliable, and exactly what you want when it’s cold outside.
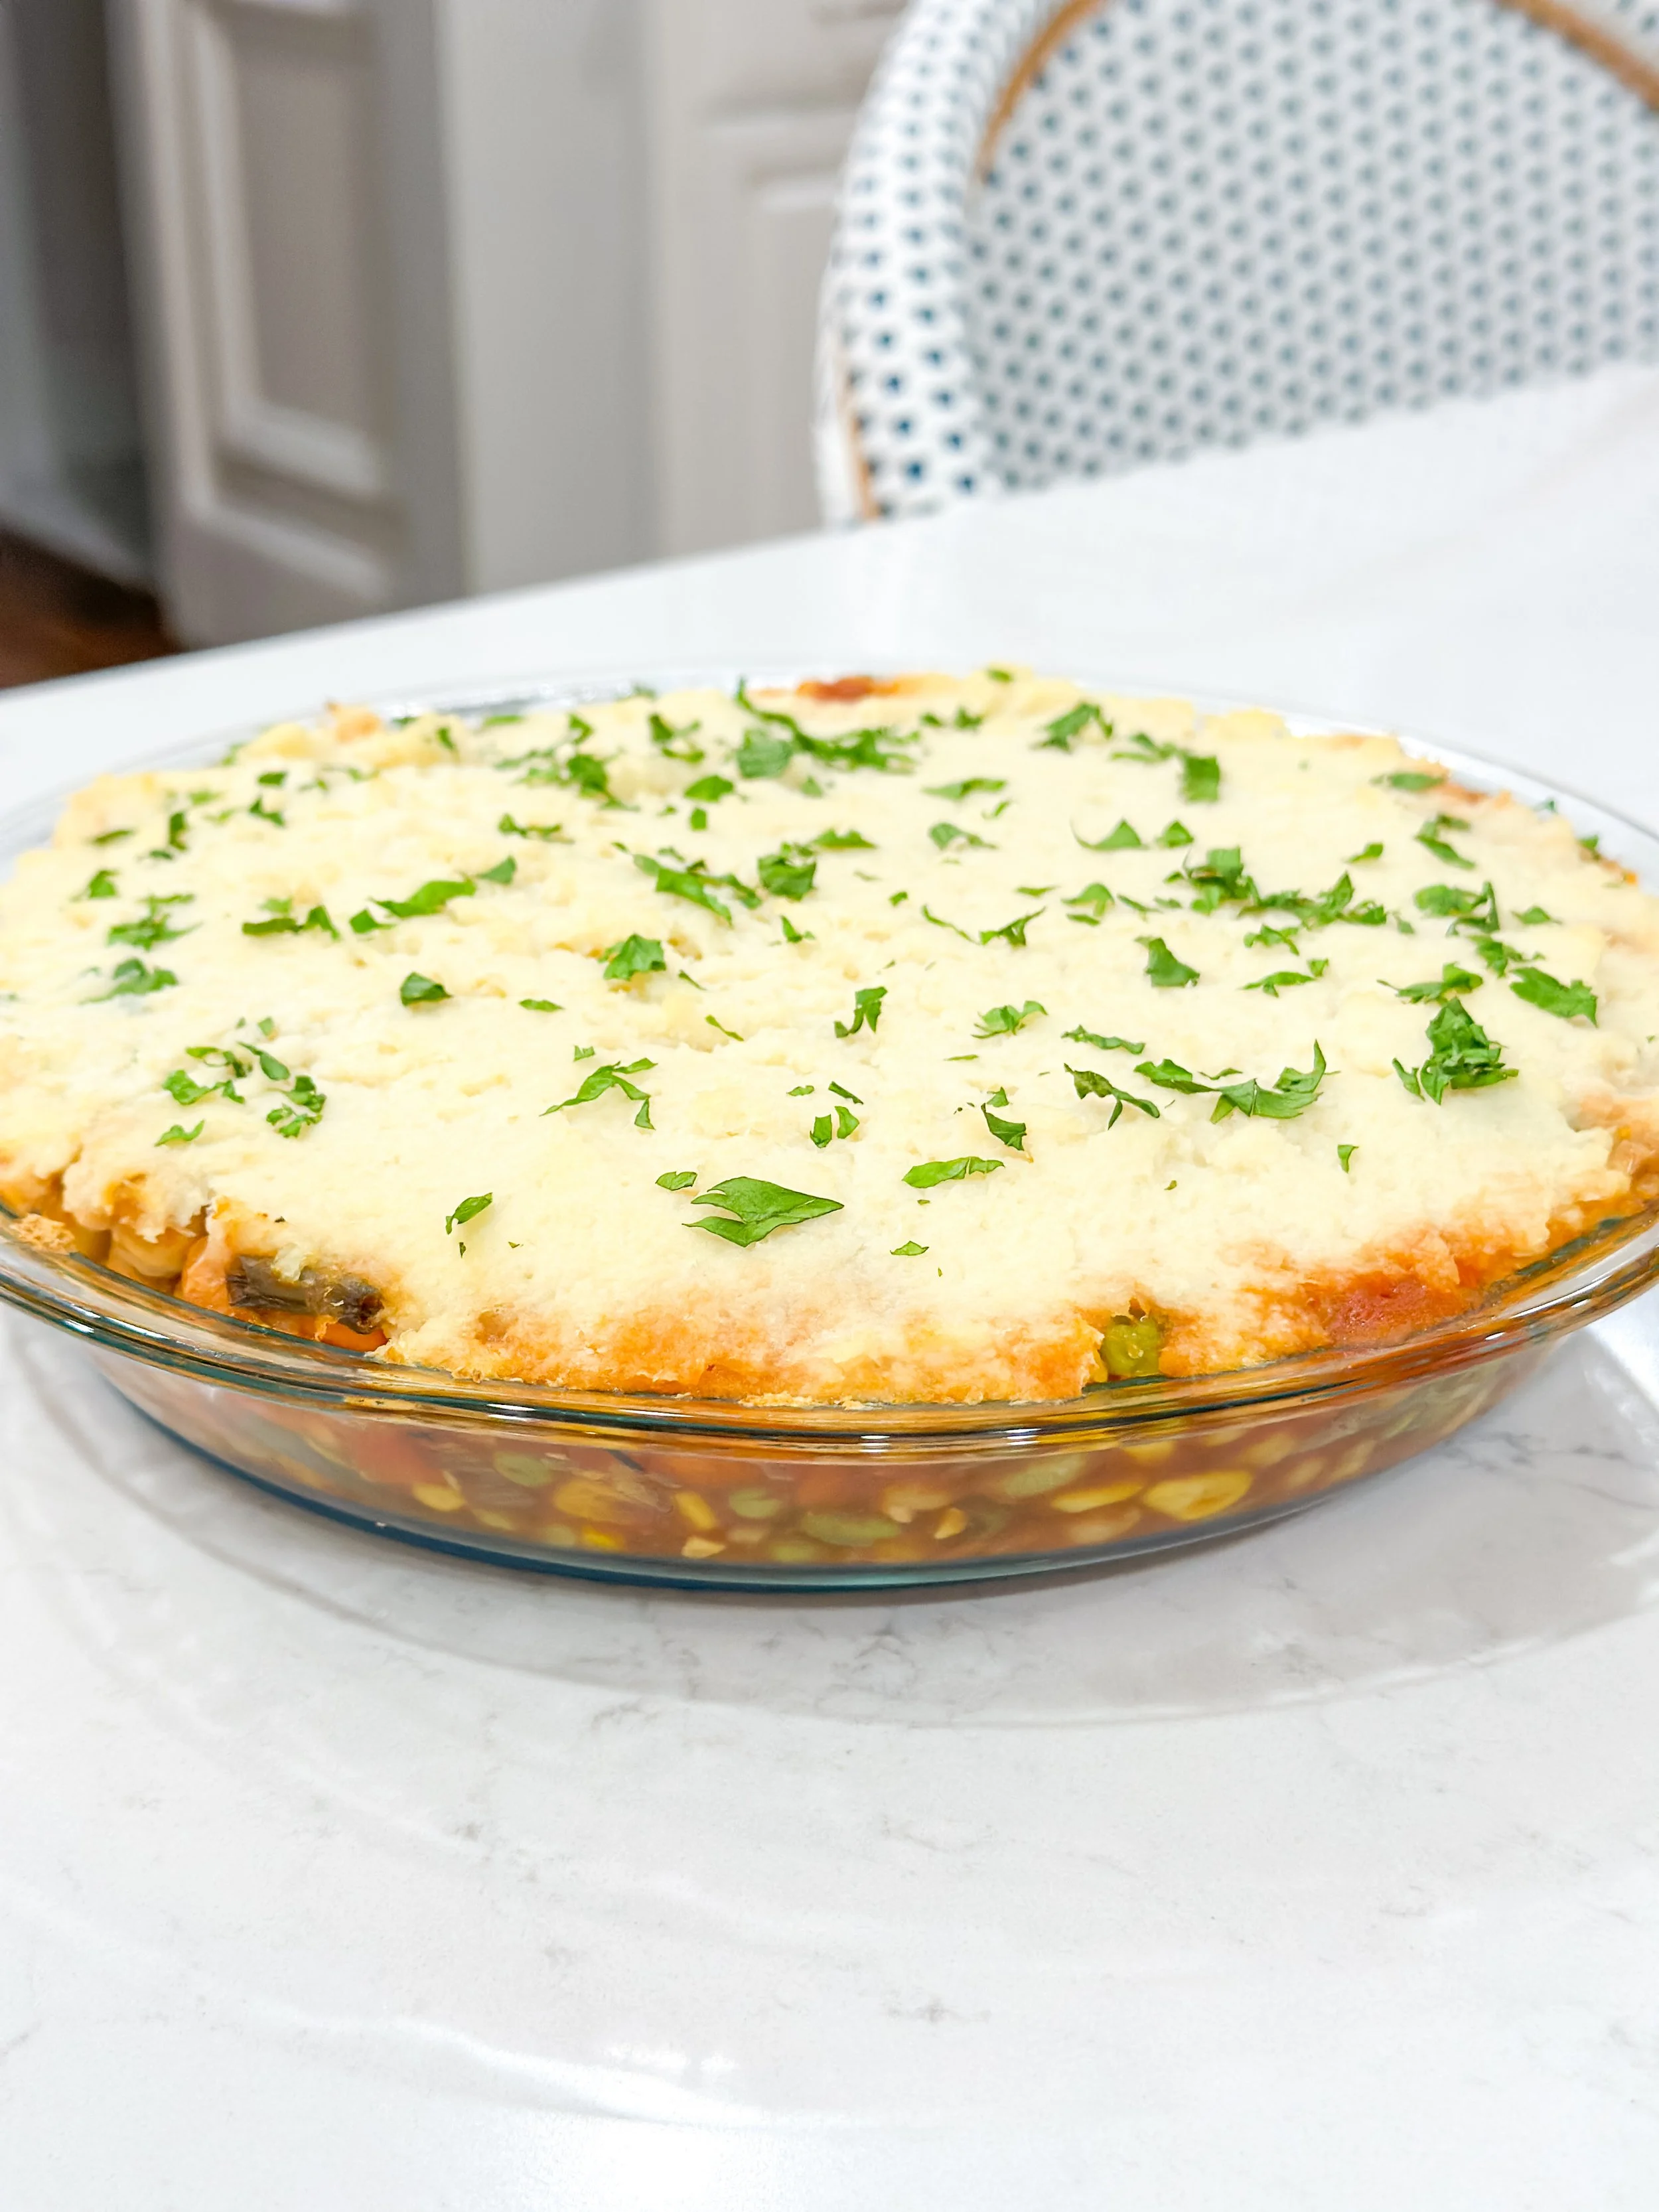
Chickpea & Veggie Cottage Pie (Plant-Based, Family-Friendly)
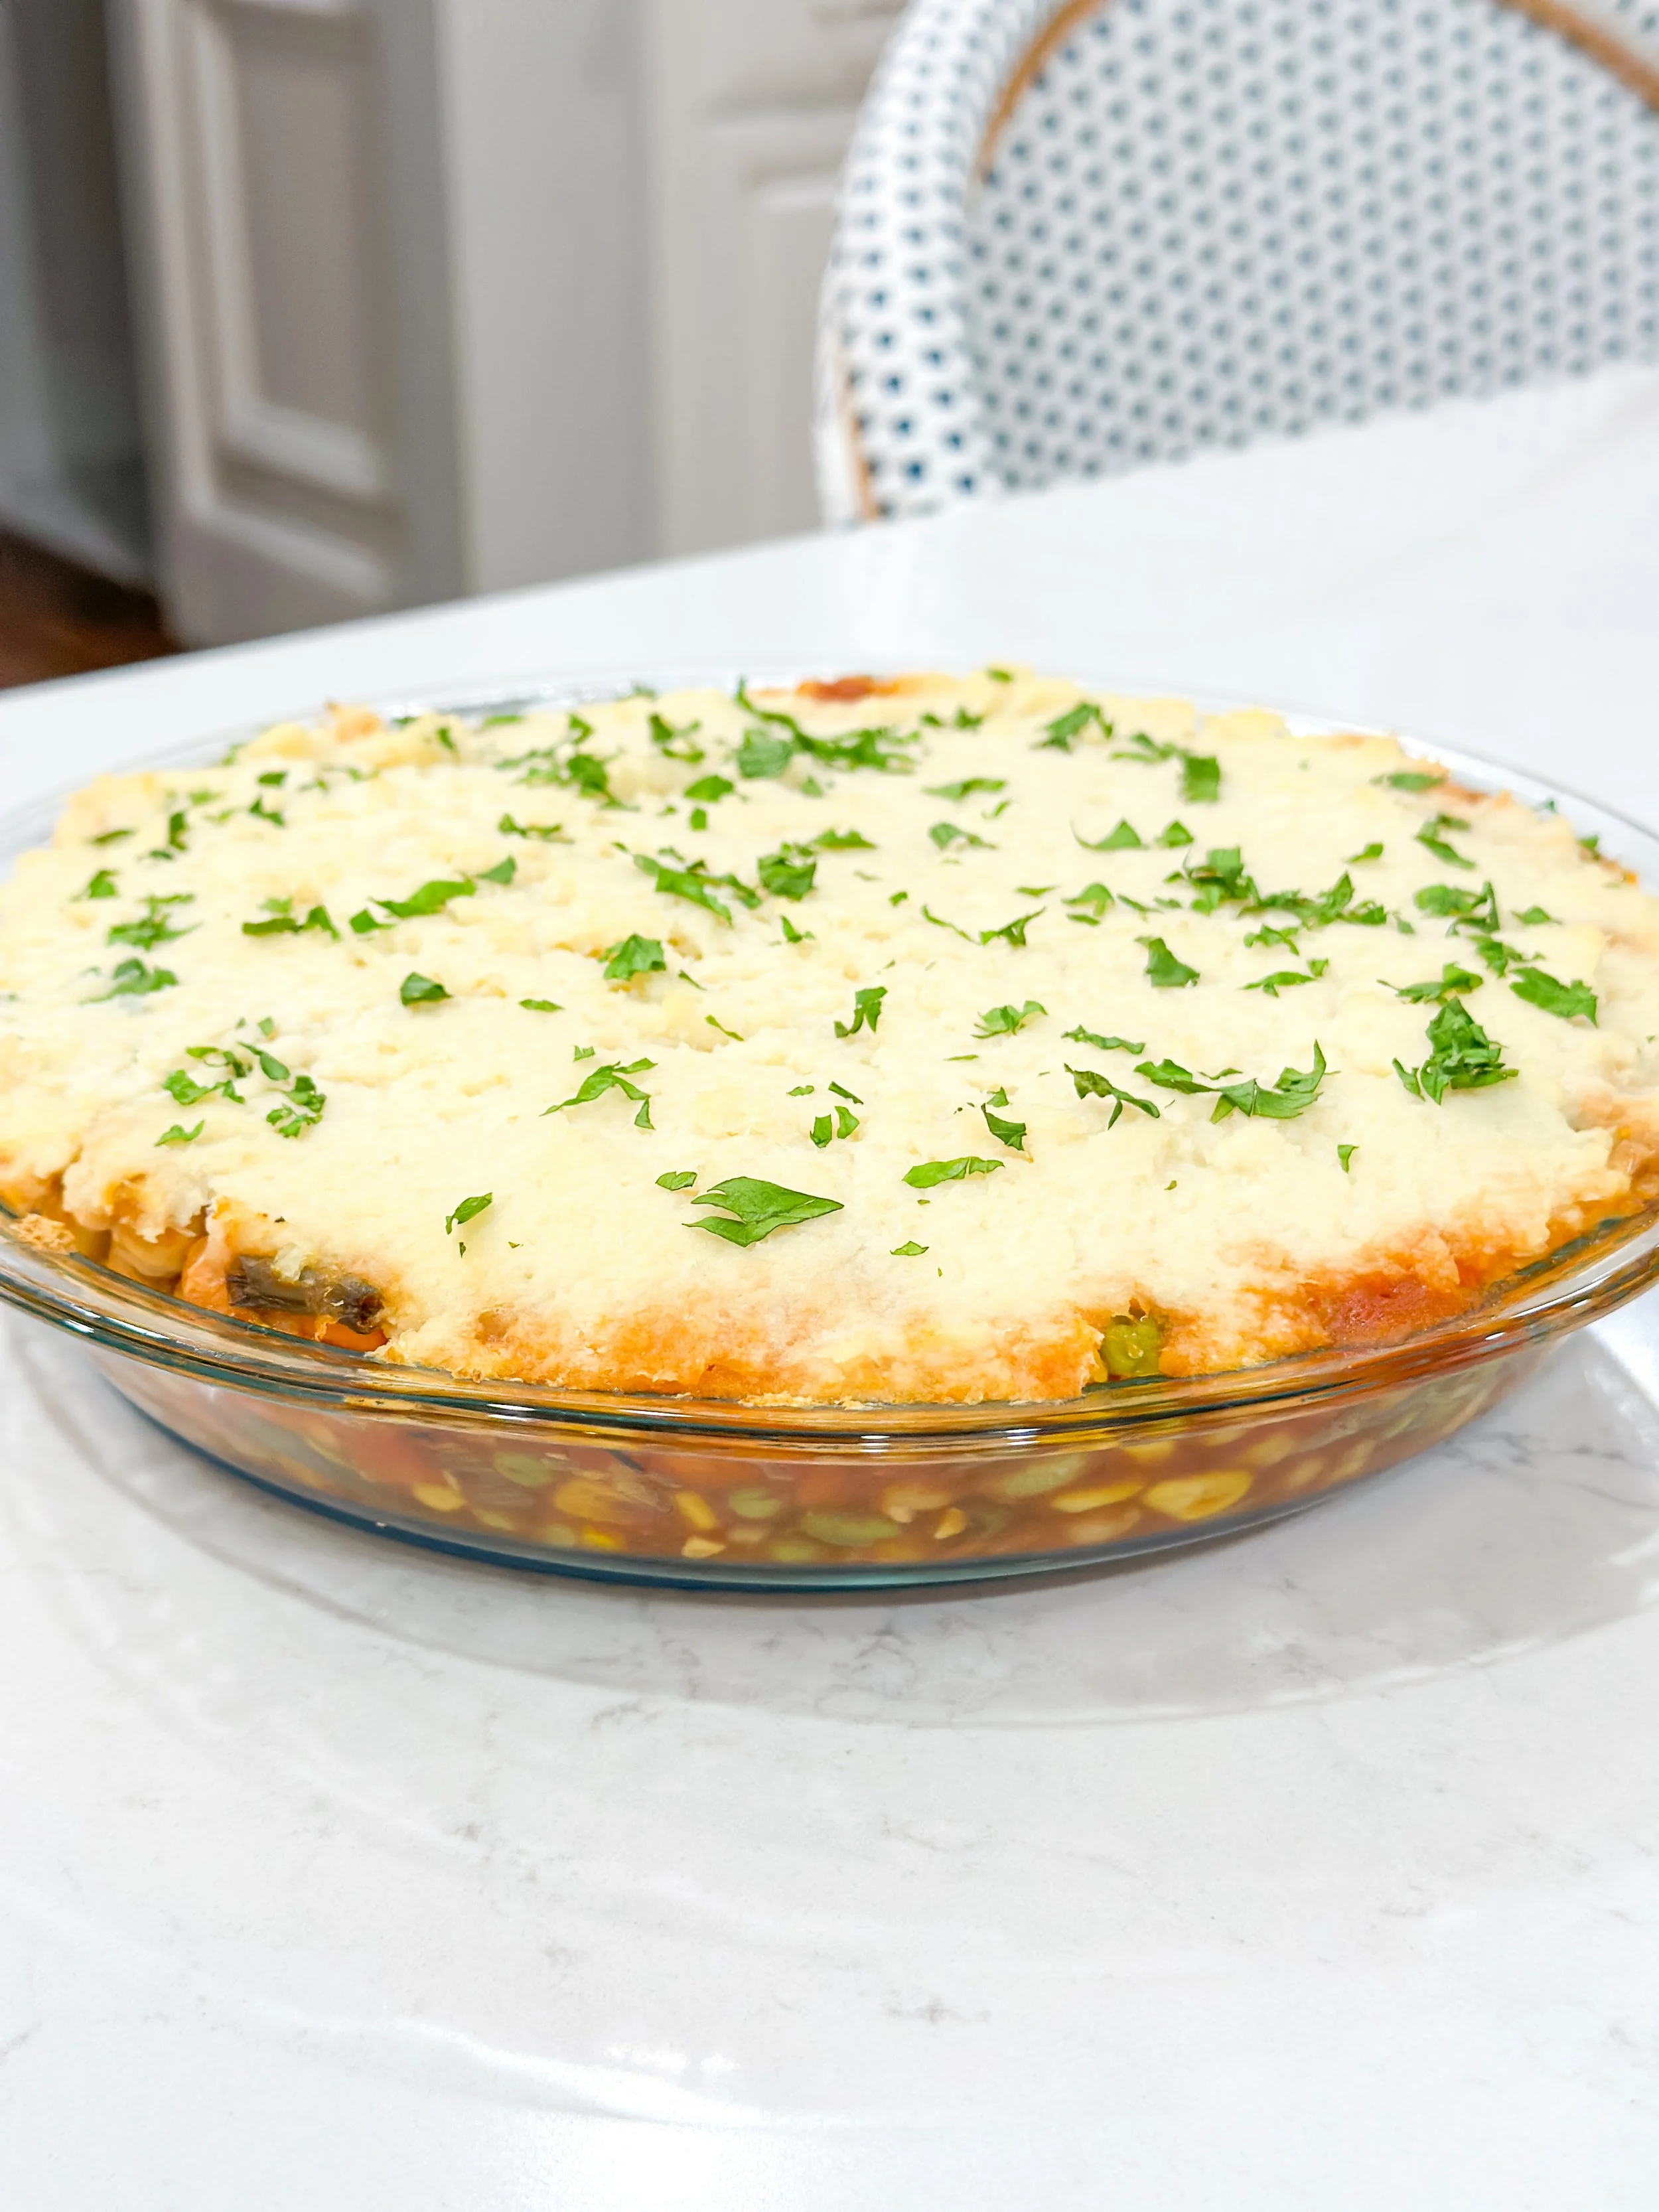
There’s something about cottage pie that feels instantly familiar — warm, comforting, and deeply satisfying. This Chickpea & Veggie Cottage Pie is a plant-based take on that classic, made lighter and brighter without losing any of the cozy appeal.
A simple, savory filling of chickpeas, peas, corn, and carrots comes together easily and stays mild enough for kids to enjoy. On top, instead of traditional mashed potatoes, I use Palmini mashed “potatoes” made from hearts of palm. They create that classic cottage pie look and texture, but with a lighter feel that still delivers on comfort.
It’s the kind of meal that works for everyone at the table — one base, no extra cooking — with easy ways to elevate it for adults while keeping it approachable for kids.
Why You’ll Love This Recipe
Family-friendly: Mild, familiar flavors kids love (ketchup optional but encouraged)
Plant-based & nourishing: Protein-rich chickpeas, fiber-filled veggies
Easy upgrade: One meal, simple add-ons for adults
Weeknight-ready: Straightforward ingredients, no complicated steps
Ingredients
Chickpea & Veggie Filling
1 tablespoon olive oil
1 shallot, finely diced
2 cloves garlic, minced
2 cans chickpeas, drained and rinsed
1 cup frozen peas
1 cup corn
1 cup diced carrots
2 tablespoons tomato paste
1 teaspoon dried thyme
Salt and pepper, to taste
Splash of vegetable broth or water (as needed)
Topping
2 containers Palmini mashed “potatoes” (hearts of palm)
2–3 tablespoons vegan butter (or regular butter, if preferred)
Salt, to taste
Optional Adult Finish
Caramelized shallots
Fresh herbs (parsley, thyme, or chives)
Extra cracked pepper or flaky salt
Instructions
Make the filling
Heat olive oil in a large skillet over medium heat. Add the diced shallot and cook until soft and lightly golden. Stir in garlic and cook for 30 seconds until fragrant.Build the base
Add chickpeas, peas, corn, carrots, tomato paste, thyme, salt, and pepper. Stir well and cook for 5–7 minutes, adding a splash of broth or water if needed so everything stays saucy but not wet.Prepare the mash
Warm the Palmini mash in a saucepan or microwave. Stir in vegan butter until creamy and smooth. Season lightly with salt.Assemble
Transfer the chickpea mixture to a baking dish. Spread the Palmini mash evenly over the top, smoothing with a spatula.Bake
Bake at 375°F for 20–25 minutes, until warmed through and lightly golden on top. For extra color, broil for 2–3 minutes at the end.Finish & serve
Serve as-is for kids, or finish adult portions with caramelized shallots, fresh herbs, and extra seasoning at the table.
Make It Your Own
Add mushrooms or lentils for extra depth
Stir fresh herbs directly into the filling
Serve with a simple green salad or steamed green beans
Turn leftovers into next-day lunch bowls
Cozy, Familiar, and Weeknight-Perfect
This Chickpea & Veggie Cottage Pie is proof that comfort food doesn’t have to be heavy to be satisfying. It’s nourishing, flexible, and easy enough for busy nights — the kind of meal that brings everyone to the table without extra work.
If you try it, let me know how you finish yours — ketchup, herbs, or both 💛
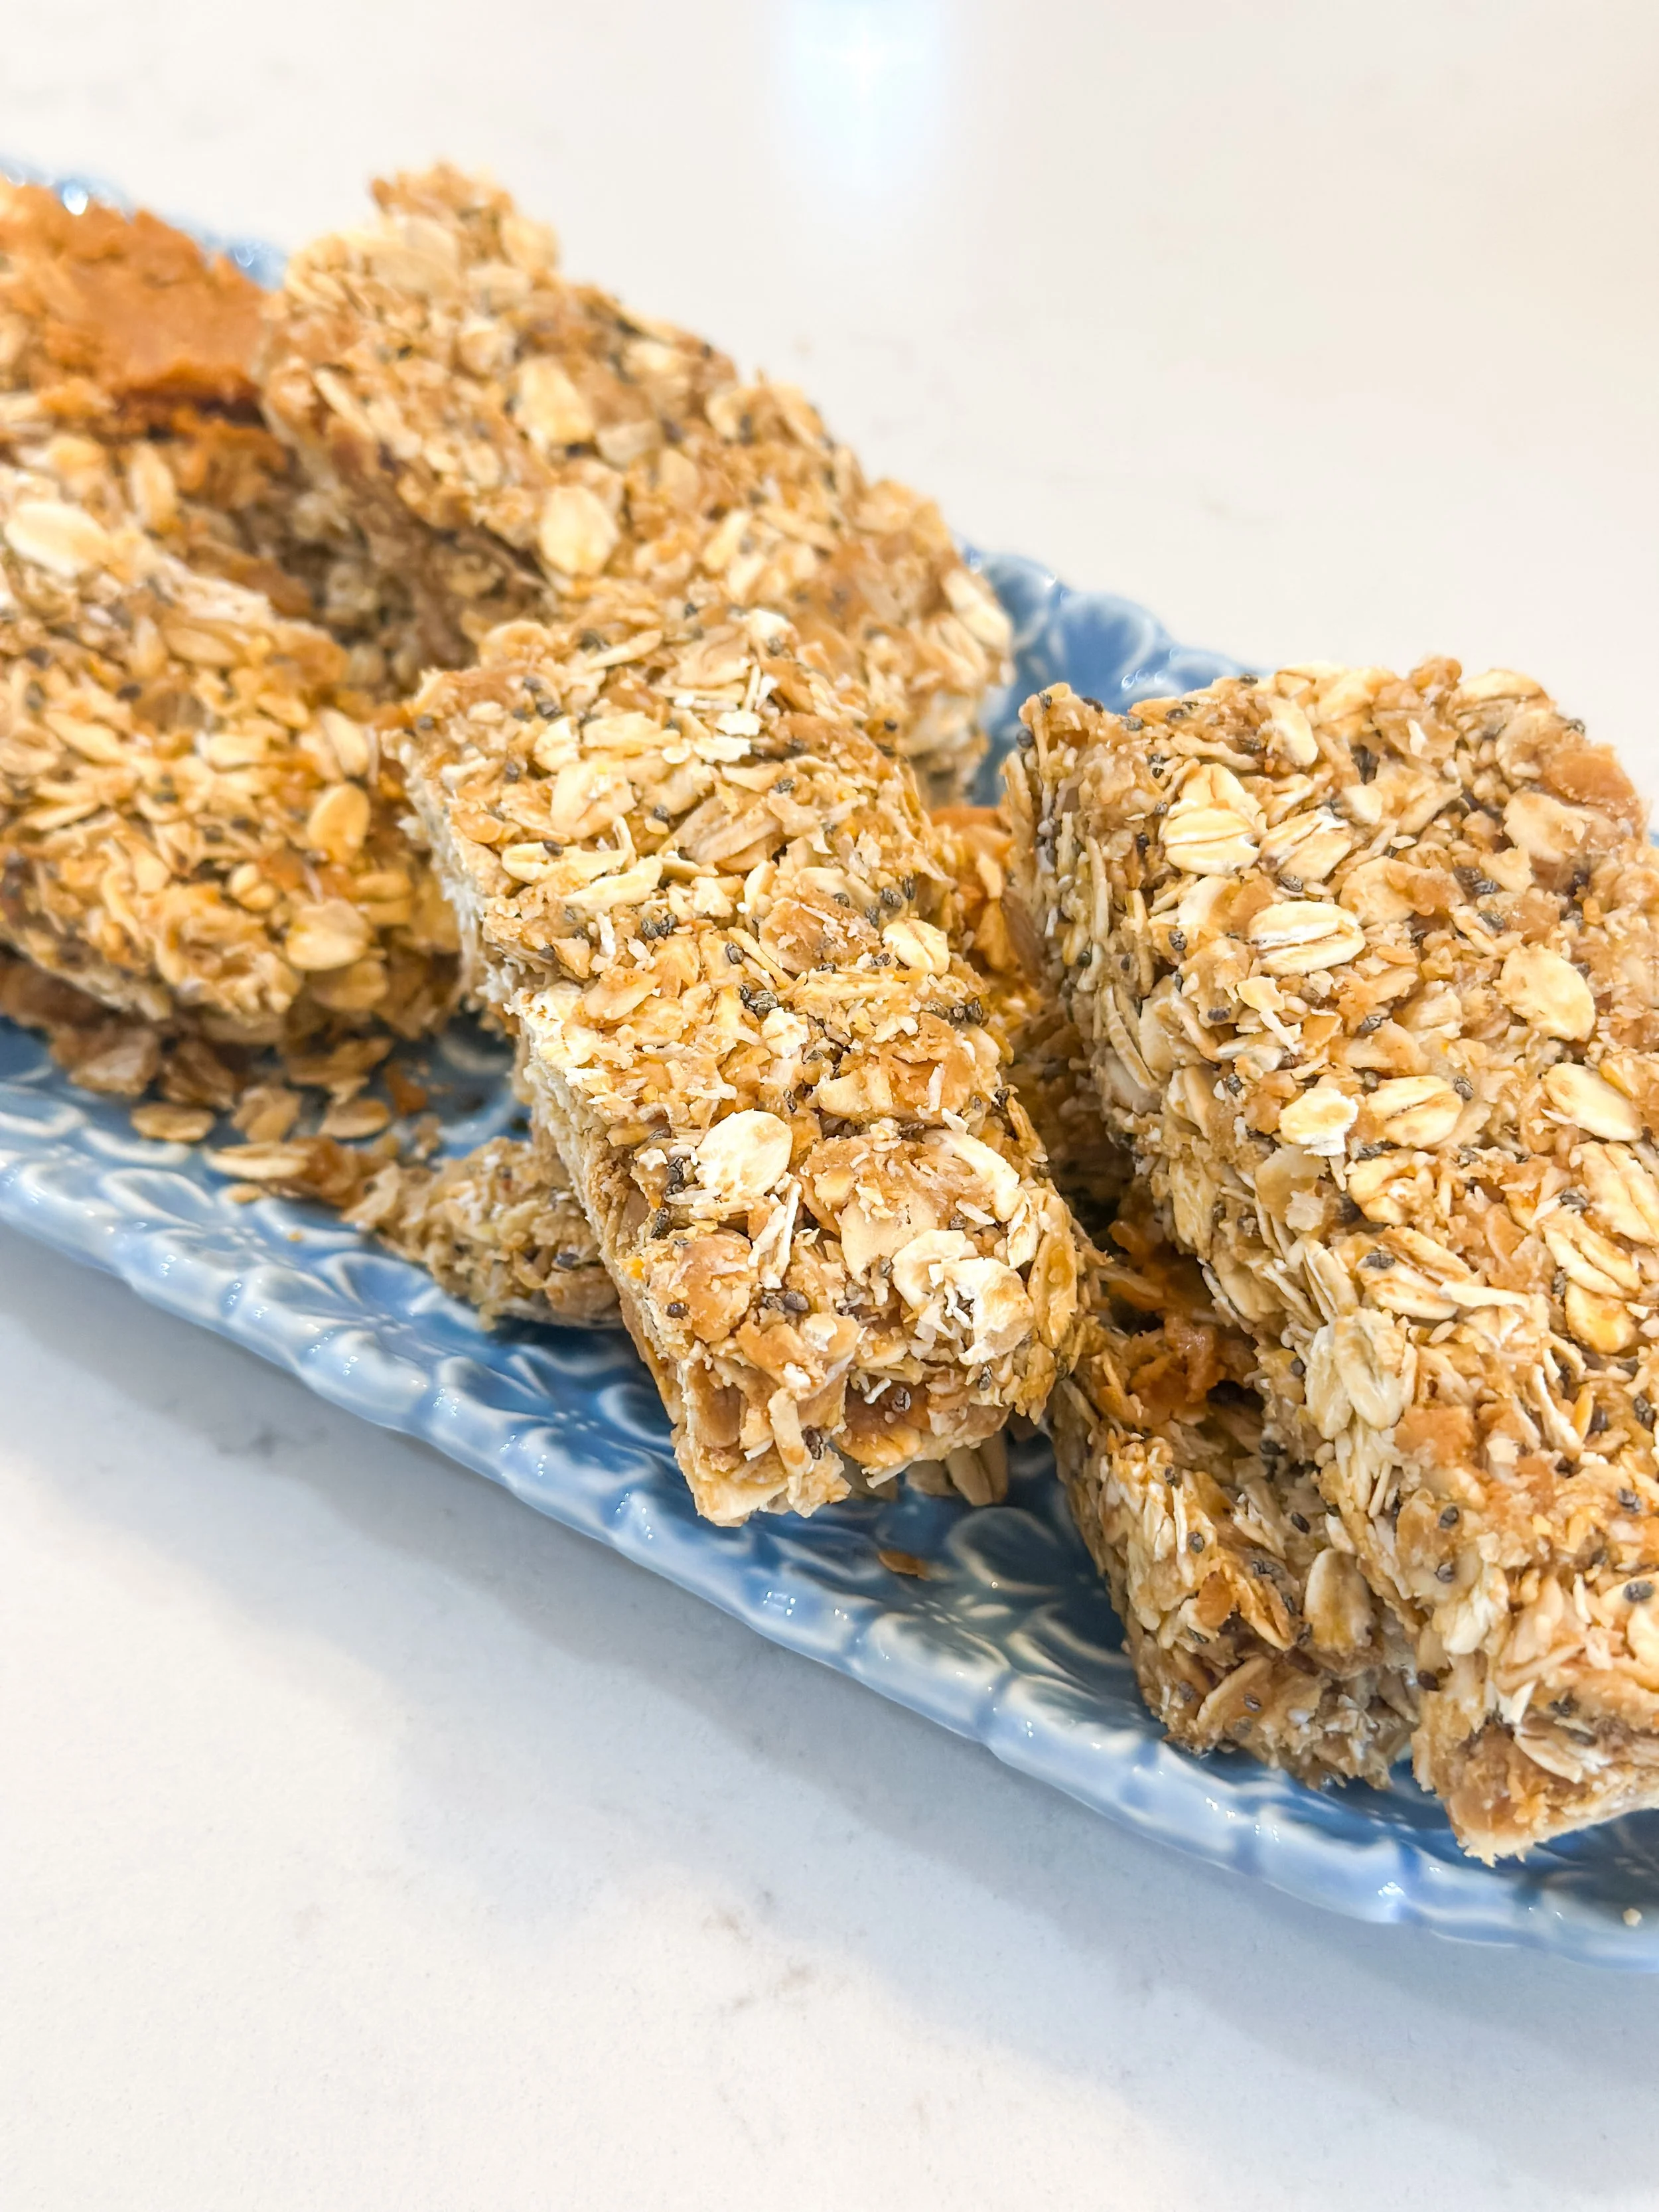
No-Bake Peanut Butter Chia Granola Bars
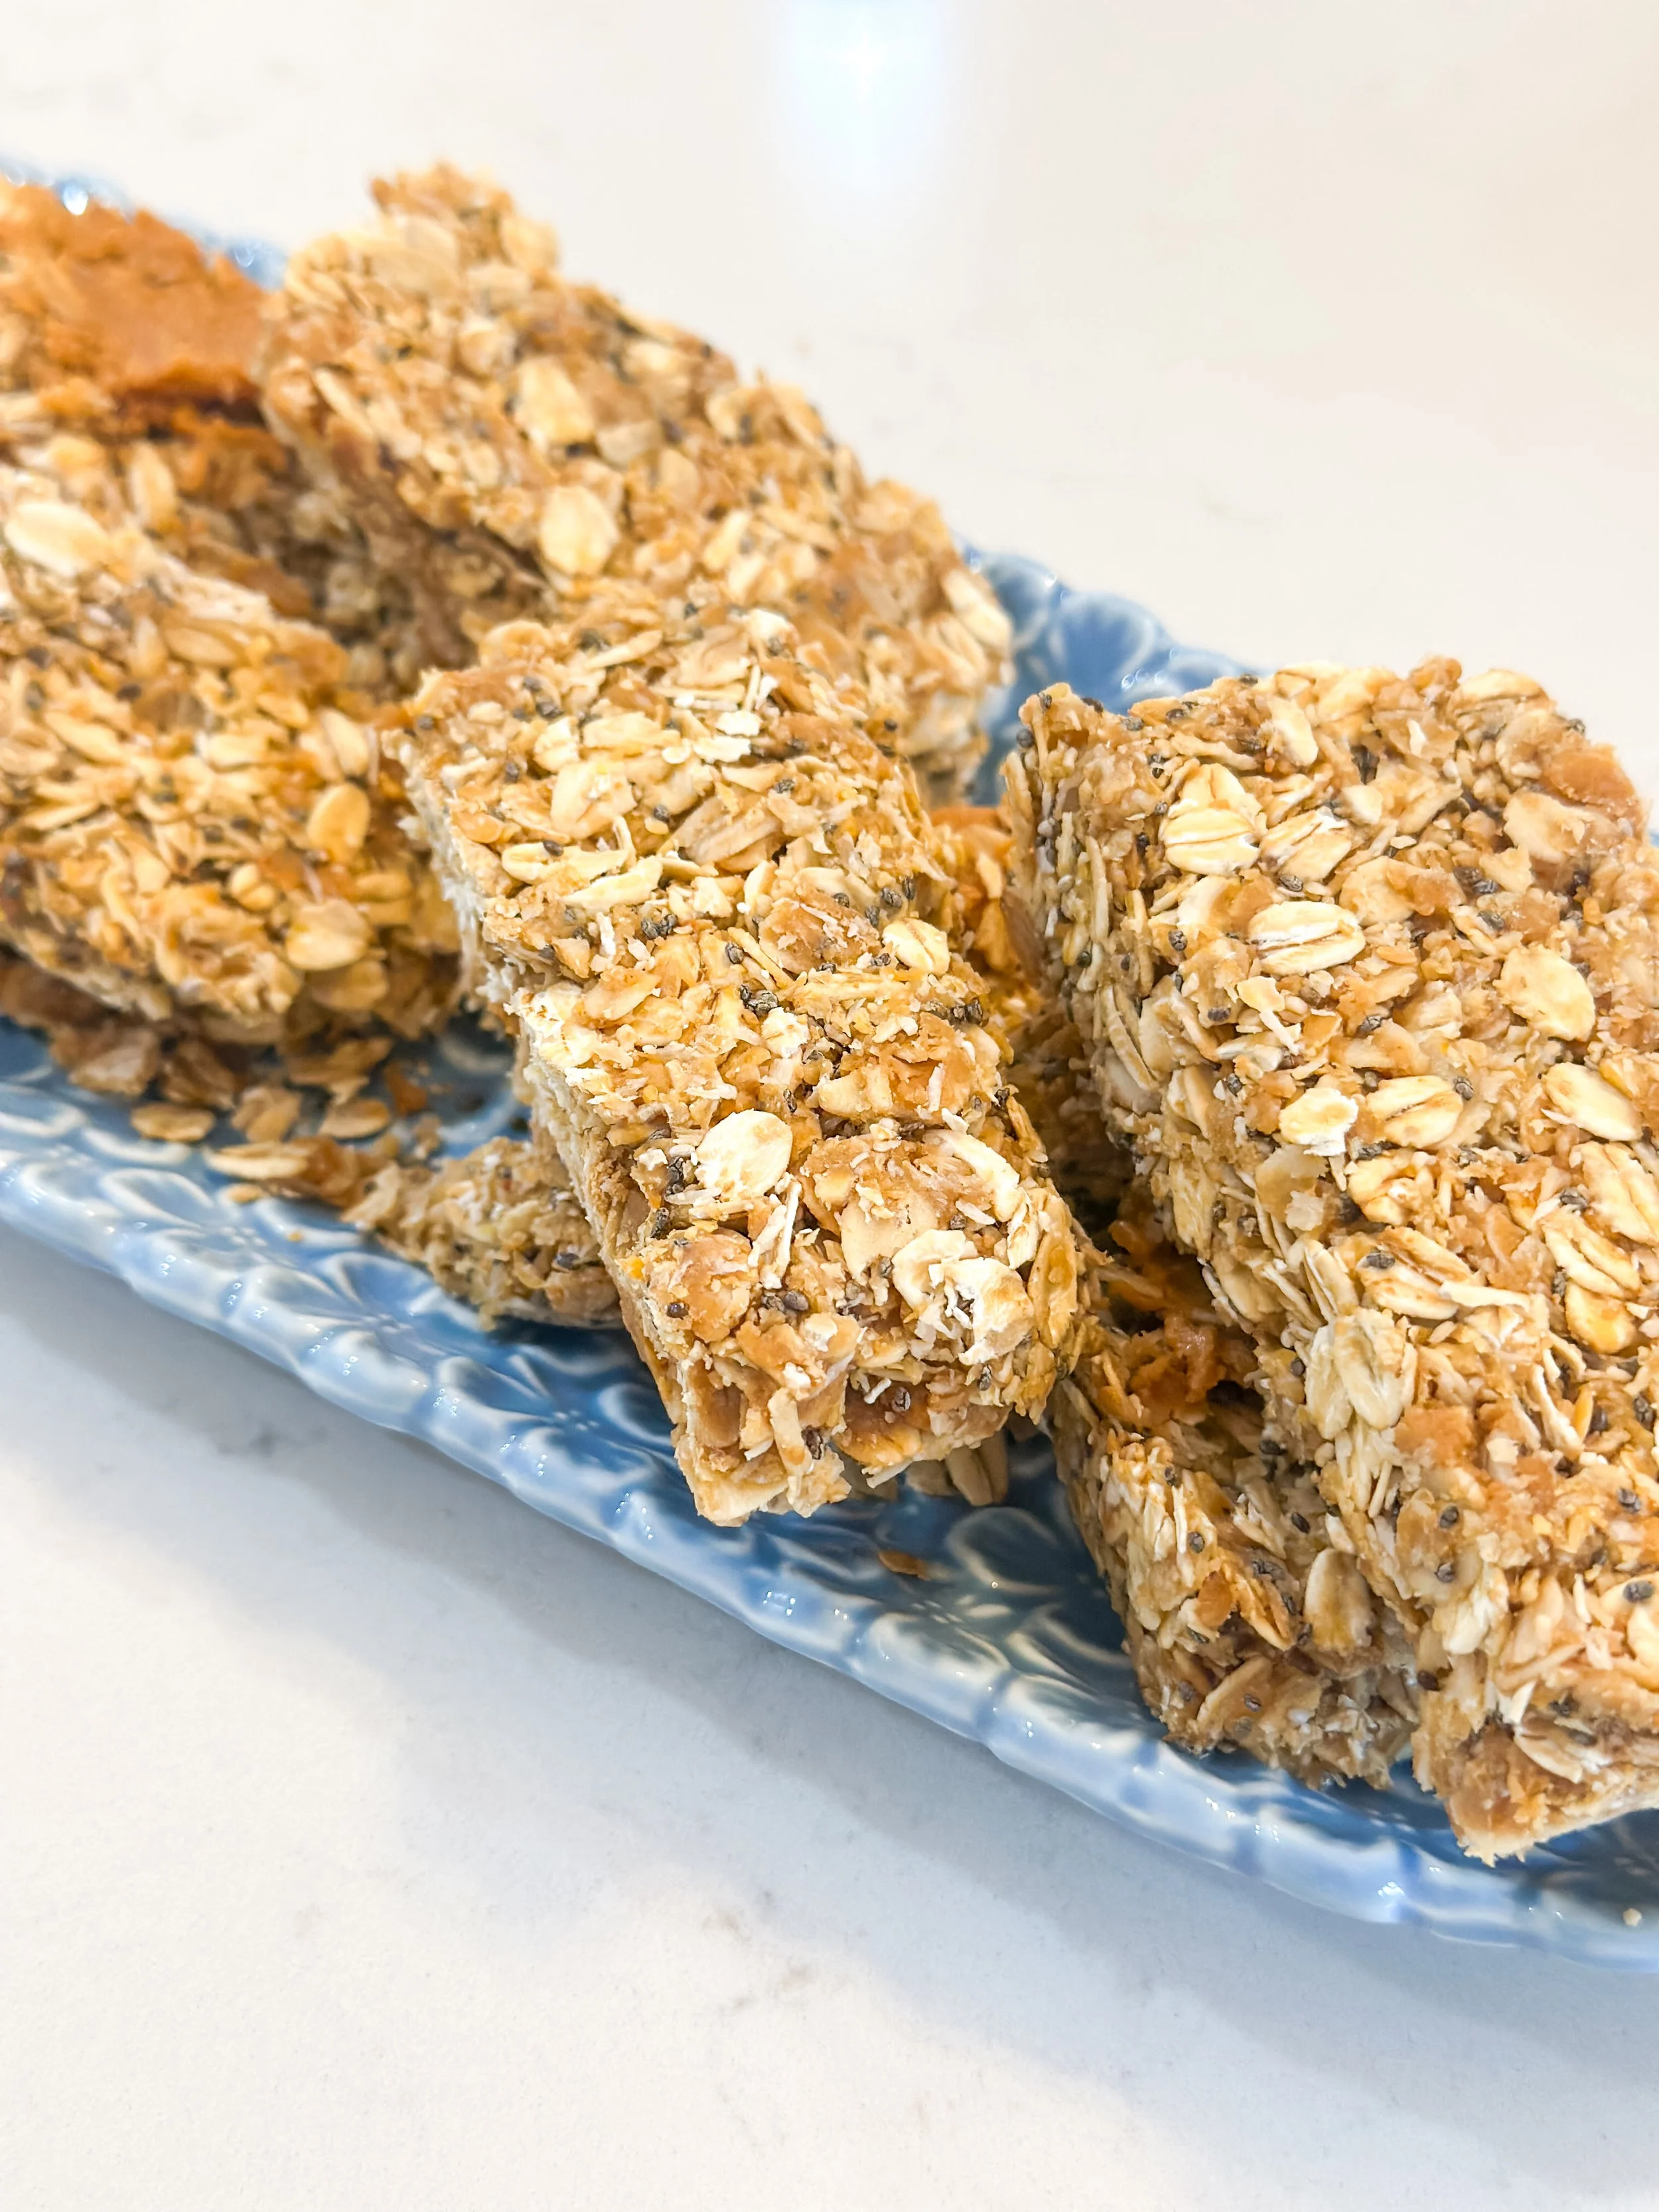
There’s something about a long, cozy weekend that makes homemade snacks feel extra special. These no-bake peanut butter chia granola bars are one of those recipes you’ll find yourself making again and again — simple pantry ingredients, quick to pull together, and always a hit with kids.
They’re lightly sweet, chewy, and perfect for lunchboxes, after-school snacks, or those moments when everyone seems to be hungry right now. No oven, no fuss — just stir, press, chill, and slice.
And yes… if you’re wondering whether you should add chocolate chips, the answer is always YES 🍫
Ingredients
1½ cups rolled oats
½ cup creamy peanut butter
⅓ cup maple syrup
2 Tbsp chia seeds
2 Tbsp ground flaxseed
Pinch of salt
½ tsp vanilla extract
Optional add-ins: mini chocolate chips, shredded coconut, chopped peanuts
Instructions
Line an 8x8-inch pan with parchment paper.
In a small saucepan over low heat, gently warm the peanut butter and maple syrup until smooth and pourable. Remove from heat and stir in the vanilla and salt.
In a large bowl, combine the oats, chia seeds, flaxseed, and any optional add-ins.
Pour the warm peanut butter mixture over the dry ingredients and stir until everything is evenly coated.
Transfer the mixture to the prepared pan and press it down firmly using the back of a measuring cup or glass.
Refrigerate for at least 1–2 hours, until set. Slice into bars and enjoy.
Storage Tips
Refrigerator: Store in an airtight container for up to 1 week.
Freezer: Freeze for up to 2 months. Let thaw slightly before eating.
Why We Love These
Oats provide fiber and staying power
Peanut butter adds healthy fats and protein
Chia seeds and flax give a gentle nutrient boost
No baking required — perfect for busy days and cozy weekends alike
These are the kind of snacks that disappear quickly around here, and I hope they become a staple in your kitchen too. If you make them, don’t forget to save the recipe — and definitely don’t skip the chocolate chips 🤍